

44 Easy Make-Ahead Potluck Side Dishes
Food visuals are for editorial presentation and may differ from the finished recipes. Visit the linked creators for complete recipes. Recipe related instructions here are our own suggestions.
When hosting or attending a potluck, timing is everything. Traditional hot dishes often get lukewarm during the trip over, while delicate green salads wilt before anyone gets to eat.
The solution? Make-ahead side dishes. Preparing your sides 24 to 48 hours in advance allows flavors to marinate and meld together, resulting in richer, bolder taste profiles while keeping your kitchen stress-free on party day.
Right Potluck Is Not What You Think Is!
A good potluck side dish should be easy to make ahead, travel well and still taste great when it is time to serve. Before choosing one, check what the host is already planning and whether refrigerator or reheating space will be available.
- Balance the menu: Pair rich mains with something fresh and tangy, or choose a heartier potato, grain or pasta side for a lighter spread.
- Choose something that travels well: Slaws, bean salads, grain salads and baked dishes are usually easier to transport than delicate salads or foods needing last-minute assembly.
- Think about serving: Cold and room-temperature dishes are often easiest for outdoor parties, office potlucks and larger gatherings.
- Make it ahead when possible: Choose recipes that stay fresh overnight without becoming soggy or dry.
- Consider your guests: Adding a vegetarian, vegan, gluten-free or dairy-free option can make the table more welcoming for everyone.
The best choice is usually simple, reliable and easy for both you and the host to serve.
1. Mexican Street Corn Salad (Esquites)
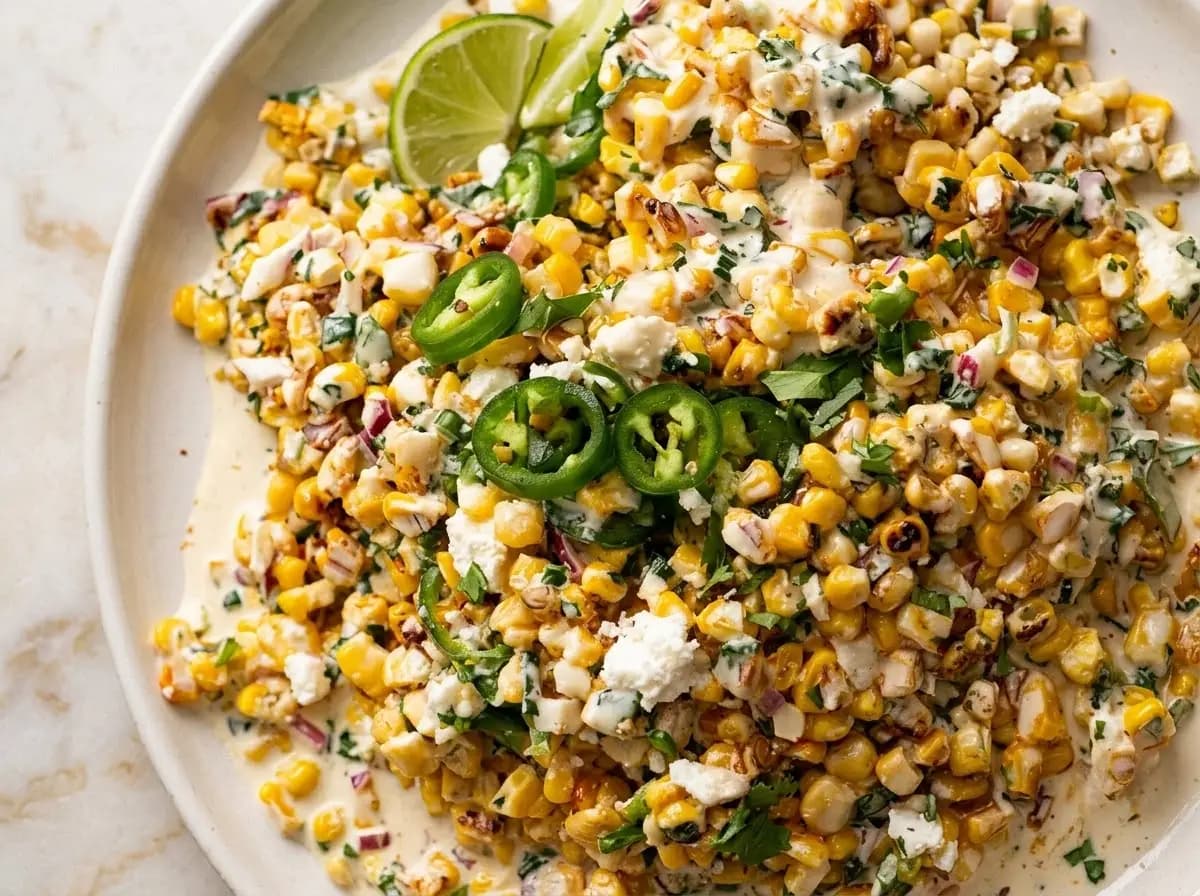
You get all the smoky, creamy, tangy goodness of Mexican street corn in an easy-to-serve salad that feels made for summer gatherings. Sweet corn is charred until the edges turn golden, then folded with jalapeño, red onion, fresh cilantro, and plenty of crumbly cotija cheese. A creamy lime dressing coats every kernel without making the salad feel heavy, while a touch of chili brings gentle warmth and balances the sweetness of the corn.
Because the corn is removed from the cob, you can serve it without the mess of whole elote. Each spoonful gives you smoky corn, cooling dressing, salty cheese, fresh herbs, and the occasional bite of jalapeño. It is colorful, casual, and polished enough to sit alongside grilled mains at a backyard potluck.
Serving Temperature
You can serve this salad slightly warm, at room temperature, or chilled. For the best balance of flavor and texture, serve it at cool room temperature. The corn stays tender, the dressing loosens slightly, and the lime, chili, herbs, and cheese taste more pronounced than they do straight from the refrigerator.
Avoid serving it piping hot, as the creamy dressing may become oily or separate.
Serving Suggestions
You can serve this esquites-style salad alongside:
- Tacos, fajitas, quesadillas, or enchiladas
- Tortilla chips as a scoopable party side
- A summer buffet with slaws, grain salads, and grilled mains
For individual servings, spoon it into small cups and finish each portion with cotija, jalapeño, cilantro, and a lime wedge.
Make Ahead Window & Storage
You can prepare the components up to 24 hours in advance.
Char the corn, chop the vegetables, crumble the cheese, and prepare the dressing separately. Store everything in airtight containers in the refrigerator, then combine the salad a few hours before serving. Once fully mixed, it keeps well in the refrigerator for approximately two to three days, although the herbs and onions may soften gradually. Reserve some fresh cilantro, sliced jalapeño, or cotija for adding just before serving so the final presentation still looks fresh.
Let the salad sit outside the refrigerator for around 15 to 20 minutes before serving.
Pack for the Potluck
Transfer the salad to a tightly sealed container and keep it chilled in an insulated bag with ice packs during transport. Carry the final garnishes and lime wedges separately so they remain bright and neat.
At the gathering, stir the salad gently to redistribute the dressing, then add the reserved cotija, jalapeño slices, cilantro, and lime. Since the dressing may contain dairy and mayonnaise, do not leave it sitting in direct sun or warm outdoor conditions for an extended period.
2. Lemony Orzo Pasta Salad with Chickpeas and Banana Peppers
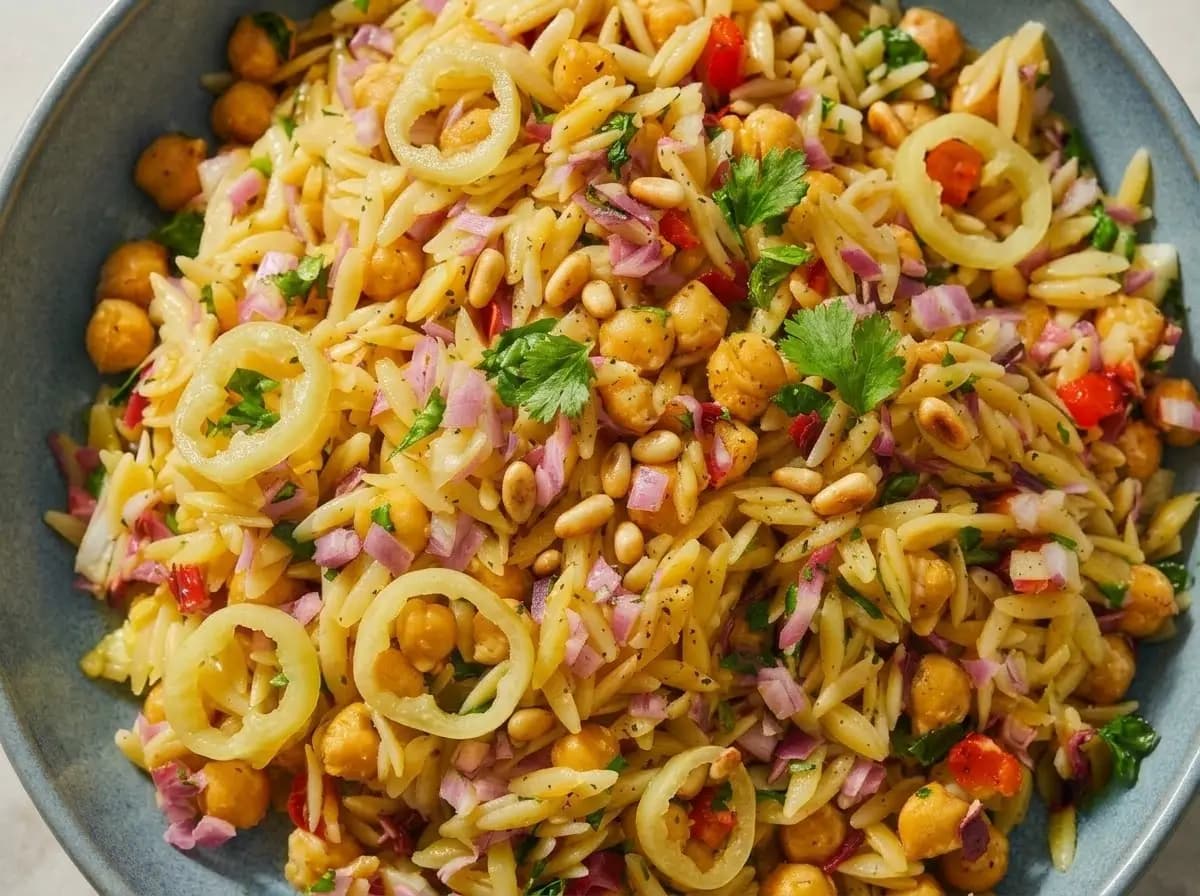
Bright lemon and briny banana peppers give this orzo salad the kind of lively flavor that keeps every bite interesting. The small pasta absorbs a garlicky citrus dressing while chickpeas add a tender, satisfying bite. Finely chopped red onion, sweet red pepper, fresh parsley, and toasted pine nuts bring color, freshness, and just enough crunch to keep the salad from feeling heavy.
You can bring this to a potluck when you want something more substantial than a leafy salad but fresher than a creamy pasta dish. The orzo holds the dressing beautifully, the chickpeas make it filling, and the banana peppers leave a gentle tangy heat that works especially well beside grilled or roasted mains.
Serving Temperature
You can serve this orzo salad chilled or at cool room temperature. Its lemony dressing and briny flavors are most noticeable after the salad has rested outside the refrigerator for about 15 to 20 minutes.
Avoid serving it warm straight after cooking. Giving the orzo time to cool allows the dressing to settle into the pasta and keeps the herbs, peppers, and onions crisp and fresh.
Make Ahead Window & Storage
You can prepare this salad up to 24 hours before serving, and the extra resting time allows the orzo and chickpeas to absorb more of the lemon dressing.
Cook the orzo until just tender, drain it well, and toss it with part of the dressing while it is still slightly warm. Once cooled, fold in the chickpeas, banana peppers, red onion, red pepper, and remaining dressing. Keep the fresh parsley and pine nuts separate until shortly before serving so they retain their color and texture.
Store the finished salad in an airtight container in the refrigerator for up to three days. Before serving, stir it well and add a small splash of lemon juice or olive oil if the pasta has absorbed most of the dressing.
Alternative Ways to Serve
You can present the salad in one large shallow bowl for a buffet, divide it into individual cups for easier potluck serving, or spoon smaller portions into crisp lettuce leaves for a lighter handheld option. Give it a quick toss before serving and finish it with extra herbs, toasted pine nuts, lemon zest, and a few visible banana pepper rings.
Pack for the Potluck
Pack the salad in a wide, tightly sealed container so the orzo is easy to stir without crushing the chickpeas. Transport it in an insulated bag with an ice pack, especially during warm weather.
Carry the toasted pine nuts, fresh herbs, and a few extra banana pepper slices in separate small containers. Once you arrive, gently toss the salad, adjust the lemon and seasoning if needed, and scatter the reserved toppings over the surface before placing it on the serving table.
3. Chili-Crisp Soba, Cucumber & Snap Pea Noodle Salad
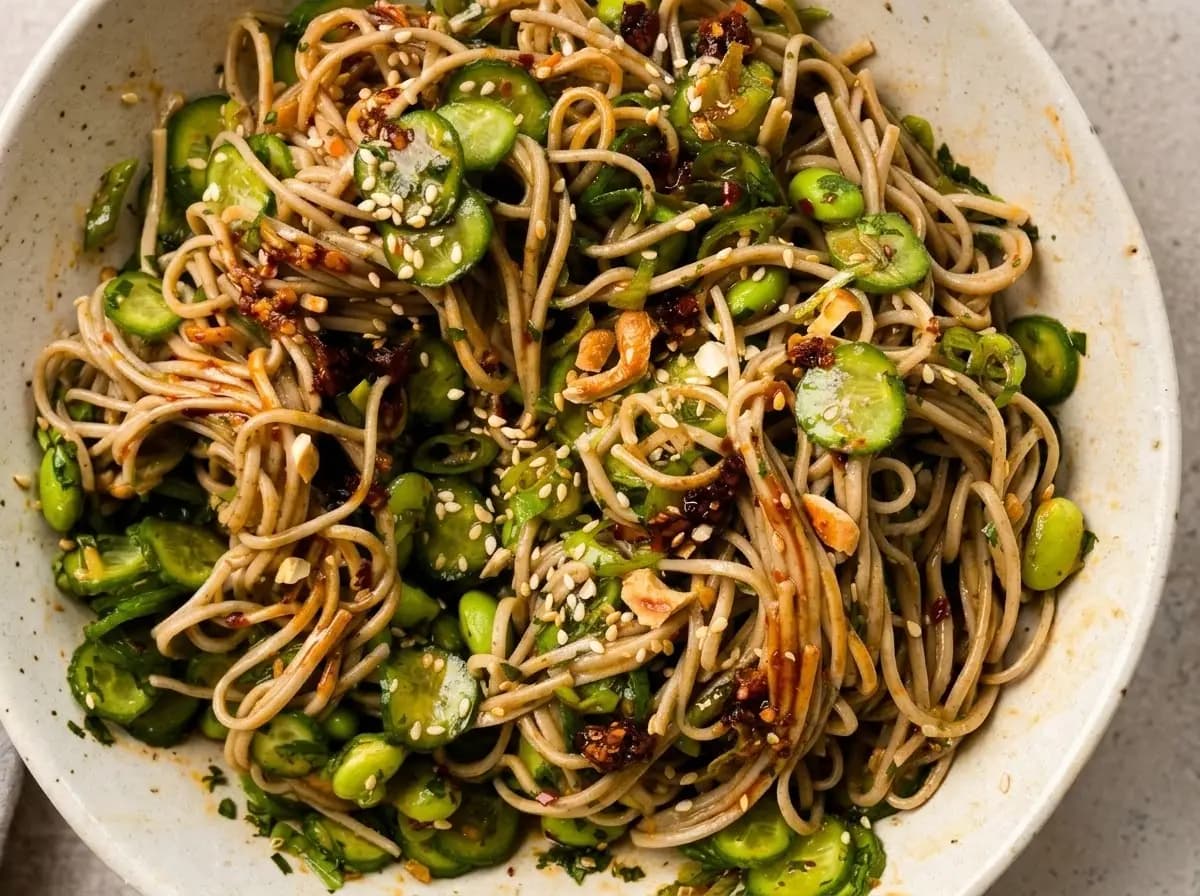
A tangle of chilled soba noodles becomes the base for a salad that feels cool and refreshing at first, then finishes with the slow, savory heat of chili crisp. You fold the noodles with thinly sliced cucumbers, crisp snap peas, scallions, and edamame, creating a mix of tender, crunchy, and juicy textures in every forkful.
The dressing brings together soy sauce, rice vinegar, sesame oil, and chili crisp, giving you saltiness, acidity, nuttiness, and heat without covering the earthy character of the buckwheat noodles. Toasted sesame seeds and chopped cashews add a final layer of crunch, while fresh herbs keep the salad bright enough for a warm-weather potluck or make-ahead lunch.
Serving Temperature
You should serve this noodle salad chilled or at cool room temperature. For the best texture, take it out of the refrigerator around 15 minutes before serving so the dressing loosens and coats the noodles more evenly.
Avoid serving it hot, since warm noodles can soften the cucumbers and snap peas and make the dressing feel heavier. If the salad has been sitting outdoors, keep it shaded and return it to a cooler when it is not being served.
Make Ahead Window & Storage
You can prepare most of the salad up to 24 hours ahead. Cook and rinse the soba noodles, prepare the dressing, slice the vegetables, and store each component separately in airtight containers in the refrigerator.
For the freshest texture, combine the noodles with most of the dressing a few hours before serving, then add the cucumbers, snap peas, scallions, and herbs closer to serving time. Keep the sesame seeds, chopped cashews, and a small spoonful of chili crisp separate so they stay crisp and visually distinct.
Once fully assembled, the salad keeps well for approximately two days. The noodles may absorb the dressing as they sit, so refresh them with a small splash of rice vinegar, soy sauce, or reserved dressing before serving.
Potluck Portability and Transportation
Pack the noodle salad in a wide, tightly sealed container so the noodles and vegetables are not compressed into a dense block. Carry it in an insulated bag with ice packs, especially during warm weather.
Transport the crunchy garnishes and reserved chili crisp separately. At the potluck, loosen the noodles gently with tongs, add the final dressing only if needed, and finish with sesame seeds, chopped cashews, scallions, and small spoonfuls of chili crisp across the top.
4. Dense White Bean, Artichoke & Roasted Pepper Antipasto Salad
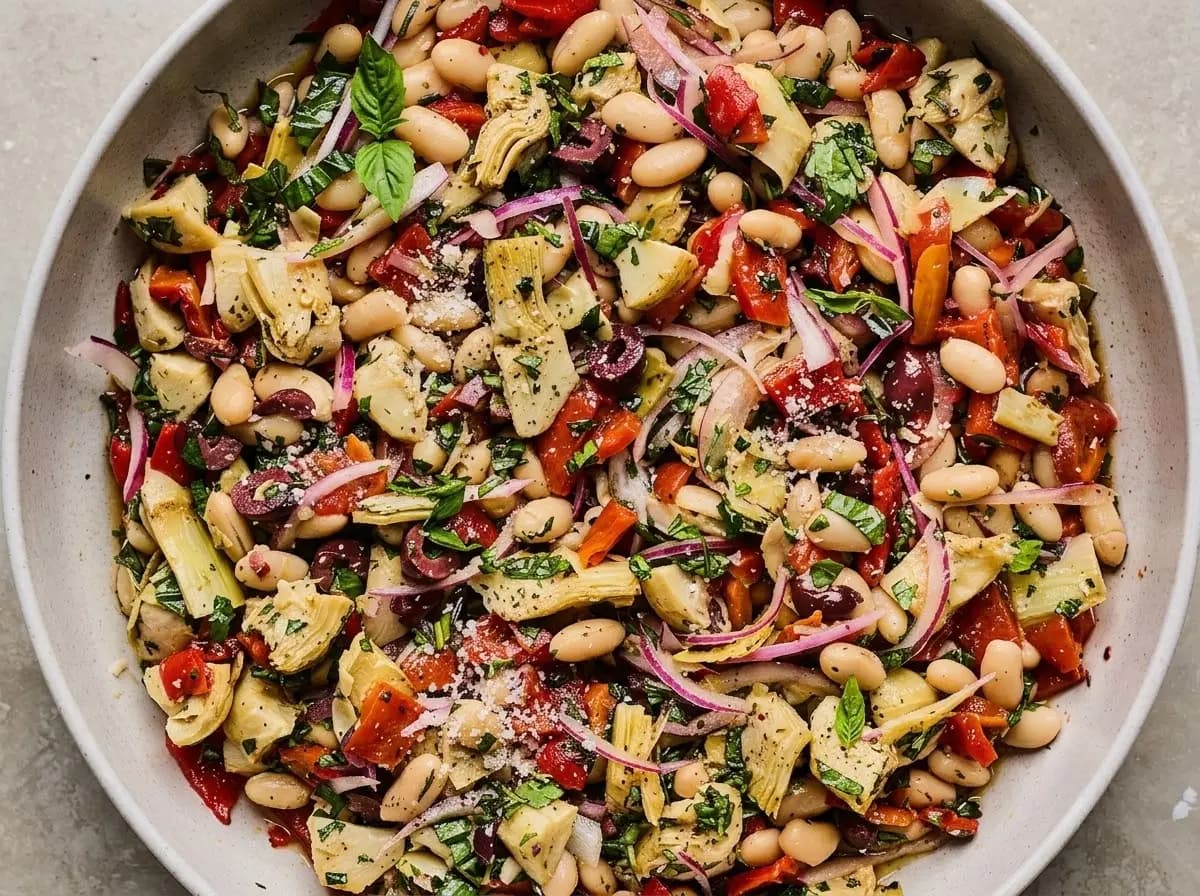
Briny, herb-flecked, and substantial enough to hold its own on a crowded potluck table, this antipasto salad brings together creamy white beans, tender artichoke hearts, smoky roasted peppers, and meaty olives in every spoonful. Thin ribbons of red onion add a sharp little bite, while fresh basil keeps the richer marinated ingredients from feeling heavy.
You toss everything in a punchy red wine vinaigrette scented with garlic, oregano, and black pepper, allowing the beans to soak up the tangy, olive-oil-rich dressing as the salad rests. The result is a dense, satisfying mixture with enough contrast to stay interesting: soft beans, juicy peppers, tender artichokes, chewy olives, crisp onion, and a light shower of Parmesan for a salty finish.
Serving Temperature
You can serve this antipasto salad chilled or at cool room temperature. It tastes best when you remove it from the refrigerator about 20 minutes before serving, giving the olive oil time to loosen and allowing the garlic, herbs, vinegar, and roasted vegetables to become more expressive.
Avoid serving it hot. Heat can make the beans overly soft, dull the fresh basil, and cause the vegetables to lose the pleasantly firm texture that makes the salad work so well.
Make Ahead Window & Storage
You can assemble the salad up to 24 hours in advance, making it especially useful when you need a side dish that improves as it rests. Drain the beans, artichokes, roasted peppers, and olives thoroughly before combining them so excess packing liquid does not dilute the vinaigrette.
Store the finished salad in an airtight container in the refrigerator for up to three days. Keep a small amount of fresh basil and Parmesan separate, then add them shortly before serving so the herbs remain bright and the cheese stays visually distinct.
Stir the salad gently after refrigeration, lifting the beans and vegetables from the bottom so the dressing is redistributed without crushing the softer ingredients. Taste before adding more salt, since the olives, artichokes, roasted peppers, and Parmesan may already provide plenty.
Potluck Portability and Transportation
Pack the salad in a wide, tightly sealed container and transport it in an insulated bag with ice packs. A shallow container helps prevent the beans and artichokes from becoming compressed under their own weight during the journey.
Carry the reserved basil and Parmesan separately. Once you arrive, let the salad stand briefly, give it a careful toss, and scatter the fresh garnishes over the top. Because the ingredients are sturdy and the dressing is vinaigrette-based, the salad travels well without becoming soggy or separating.
5. Crispy Rice, Edamame & Ginger-Sesame Crunch Salad
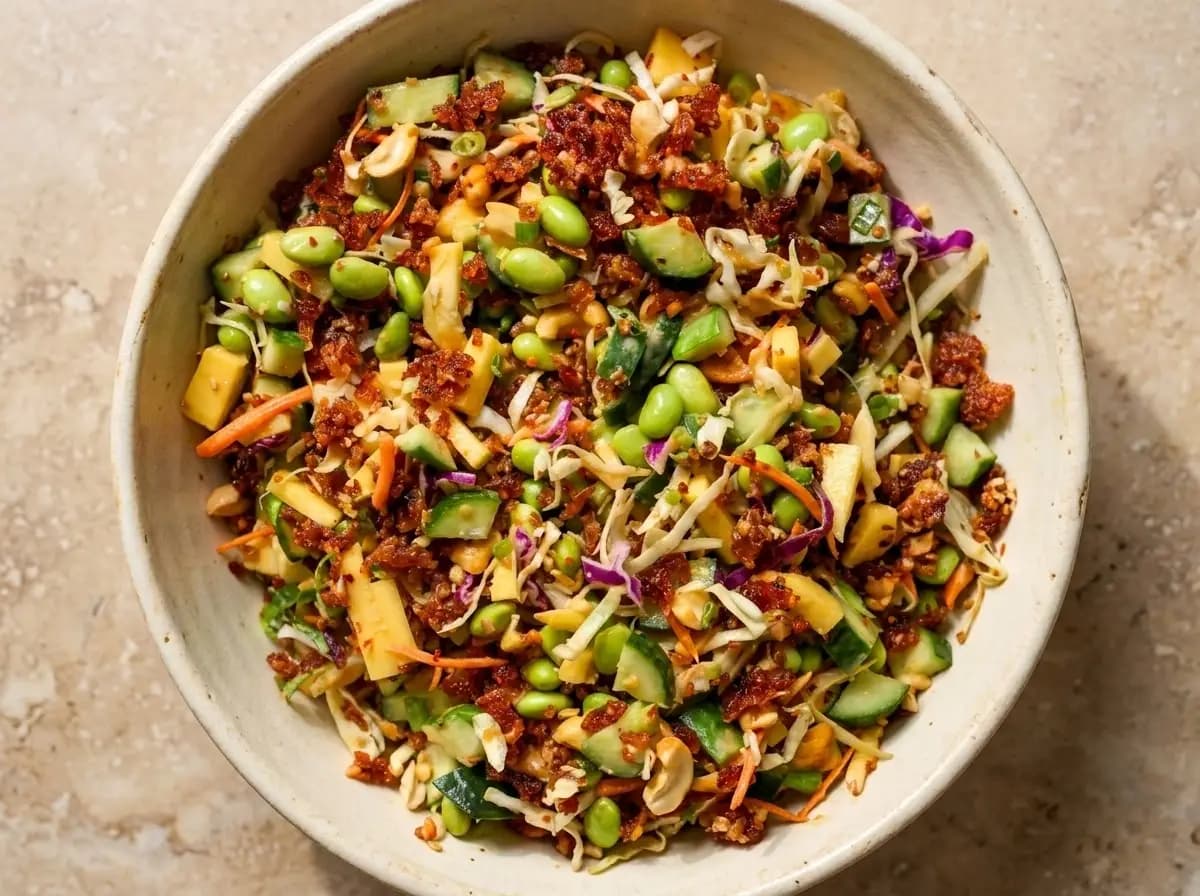
Crisp-edged rice turns this colorful salad into something far more exciting than an ordinary bowl of chopped vegetables. You get nutty clusters of toasted rice folded through tender edamame, cool cucumber, shredded cabbage, carrots, scallions, and a handful of roasted cashews, giving every bite a lively mix of crunch, freshness, and satisfying chew.
A ginger-sesame dressing brings the whole bowl together with savory soy, toasted sesame oil, rice vinegar, garlic, and a gentle touch of sweetness. The vegetables keep the salad light, while the crispy rice catches little pockets of dressing without losing all of its texture. A spoonful of chili crisp can add warmth and extra crunch, making this a vibrant potluck side that feels substantial without becoming heavy.
Serving Temperature
You should serve this salad chilled or at cool room temperature. Let it sit outside the refrigerator for around 10 to 15 minutes before serving so the sesame dressing loosens slightly and the ginger, soy, and vinegar become more noticeable.
Avoid serving it warm. Heat will soften the cucumber and cabbage, while steam from warm rice can quickly take away the crisp texture that defines the salad.
Make Ahead Window & Storage
You can prepare the individual components up to 24 hours in advance. Cook and cool the rice promptly, crisp it in the oven or a skillet, and allow it to cool completely before storing. Keep the crispy rice in a tightly sealed container, separate from the vegetables and dressing.
Slice the cucumber, shred the cabbage and carrots, cook the edamame, and whisk the ginger-sesame dressing ahead of time. Refrigerate the vegetables and dressing in separate airtight containers, then combine everything shortly before serving.
Once fully dressed, the salad is best eaten the same day because the rice gradually loses its crunch. Leftovers can be refrigerated for up to two days, but you may want to add a fresh handful of crispy rice, cashews, or sesame seeds before serving again.
Potluck Portability and Transportation
Pack the vegetable mixture in a wide, tightly sealed container and carry it in an insulated bag with ice packs. Transport the crispy rice, cashews, sesame seeds, and dressing separately so the crunchy elements remain dry during the journey.
At the potluck, pour in only enough dressing to coat the vegetables lightly, then fold in most of the crispy rice. Scatter the remaining rice, cashews, sesame seeds, scallions, and a few small spoonfuls of chili crisp over the top just before serving.
6. Watermelon and Feta Skewers with Mint and Balsamic Glaze
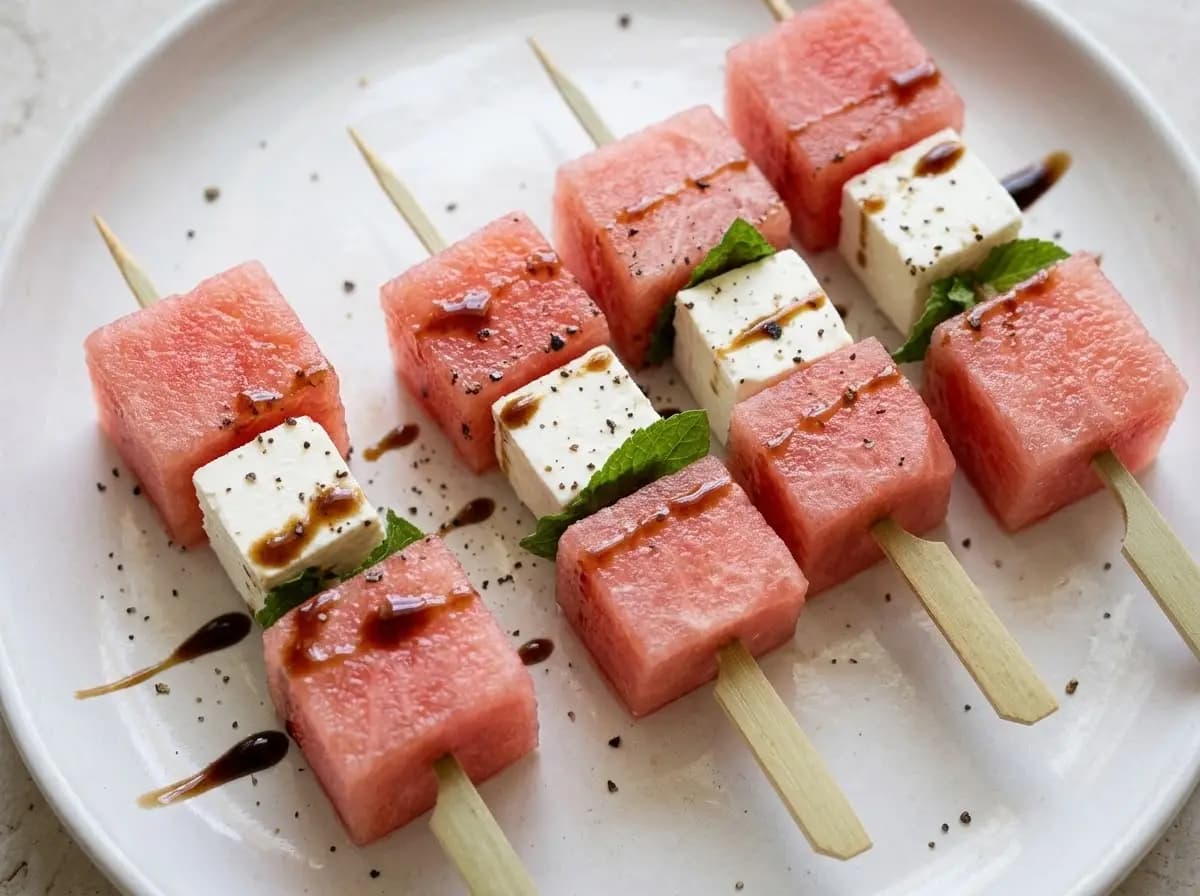
Sweet watermelon, salty feta, and cool mint come together in neat little skewers that look polished while staying wonderfully simple. As you bite through each one, the juicy fruit gives way to creamy, briny cheese, while fresh mint adds a clean herbal finish that keeps the combination light and summery.
A restrained drizzle of balsamic glaze brings just enough dark, tangy sweetness to deepen the watermelon without overpowering it. A scattering of cracked black pepper and flaky salt sharpens the contrast, giving you a refreshing handheld side that works especially well when the rest of the potluck table is filled with richer or warmer dishes.
Serving Temperature
You should serve these skewers chilled or cool from the refrigerator. They taste best when the watermelon is cold and firm but not icy, allowing its sweetness and juiciness to come through clearly against the feta.
Avoid leaving the skewers at warm room temperature for too long. The watermelon will gradually release moisture, while the feta can soften and lose its clean cubed shape.
Alternate Way to Serve
When you do not want to assemble individual skewers, you can arrange the watermelon and feta cubes across a shallow platter with mint tucked between them, then drizzle the balsamic glaze over the top just before serving. You can also turn the same ingredients into a loose chopped salad, although the skewer presentation is easier for guests to pick up at a potluck.
Make Ahead Window & Storage
You can cut the watermelon and feta up to 12 hours in advance. Store them in separate airtight containers in the refrigerator so the watermelon juice does not soften or stain the cheese.
Assemble the skewers a few hours before serving, then arrange them in a single layer or place parchment paper between layers. Keep the mint, balsamic glaze, flaky salt, and black pepper separate until shortly before serving so the leaves remain fresh and the skewers do not become wet or streaked during storage.
Once assembled, the skewers are best enjoyed the same day. Leftovers can be refrigerated overnight, but the watermelon will release more liquid and the presentation will become less crisp.
Potluck Portability and Transportation
Arrange the skewers in a shallow, tightly sealed container and transport them in an insulated bag with ice packs. Keep them in a single layer whenever possible so the watermelon cubes do not press into the feta or slide off the sticks.
Carry the balsamic glaze and final seasonings separately. Once you arrive, transfer the skewers to a chilled platter, tuck in the fresh mint leaves, drizzle lightly with glaze, and finish with black pepper and a small amount of flaky salt.
7. Eggplant Caponata with Pine Nuts & Golden Raisins
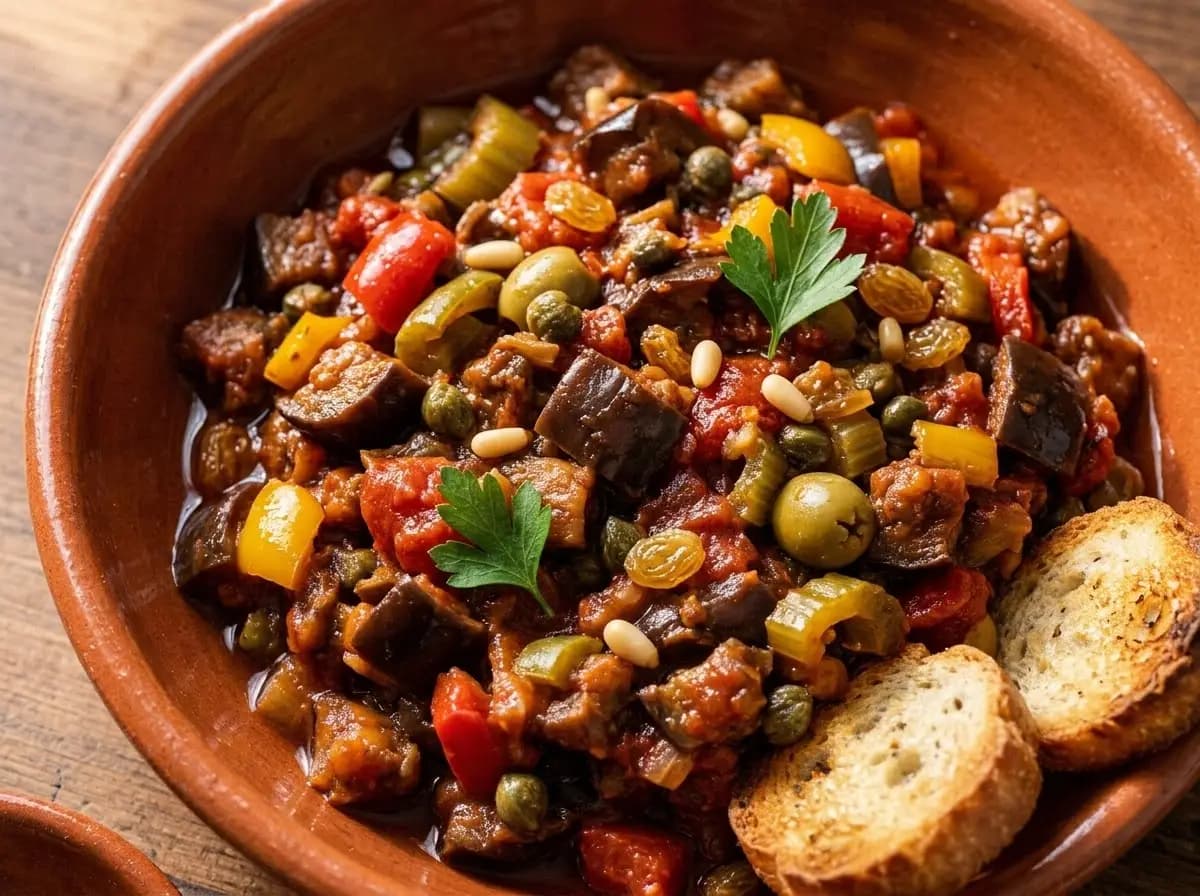
Deeply savory eggplant meets the sweet-and-sour character of classic caponata in a dish that becomes more expressive with every hour it rests. You get tender cubes of eggplant simmered with tomatoes, celery, peppers, olives, and capers, creating a rich mixture that is soft and glossy without losing all of its structure.
Golden raisins bring small bursts of sweetness, while toasted pine nuts add a delicate buttery crunch against the silky vegetables. Red wine vinegar sharpens the tomato base and balances the richness of the olive oil, giving you a layered Sicilian-inspired side that tastes tangy, briny, gently sweet, and deeply savory rather than simply tomato-heavy.
Serving Temperature
You can serve the caponata at room temperature or lightly chilled. It is especially good after sitting outside the refrigerator for around 20 to 30 minutes, which allows the olive oil to loosen and the vinegar, raisins, olives, capers, and vegetables to taste more balanced.
Avoid serving it piping hot. Caponata benefits from a resting period, and very high heat can hide the sweet-and-sour contrast that gives the dish its distinctive character.
Alternate Ways to Serve
You can spoon the caponata over toasted crostini for an easy appetizer, serve it as part of an antipasto platter, or use it as a topping for creamy polenta, couscous, or another simple grain. It also works as a filling for sandwiches and wraps or as a richly flavored accompaniment to grilled vegetables, fish, or meat.
For a more substantial vegetarian serving, fold it through warm pasta or spoon it over white beans, then finish with fresh parsley and additional toasted pine nuts.
Make Ahead Window & Storage
You can prepare the caponata 24 to 48 hours in advance. In fact, its flavor usually improves after an overnight rest because the eggplant absorbs the tomato, vinegar, olive, caper, and raisin mixture more evenly.
Let the cooked caponata cool before transferring it to an airtight container and refrigerating it. It keeps well for approximately four days. Store the toasted pine nuts and fresh parsley separately, then add them shortly before serving so they retain their texture and color.
Stir the caponata gently after refrigeration and taste it at room temperature before adjusting the seasoning. A small splash of vinegar may restore brightness, but add it gradually so the sweet-and-sour balance does not become too sharp.
Potluck Portability and Transportation
Pack the caponata in a tightly sealed container and carry it in an insulated bag with ice packs. Its dense texture and cooked vegetable base make it especially transport-friendly because it does not depend on crisp leaves or a delicate creamy dressing.
Carry the toasted pine nuts, fresh parsley, and bread separately. At the gathering, let the caponata lose some of its refrigerator chill, stir it carefully, and finish it with the reserved garnishes just before placing it on the table.
8. Za’atar Roasted Cauliflower with Tahini, Dukkah & Hummus Dip
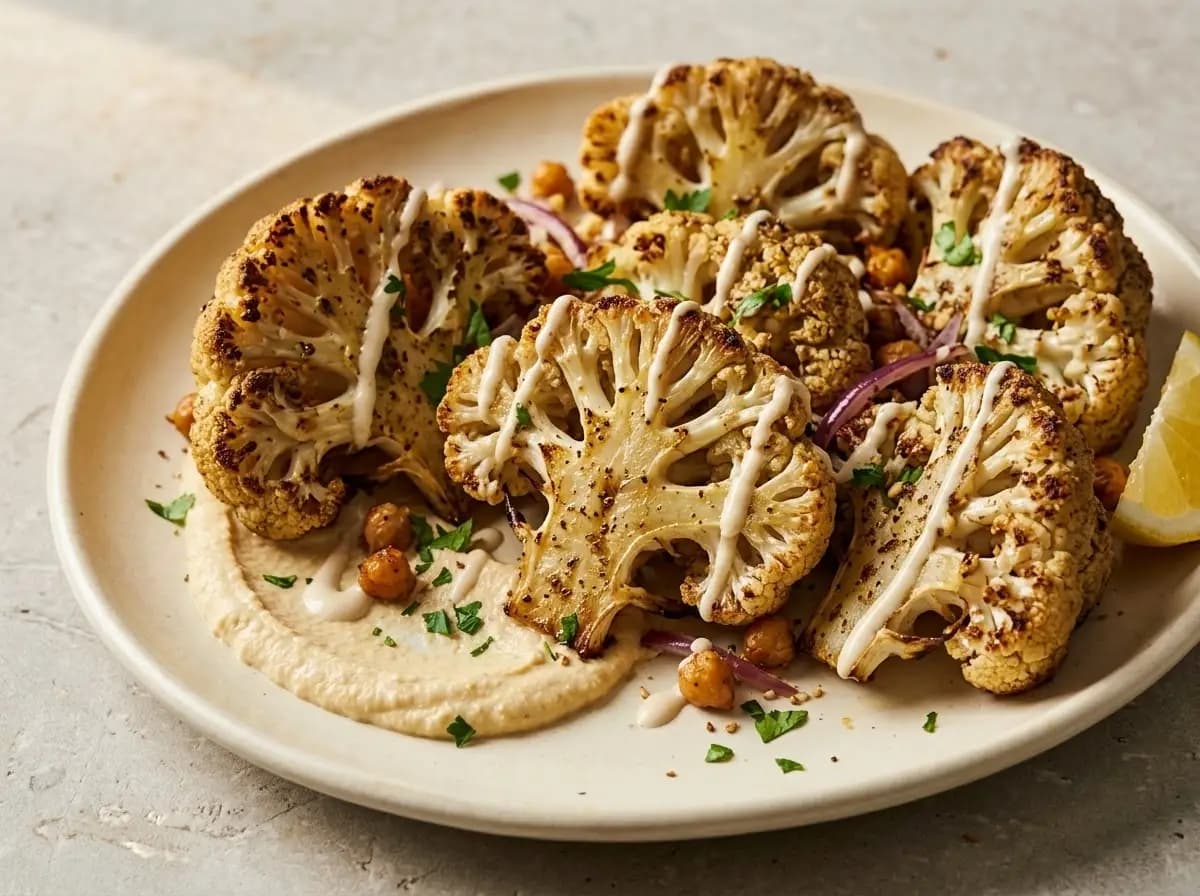
Golden at the edges and tender through the center, these za’atar-roasted cauliflower pieces give you the satisfying depth of a roasted vegetable platter with the freshness of a well-balanced mezze spread. The warm, earthy seasoning settles into every ridge of the cauliflower, while creamy hummus and a lemony tahini drizzle add richness without hiding its deeply browned flavor.
You finish the platter with crunchy dukkah, roasted chickpeas, thin red onion, fresh parsley, and a squeeze of lemon. Each bite moves between crisp edges, soft cauliflower, smooth hummus, nutty tahini, and toasted seeds, creating a side dish that feels generous and substantial while remaining bright enough for a summer potluck.
Serving Temperature
You can serve this dish warm or at room temperature. It is especially good when the cauliflower has cooled slightly after roasting, allowing the caramelized edges to remain noticeable while the hummus and tahini stay creamy and smooth.
Avoid serving it refrigerator-cold, as chilled cauliflower can become firm and muted in flavor. If you prepare it ahead, let the cauliflower return to room temperature or warm it briefly before assembling the platter.
Alternate Ways to Serve
You can serve the roasted cauliflower as one composed platter over a wide layer of hummus, or arrange the hummus and tahini in separate bowls so guests can dip individual cauliflower pieces. For a more substantial option, tuck the cauliflower, hummus, red onion, herbs, and dukkah into warm pita or flatbread.
Make Ahead Window & Storage
You can prepare most of the components up to 24 hours in advance. Roast the cauliflower until deeply golden, allow it to cool completely, and store it in an airtight container in the refrigerator. Keep the hummus, tahini sauce, roasted chickpeas, herbs, red onion, and dukkah in separate containers.
Before serving, reheat the cauliflower briefly in a hot oven or air fryer until the edges regain some of their texture. Spread the hummus onto the platter only when you are ready to assemble, then add the cauliflower and drizzle over the tahini.
Leftover assembled cauliflower can be refrigerated for up to three days, although the dukkah and chickpeas will gradually soften. For the best texture, store any remaining crunchy toppings separately.
Potluck Portability and Transportation
Transport the roasted cauliflower in a wide sealed container and carry the hummus, tahini sauce, dukkah, herbs, onions, and chickpeas separately. This prevents the cauliflower from becoming coated too early and keeps the toasted toppings crisp.
At the gathering, spread the hummus over a shallow platter, arrange the cauliflower on top, and add the tahini in a light drizzle. Finish with dukkah, roasted chickpeas, red onion, parsley, and fresh lemon just before placing it on the table.
9. Marinated Zucchini Carpaccio with Capers & Pistachios
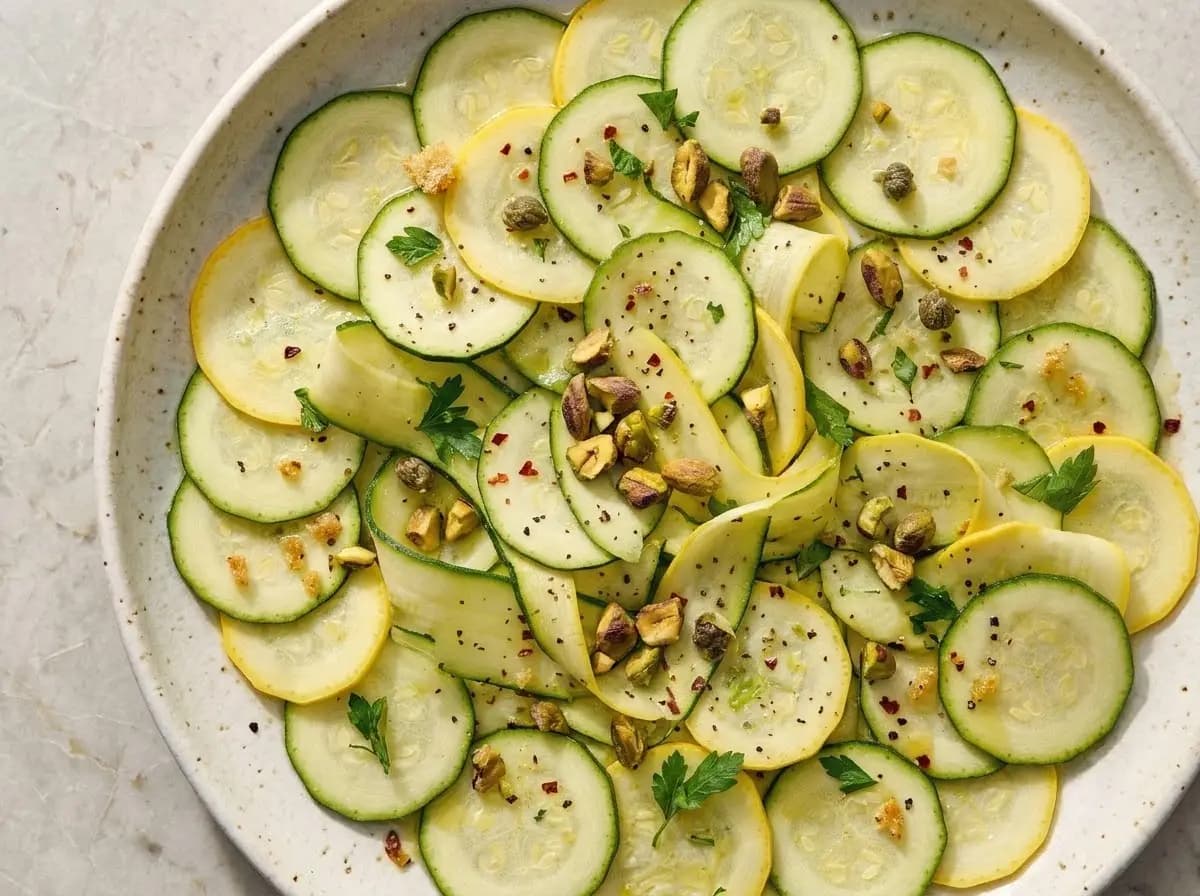
Delicate slices of zucchini take on a completely different personality once they are marinated, turning tender, glossy, and full of bright flavor without ever needing to be cooked. You layer the zucchini into a wide platter and let it soak up lemon, olive oil, garlic, and seasoning, so each bite tastes clean, lightly tangy, and quietly rich at the same time.
Capers bring little pops of briny sharpness, while pistachios add the nutty crunch that keeps the dish from feeling too soft or delicate. A scattering of herbs and a touch of red pepper or black pepper give the carpaccio a fresh finish, making it feel elegant enough for a dinner spread but easy enough to prepare for a summer potluck or make-ahead lunch table.
Serving Temperature
You should serve this carpaccio chilled or cool from the refrigerator. It tastes best after marinating and then resting briefly at room temperature for about 10 to 15 minutes, which helps the olive oil loosen and allows the lemon, capers, and herbs to come through more clearly.
Avoid serving it warm. Heat softens the sliced zucchini too quickly and takes away the crisp, fresh texture that makes a raw marinated vegetable dish feel so appealing.
Make Ahead Window & Storage
You can prepare this dish up to 12 hours in advance. Slice the zucchini very thinly, arrange it in a shallow layer, and toss or brush it with the lemony marinade so the slices soften slightly without becoming limp.
Store the marinated zucchini in an airtight container or tightly covered platter in the refrigerator. Keep the pistachios and any delicate herb garnish separate until just before serving so they stay crisp and fresh.
This carpaccio is best enjoyed the day it is made, since the zucchini will continue to release moisture as it sits. If needed, you can gently blot away excess liquid or spoon off a little marinade before serving.
Potluck Portability and Transportation
Arrange the sliced zucchini in a shallow, tightly sealed container so the layers stay neat during transport. Carry it in an insulated bag with ice packs, especially in warm weather, since the dish is meant to stay cool and fresh rather than sit out for long periods.
Pack the pistachios and final herb garnish separately. Once you arrive, give the zucchini a gentle adjustment on the serving platter if needed, then scatter over the capers, pistachios, herbs, and final seasoning just before placing it on the table.
10. Greek Lemon Potatoes with Oregano & Crispy Garlic
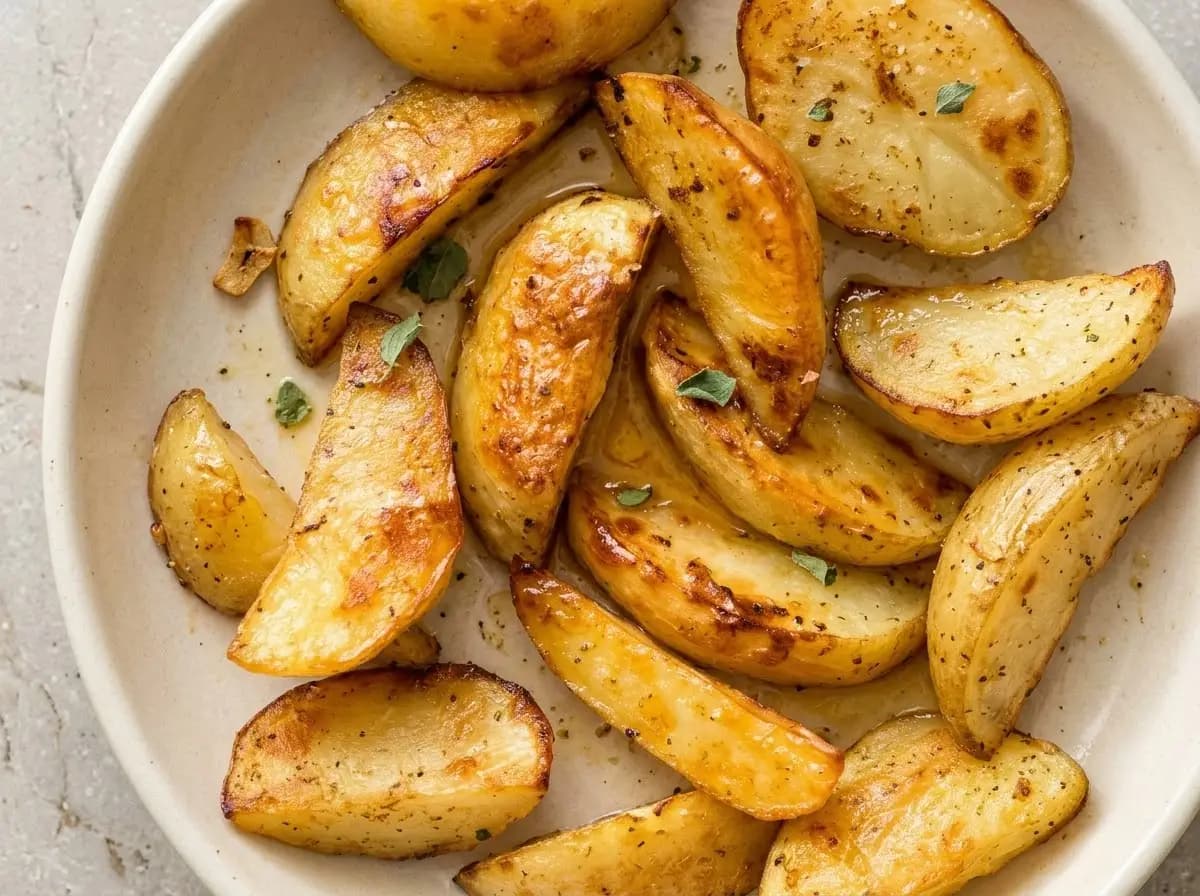
Crisp golden edges give way to soft, lemon-soaked centers in these Greek-style roasted potatoes. You roast the wedges with olive oil, fresh lemon juice, garlic, oregano, and a small amount of broth, allowing them to absorb the seasoning before the remaining liquid cooks away and the surfaces begin to caramelize.
The lemon keeps the potatoes bright rather than heavy, while oregano adds an earthy herbal note that settles into every browned edge. Crisp pieces of garlic bring a final savory crunch, giving you a warm, rustic side that feels simple on the plate but delivers much more flavor than ordinary roasted potatoes.
Serving Temperature
You should serve these potatoes warm or at room temperature. They are at their best shortly after roasting, when the edges are still crisp and the centers remain tender and moist with lemon, garlic, and olive oil.
If they have cooled completely, reheat them uncovered in a hot oven or air fryer rather than in the microwave. Dry heat helps revive the browned edges, while microwave reheating can make the wedges soft and slightly rubbery.
Make Ahead Window & Storage
You can roast the potatoes up to 24 hours in advance. Let them cool completely before transferring them to a shallow airtight container and refrigerating them. Keep the crispy garlic and a small amount of fresh oregano separate so they retain their texture and aroma.
Reheat the potatoes in a single layer at a high temperature until warmed through and crisp around the edges. If they appear dry, add only a light drizzle of olive oil before reheating rather than more broth, which could soften the browned surfaces.
Cooked leftovers keep well in the refrigerator for approximately three to four days. Add the reserved garlic, oregano, and a fresh squeeze of lemon after reheating to restore the brighter flavors.
Potluck Portability and Transportation
Transport the potatoes in a wide, tightly sealed container so the wedges are not piled too deeply and crushed under their own weight. Keep them warm in an insulated carrier when the journey is short, or transport them chilled and reheat them uncovered at the gathering when an oven is available.
Carry the crispy garlic and final oregano garnish separately. Just before serving, arrange the potatoes on a shallow platter, scatter the garlic and herbs over the top, and add a restrained squeeze of lemon so the wedges stay bright without becoming wet.
11. Baked Polenta with Calabrian Tomato Jam

What makes these baked polenta cakes so memorable is the contrast between their crisp, bronzed crust and soft, creamy center. You cook the polenta until thick, let it set, then bake the portions until the edges become golden enough to support a generous spoonful of slow-cooked tomato jam.
The topping begins sweet and intensely tomato-rich before Calabrian chile brings a warm, lingering heat. A small spoonful of ricotta softens that spice, while toasted pine nuts and fresh basil add crunch and freshness. You end up with a colorful, composed side that feels more polished than a casserole but remains easy for guests to pick up and serve.
Serving Temperature
You can serve the polenta cakes warm or at room temperature. They taste best when the centers are still tender and the baked surfaces retain a little crispness, while the tomato jam is warm enough to spread easily without running off the top.
Avoid serving them refrigerator-cold, as chilled polenta becomes firm and the tomato jam loses some of its sweetness and chile warmth. If necessary, reheat the plain cakes before adding the toppings.
Alternate Ways to Serve
You can bake the polenta in one shallow dish and cut it into small squares instead of shaping individual rounds. For a more casual buffet presentation, arrange the crisp polenta pieces on a platter and serve the Calabrian tomato jam and ricotta in separate bowls so guests can add their own toppings.
Make Ahead Window & Storage
You can prepare both the polenta and tomato jam up to two days in advance. Pour the cooked polenta into a lined pan, chill it until firm, then cut or shape it into portions. Store the unbaked pieces in an airtight container with parchment paper between the layers.
Refrigerate the tomato jam separately so its moisture does not soften the polenta. The pine nuts, basil, and ricotta should also remain separate until you are ready to assemble the dish.
Bake or reheat the polenta shortly before serving, then add the tomato jam once the surfaces are crisp. Leftover assembled cakes can be refrigerated for up to three days, although the topping will gradually soften the crust. Reheat them uncovered in the oven rather than using the microwave.
Potluck Portability and Transportation
Transport the baked polenta cakes in a shallow container, placing parchment between layers if stacking is unavoidable. Carry the tomato jam, ricotta, pine nuts, and basil in separate sealed containers so the cakes do not become soggy during the journey.
At the gathering, arrange the polenta on a platter and spoon a small amount of tomato jam onto each piece. Finish with ricotta, toasted pine nuts, basil, and a light drizzle of olive oil just before serving.
12. Red Lentil Kofte with Lemon-Tahini Herb Salad
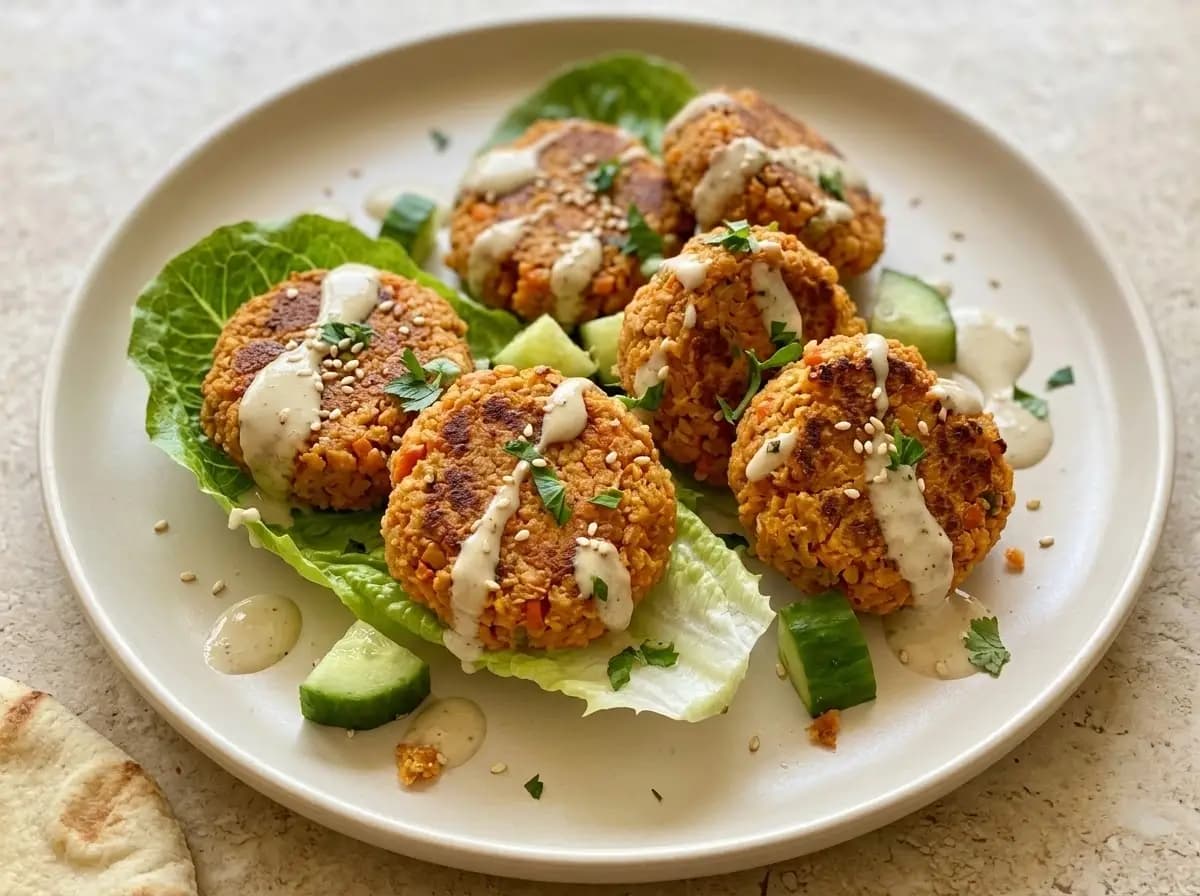
Burnished on the outside and tender through the center, these red lentil kofte give you a satisfying plant-based bite without feeling dense or heavy. Red lentils are cooked until soft, then combined with fine bulgur, warm spices, sautéed aromatics, and fresh herbs before being shaped into compact portions that hold together neatly on a platter.
The lemon-tahini herb salad brings the freshness the kofte need, layering crisp cucumber, parsley, mint, and tender greens with a bright citrus dressing. Creamy tahini runs through the plate while toasted sesame seeds add a gentle crunch, so each serving moves between earthy lentils, lively herbs, cool vegetables, and nutty richness.
Serving Temperature
You can serve the kofte warm, at room temperature, or lightly chilled. They are especially good at cool room temperature, when the spices and herbs are more noticeable and the lentil mixture remains soft without becoming fragile.
Serve the herb salad cool and add it shortly before eating. Avoid placing hot kofte directly onto the dressed greens, since the heat can wilt the herbs and cause the cucumber to release excess moisture.
Alternate Ways to Serve
You can tuck the kofte into lettuce cups with the cucumber-herb salad and a drizzle of tahini, or serve them inside warm pita with extra herbs and pickled vegetables. For a mezze-style presentation, arrange them on a wide platter with the salad, lemon wedges, tahini sauce, and flatbread placed around the edges.
Make Ahead Window & Storage
You can prepare the lentil mixture up to 24 hours in advance and keep it covered in the refrigerator before shaping. The finished kofte can also be cooked or assembled a day ahead, then stored in a single layer or with parchment paper between layers.
Prepare the tahini dressing separately and refrigerate it in a sealed container. Chop the cucumber and herbs several hours ahead, but wait to add the lemon dressing until closer to serving so the salad stays crisp and vibrant.
The kofte keep well in the refrigerator for approximately three days. Let them return to cool room temperature before serving, or warm them briefly in a covered oven so they do not dry out. Stir a small amount of cold water and lemon juice into the tahini if it thickens during refrigeration.
Potluck Portability and Transportation
Arrange the kofte in a wide, tightly sealed container and separate any stacked layers with parchment paper. Carry the herb salad, tahini dressing, lettuce, and garnishes in their own containers inside an insulated bag with ice packs.
At the gathering, arrange the lettuce and herb salad on a serving platter, add the kofte, and drizzle over only part of the tahini. Keep the remaining sauce nearby for guests, then finish the dish with sesame seeds, chopped herbs, and fresh lemon.
13. French Lentil & Roasted Beet Salad with Walnut Gremolata
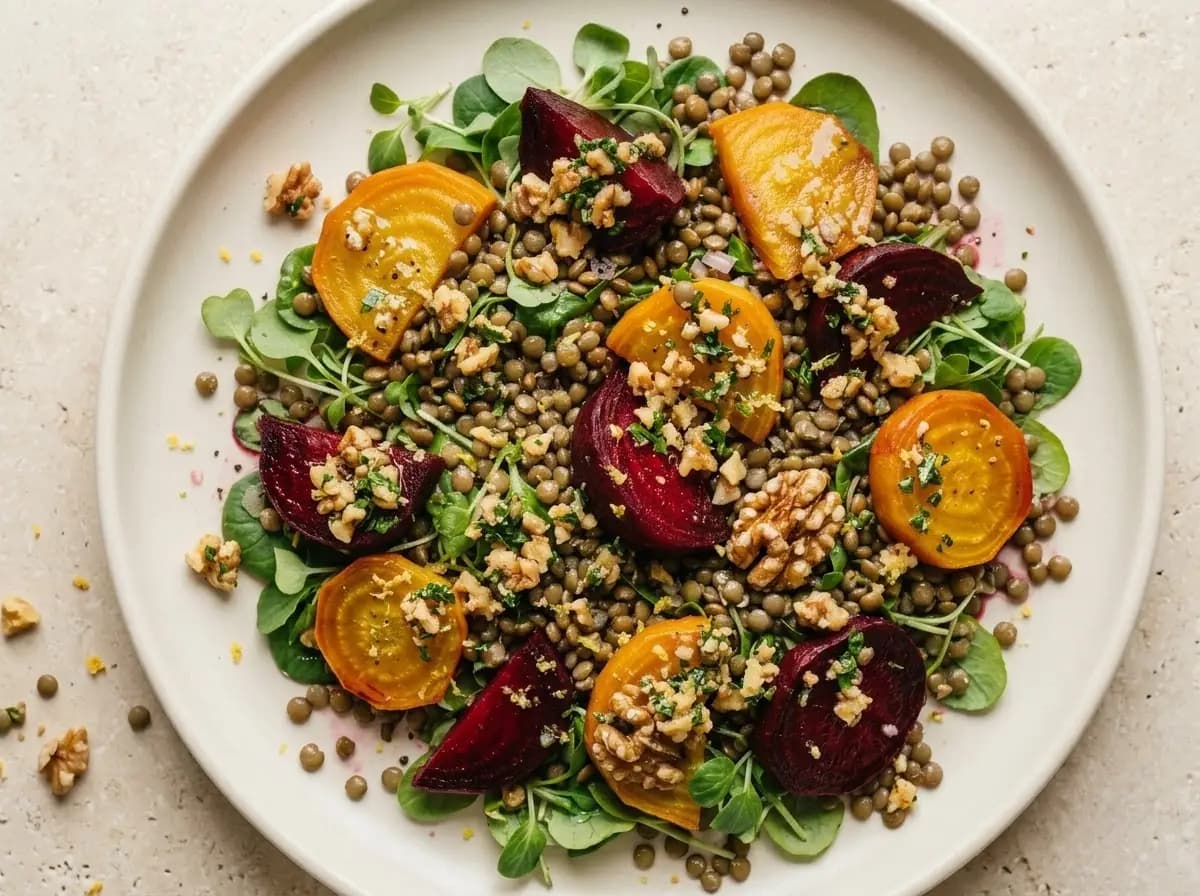
Jewel-toned roasted beets give this lentil salad its dramatic color, but the real appeal comes from the contrast between earthy vegetables, firm French lentils, peppery greens, and crunchy walnut gremolata. You get sweet golden and red beets in every serving, balanced by lentils that stay pleasantly separate instead of becoming soft or mushy.
A sharp Dijon vinaigrette brings brightness to the deeper flavors, while the walnut gremolata adds toasted richness, fresh parsley, garlic, and fine lemon zest. As the salad rests, the lentils absorb the dressing without losing their shape, giving you a substantial make-ahead side that feels fresh, colorful, and polished enough for a summer gathering.
Serving Temperature
You can serve this salad chilled or at cool room temperature. For the fullest flavor, remove it from the refrigerator about 20 minutes before serving so the olive oil loosens and the mustard, vinegar, lemon, walnuts, and roasted beets become more noticeable.
Avoid serving it warm if the lentils have already been combined with the greens. Residual heat can wilt the leaves and make the salad lose the fresh contrast that balances the earthy beets.
Make Ahead Window & Storage
You can roast the beets, cook the lentils, prepare the vinaigrette, and mix the walnut gremolata up to 24 hours in advance. Store each component separately in airtight containers in the refrigerator.
Toss the lentils with part of the vinaigrette while they are still slightly warm so they absorb the seasoning, then chill them completely. Add the greens, roasted beets, and remaining dressing closer to serving time to keep the leaves fresh and prevent the red beets from staining the entire salad.
Once assembled, the salad keeps well for approximately two days, although the greens will gradually soften. Reserve some walnut gremolata separately and scatter it over the top just before serving so the walnuts retain their crunch.
Potluck Portability and Transportation
Pack the dressed lentils and roasted beets in a tightly sealed container and transport the greens, walnut gremolata, and any reserved vinaigrette separately. Carry everything in an insulated bag with ice packs.
At the gathering, arrange the greens on a wide platter, spoon over the lentils and beets, and add only enough extra dressing to lightly coat the salad. Finish with the walnut gremolata, fresh herbs, lemon zest, and black pepper just before serving.
14. Coronation Coleslaw with Curry-Spiked Chickpeas
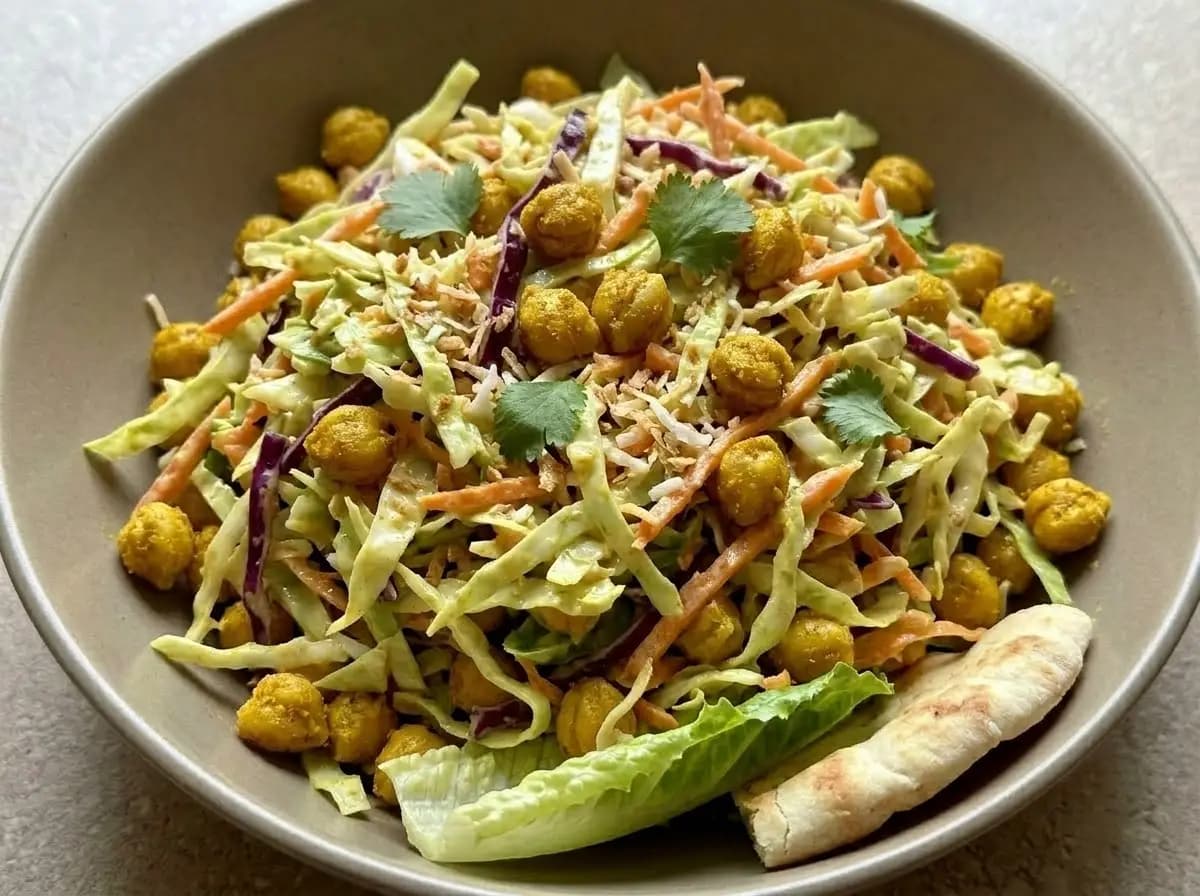
Crisp ribbons of cabbage and carrot carry a creamy, gently spiced dressing in this fresh take on coronation-style flavors. You get plenty of crunch from the slaw, substance from the chickpeas, and a warm curry note that settles into the dressing without overwhelming the vegetables.
A little mango chutney brings fruity sweetness, while lemon adds the acidity needed to keep the creamy base bright. Fresh cilantro lifts the whole bowl, and a scattering of toasted coconut or nuts can add a final layer of texture. The result is colorful, satisfying, and sturdy enough for a potluck while still tasting lighter than a traditional mayonnaise-heavy coleslaw.
Serving Temperature
You should serve this coleslaw chilled or cool from the refrigerator. It tastes best after a short rest, which gives the curry, chutney, lemon, and chickpeas time to settle into the dressing while the cabbage remains crisp.
Let it stand at cool room temperature for about 10 minutes before serving, but avoid leaving it in direct sun or warm conditions for an extended time because the dressing may contain yogurt or mayonnaise.
Alternate Ways to Serve
You can spoon the slaw into pita pockets or wraps for a more substantial handheld serving, or divide it among crisp lettuce cups for smaller individual portions. Keep the filling chilled until shortly before serving so the cabbage stays crunchy.
Make Ahead Window & Storage
You can prepare the dressing and curry-spiced chickpeas up to 24 hours in advance. Shred the cabbage and carrots ahead as well, but store the vegetables separately from the dressing to prevent them from softening too early.
Combine the slaw several hours before serving so the flavors have time to blend without losing too much crunch. Reserve some cilantro and any toasted toppings separately, then add them just before placing the bowl on the table.
Once fully assembled, the coleslaw keeps well in an airtight container in the refrigerator for approximately two to three days. It will become softer over time, so stir it gently before serving and add a small squeeze of lemon if the flavor needs refreshing.
Potluck Portability and Transportation
Transfer the coleslaw to a tightly sealed container and carry it in an insulated bag with ice packs. Pack any toasted nuts, coconut, fresh herbs, or other crunchy garnishes separately so they do not soften during the journey.
At the gathering, give the slaw a careful toss to redistribute the dressing, then finish it with the reserved cilantro and crunchy toppings. Keep the bowl chilled whenever it is not being served.
15. Tomato Confit & Olive Focaccia Squares paired with Whipped Feta & Hot Honey Dip
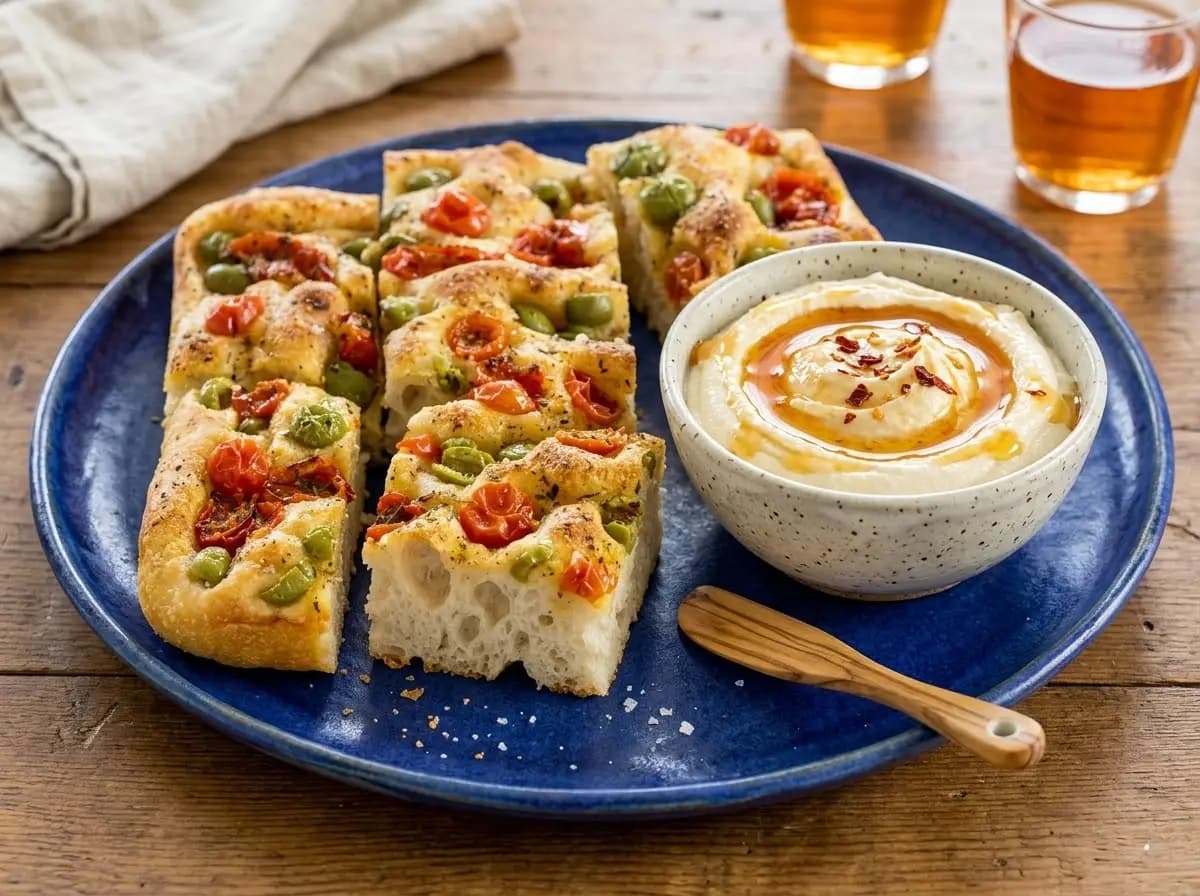
Puffy, olive-oil-rich focaccia becomes an especially inviting potluck side when every square carries pockets of sweet tomato confit and briny green olives. You get a lightly crisp golden surface, a soft open crumb, and juicy bursts of tomato tucked into the dimples, with herbs and flaky salt adding flavor across the top.
The whipped feta dip gives the bread a cool, creamy contrast, while hot honey adds a glossy finish with just enough chile warmth to balance the salty cheese and olives. You can tear or dip each airy square, picking up a little feta and honey with every bite, which makes the pairing feel more complete and memorable than focaccia served on its own.
Serving Temperature
You can serve the focaccia warm or at room temperature. It is especially good when the bread has cooled slightly after baking, so the crumb has time to settle while the surface remains tender and lightly crisp.
Serve the whipped feta chilled or cool from the refrigerator, then allow it to stand for around 10 to 15 minutes before eating. This softens the dip enough for easy scooping without making it loose or oily.
Alternate Ways to Serve
You can cut the focaccia into smaller bite-size cubes and arrange them around a central bowl of whipped feta for easier grazing. For individual portions, add a small spoonful of whipped feta and a light drizzle of hot honey to each square shortly before serving, creating ready-to-pick-up focaccia bites.
Make Ahead Window & Storage
You can prepare the tomato confit and whipped feta up to two days in advance. Refrigerate them in separate airtight containers, bringing the tomatoes closer to room temperature before adding them to the dough or finished bread.
The focaccia can be baked one day ahead. Once completely cool, wrap it well or keep it in an airtight container at room temperature. Avoid refrigerating the bread unless necessary, since cold storage can make the crumb firmer and less tender.
Before serving, refresh the focaccia uncovered in a warm oven for several minutes, then let it cool slightly before cutting. Store leftover whipped feta in the refrigerator for approximately three days, and keep the hot honey separate until serving.
Potluck Portability and Transportation
Arrange the focaccia squares in a wide container lined with parchment paper. Avoid sealing the container while the bread is still warm, since trapped steam can soften the golden surface.
Carry the whipped feta in a tightly sealed chilled container and transport the hot honey separately. At the gathering, place the dip in a shallow bowl, add a restrained swirl of hot honey, and arrange the focaccia squares around it so guests can easily scoop and serve themselves.
16. Slow-Cooker Harissa Chickpeas
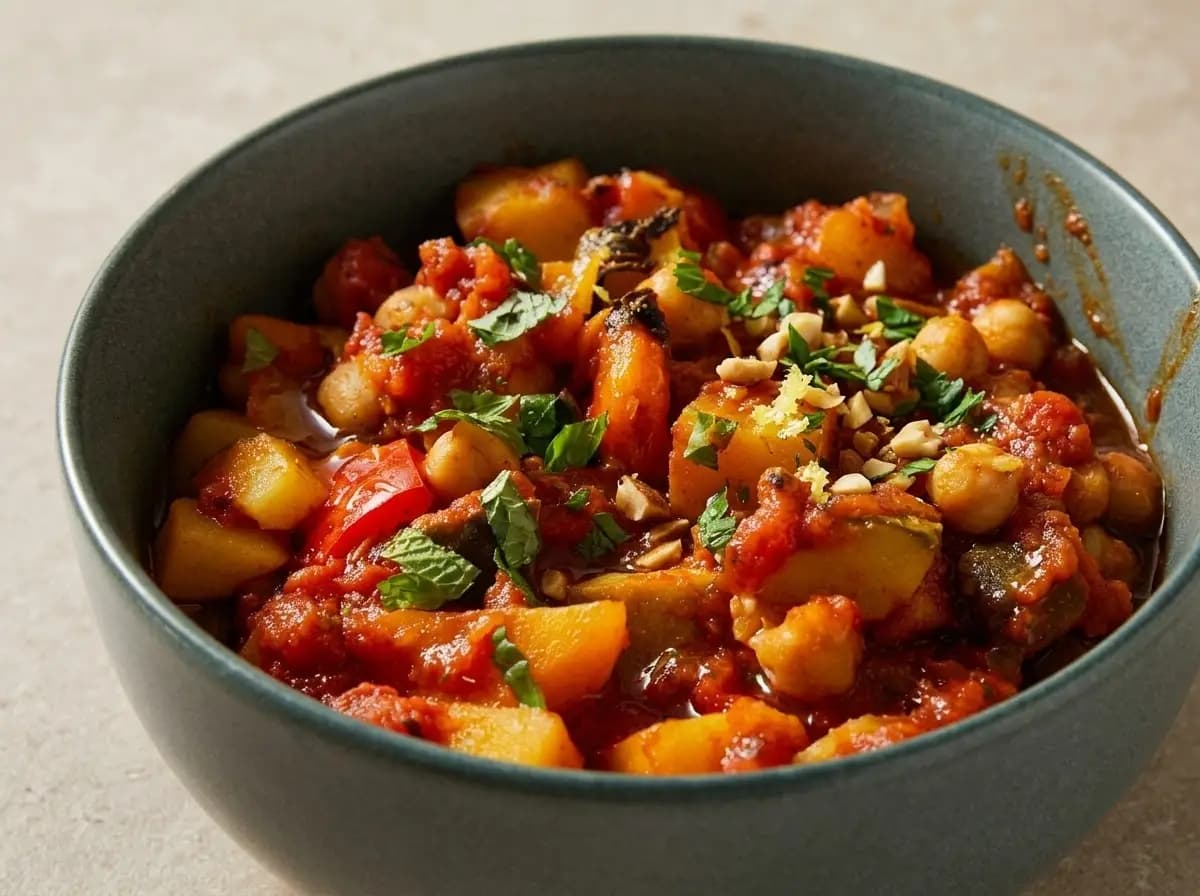
A slow, gentle simmer gives these chickpeas time to absorb the smoky heat of harissa and the mellow sweetness of dried apricots. You get a rich tomato-based stew filled with tender chickpeas, softened vegetables, and pockets of fruit that balance the chile warmth without making the dish taste overly sweet.
Warm spices deepen the sauce, while lemon and fresh herbs keep the finished dish from feeling too heavy. Chopped toasted almonds add contrast against the soft chickpeas and vegetables, giving you a substantial potluck side that tastes even more developed after resting overnight.
Serving Temperature
You can serve these harissa chickpeas warm or at room temperature. They are especially good when served gently warmed, since the sauce loosens and the harissa, spices, tomato, and apricot become more aromatic.
Avoid serving the dish straight from the refrigerator. If it has been made ahead, reheat it slowly and add a small splash of water or broth only when the sauce has thickened more than you would like.
Alternate Ways to Serve
You can spoon the chickpeas over couscous, rice, quinoa, or creamy polenta when you want to turn the side into a fuller meal. They also work well with warm flatbread, allowing you to scoop up the thick harissa sauce and tender vegetables directly from the bowl.
Make Ahead Window & Storage
You can prepare the complete dish up to two days in advance. The flavor often improves after resting because the chickpeas and apricots continue absorbing the tomato, harissa, and spices.
Allow the chickpeas to cool before transferring them to an airtight container and refrigerating them. Keep the toasted nuts, fresh herbs, and lemon zest separate so they remain crisp and vibrant when added at serving time.
Leftovers keep well in the refrigerator for approximately three to four days. Reheat them gently on the stovetop or in the slow cooker until evenly hot, stirring occasionally so the thicker sauce does not catch at the bottom.
Potluck Portability and Transportation
Transport the chickpeas in the removable slow-cooker insert when practical, or transfer them to a tightly sealed, heat-safe container. Keep the dish warm in an insulated carrier during a short journey, or transport it chilled and reheat it fully at the gathering.
Carry the almonds, herbs, and lemon separately. Before serving, stir the chickpeas gently, adjust the consistency if needed, and finish the bowl with the reserved garnishes so the surface looks fresh and textured.
17. Marinated Mushroom & Pepper Skewers
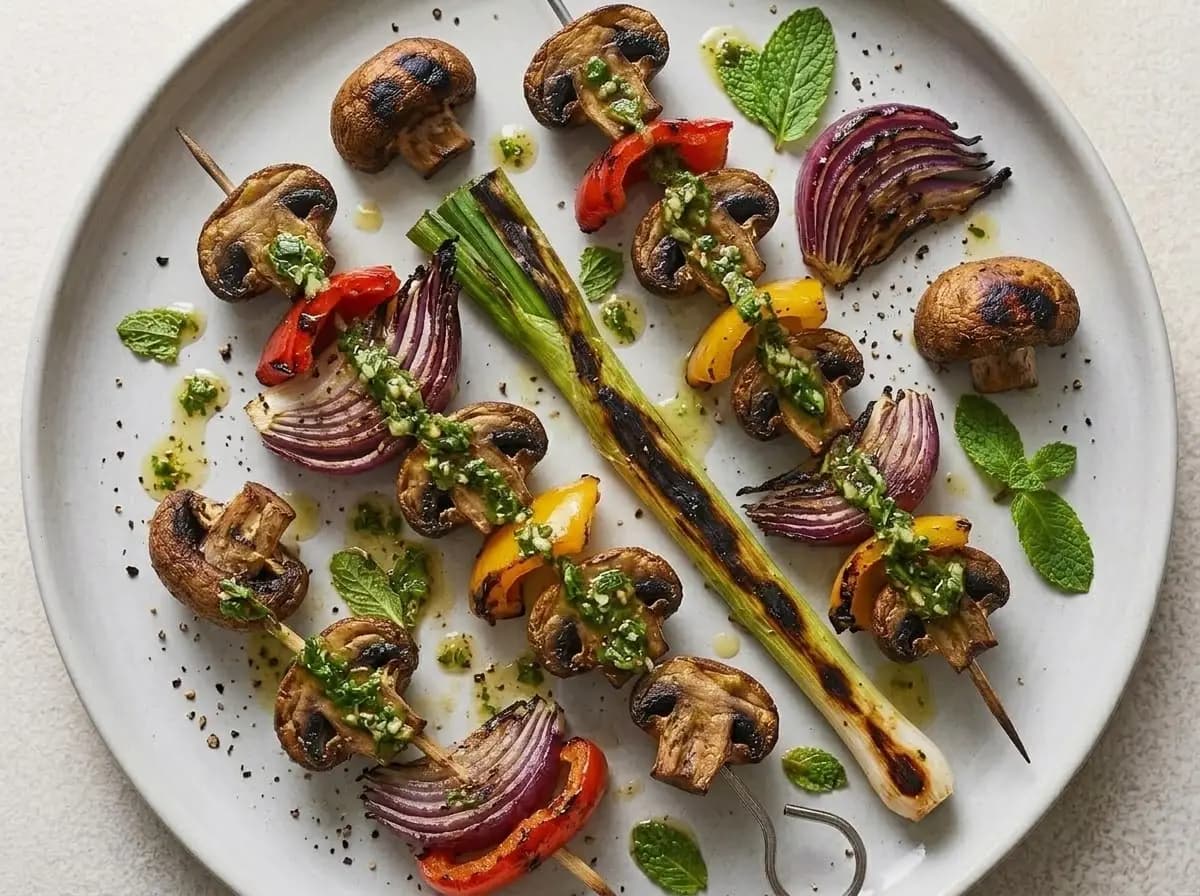
Smoky mushrooms and sweet bell peppers take on a deeper, more savory character once they are marinated and cooked over high heat. You get juicy mushrooms with caramelized edges, tender peppers with a little char, and a bright salsa verde that cuts through the richness with herbs, garlic, lemon, and olive oil.
The vegetables stay substantial enough to feel satisfying, while the salsa verde keeps every bite fresh rather than heavy. A final spoonful of the herb-packed sauce settles into the creases of the mushrooms and along the blistered peppers, giving you a colorful potluck side with plenty of contrast between smoky, earthy, sweet, and tangy flavors.
Serving Temperature
You can serve these skewers warm or at room temperature. They taste especially good after resting for about 10 minutes, when the mushrooms have absorbed more of the marinade but the peppers still retain some structure.
Avoid serving them refrigerator-cold, as chilled mushrooms can become firm and the olive oil in the salsa verde may thicken. Let prepared skewers return to room temperature or warm them briefly before adding the final sauce.
Alternate Ways to Serve
You can remove the cooked mushrooms and peppers from the skewers and arrange them as a warm antipasto-style platter with salsa verde spooned across the top. They can also be tucked into flatbread or served over a simple grain when you want to turn the side into a more substantial vegetarian meal.
Make Ahead Window & Storage
You can prepare the salsa verde and clean the vegetables up to 24 hours in advance. Store the sauce in a tightly sealed container in the refrigerator, and keep the mushrooms dry until you are ready to marinate them.
Marinate the mushrooms and peppers for approximately 30 minutes to two hours before cooking. Leaving the mushrooms in an acidic marinade for too long can make their surfaces soft and slightly slippery.
Cooked skewers can be refrigerated for up to three days, although their texture is best on the day they are made. Reheat them briefly under the broiler, on a grill pan, or in a hot oven, then add fresh salsa verde after warming.
Potluck Portability and Transportation
Arrange the cooked skewers in a wide, tightly sealed container and avoid stacking too many layers, which can crush the mushrooms and loosen the vegetables from the sticks. Carry the salsa verde separately in a leakproof container.
At the gathering, place the skewers on a shallow platter and spoon over only part of the sauce so the vegetables remain visibly charred. Keep the remaining salsa verde nearby for guests who would like an extra herbaceous finish.
18. Tajín Cantaloupe-Cucumber Lime Salad
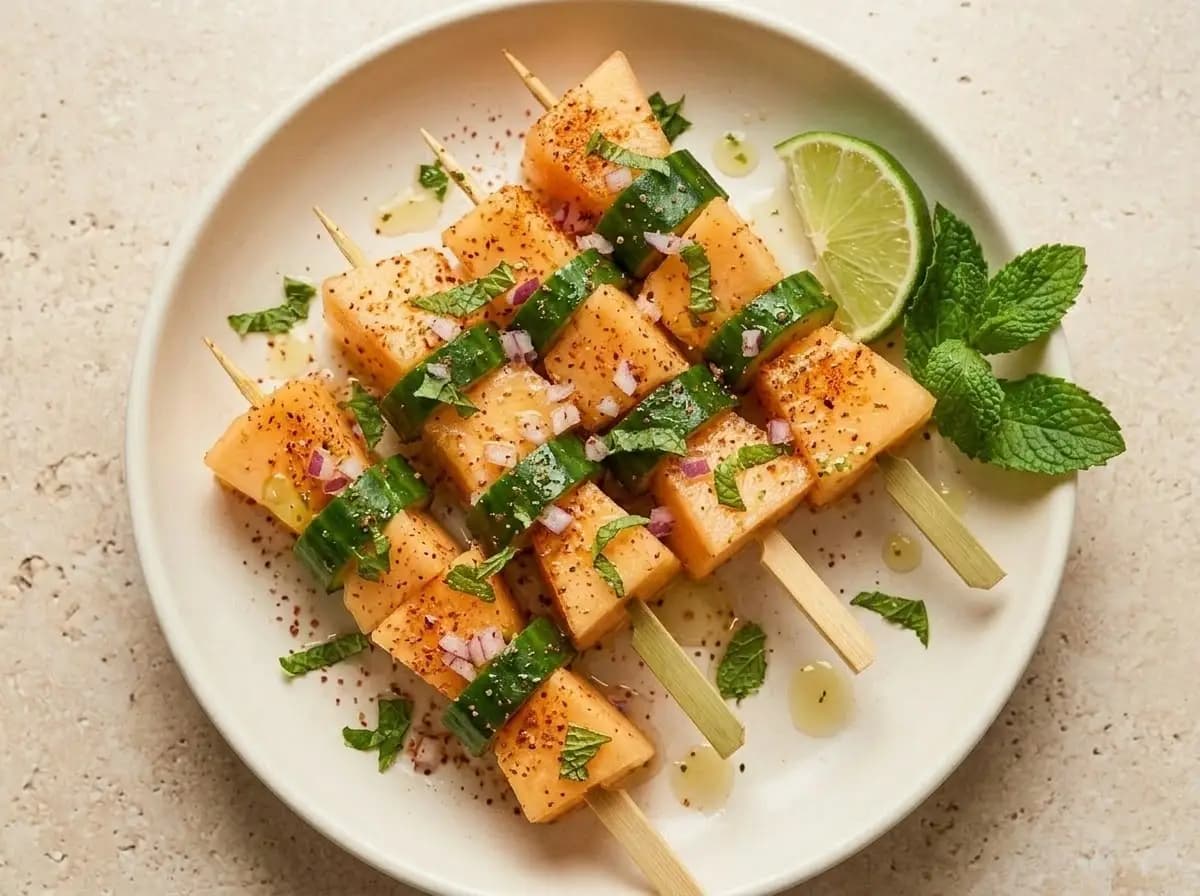
Juicy cantaloupe and crisp cucumber make this salad feel instantly cooling, but the real personality comes from the Tajín and lime. You get sweet melon, fresh crunch, a little sharpness from red onion, and a bright citrusy finish that keeps every bite lively instead of overly sugary.
Tajín adds exactly the kind of savory, tangy, chile-lime edge that makes cantaloupe taste even more refreshing, while mint and fresh herbs give the bowl a clean finish. It is simple, colorful, and especially good when you want a side dish that feels light, hydrating, and full of warm-weather flavor without needing much effort.
Serving Temperature
You should serve this salad well chilled or cool from the refrigerator. It tastes best when the cantaloupe is cold and juicy, the cucumber stays crisp, and the lime and Tajín feel bright and sharp against the sweetness of the fruit.
Avoid leaving it out too long in the heat, since the melon will gradually release more liquid and soften the texture of the salad. If needed, keep it chilled until shortly before serving.
Alternate Ways to Serve
You can spoon the salad into small cups for an easy party or potluck presentation, or thread the cantaloupe and cucumber onto short skewers and scatter the onion, herbs, Tajín, and lime over the top just before serving. It also works nicely as a fresh brunch or picnic side when you want something lighter than a traditional lettuce-based salad.
Make Ahead Window & Storage
You can cut the cantaloupe, cucumber, and onion up to 12 hours in advance and store them in separate airtight containers in the refrigerator. Chop the herbs and squeeze the lime closer to serving time so the salad keeps its fresher flavor and cleaner texture.
For the best result, toss everything together shortly before serving with the Tajín, lime juice, and any final seasoning. Once assembled, the salad is best enjoyed the same day, although it can hold in the refrigerator for several hours.
If it releases extra juice while sitting, give it a gentle toss before serving. A fresh squeeze of lime and a final sprinkle of Tajín can wake it up again without needing much else.
Potluck Portability and Transportation
Pack the cut cantaloupe and cucumber in a tightly sealed chilled container and carry the lime, Tajín, and herbs separately when possible. This helps the produce stay crisp and prevents the seasoning from dissolving too early into the juices.
At the gathering, toss the salad gently, add the final lime and Tajín, and finish with the herbs just before placing it on the table. Keep it cool until serving so the fruit remains firm and refreshing.
19. Tarragon-Pesto Fingerling Potato Salad with Pickled Onions
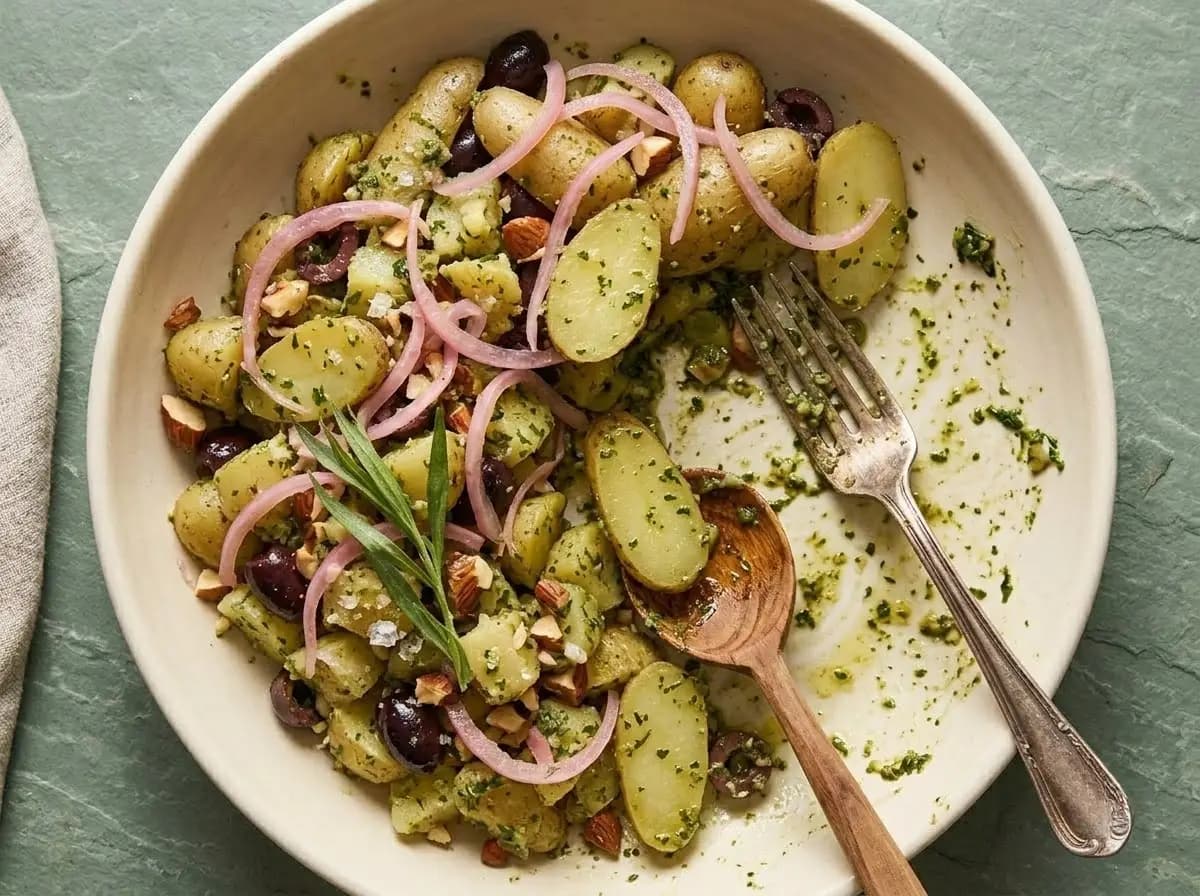
Tender potatoes become especially appealing when they are coated in a bright, herb-packed dressing instead of a heavy creamy one. In this salad, you get soft potato pieces tossed with a tarragon-forward pesto that feels fresh, savory, and lightly sharp, while pickled onions bring the acidity that keeps the whole bowl lively.
The tarragon gives the salad its distinctive flavor, adding a gentle anise-like note that works beautifully with olive oil, herbs, and warm potatoes. A few briny olives and a little crunchy nut garnish can make the texture more interesting, but the real balance comes from the contrast between earthy potatoes, vivid green pesto, and those ribbons of pink pickled onion scattered over the top.
Serving Temperature
You can serve this potato salad at cool room temperature or lightly chilled. It tastes especially good when the potatoes are no longer warm but have not become refrigerator-cold, since the pesto stays aromatic and the potatoes remain tender without turning firm.
If you refrigerate it ahead, let it sit out for about 15 to 20 minutes before serving. That gives the olive oil in the pesto time to loosen and helps the tarragon, garlic, and pickled onions taste more pronounced.
Make Ahead Window & Storage
You can prepare the pickled onions and the tarragon pesto up to 24 hours in advance. Cook the potatoes until just tender, drain them well, and let them cool slightly before tossing them with part of the dressing so they absorb the flavor more evenly.
Store the finished salad in an airtight container in the refrigerator for up to three days. If you want the cleanest texture, keep some extra pickled onions and a spoonful of pesto separate, then add them just before serving to freshen the appearance and flavor.
Stir the salad gently before serving, especially if the pesto has settled at the bottom. A small drizzle of olive oil or squeeze of lemon can help revive it if the potatoes have absorbed a lot of the dressing during storage.
Potluck Portability and Transportation
Transfer the potato salad to a tightly sealed container and carry it in an insulated bag with ice packs. Because it is dressed with an herb-based pesto rather than a delicate leafy dressing, it travels well and holds its shape nicely during transport.
Pack any reserved pickled onions, herbs, or crunchy garnish separately. At the gathering, give the salad a gentle toss, spoon it into a shallow serving bowl, and finish it with the extra onions and a little fresh tarragon so it looks bright and freshly assembled.
20. Broccoli Caesar Crunch Salad with Roasted Chickpeas

Charred broccoli brings a deeper, toastier edge to the familiar flavors of a Caesar salad. You get crisp-tender florets with dark roasted tips, crunchy chickpeas, and a creamy garlic-lemon dressing that settles into the broccoli without turning the dish heavy or overly wet.
Parmesan and golden breadcrumbs add the salty crunch that makes each bite feel complete, while black pepper and lemon keep the richer dressing bright. The combination gives you the savory appeal of Caesar salad in a sturdier format that holds up far better on a potluck table than delicate lettuce leaves.
Serving Temperature
You can serve this salad at cool room temperature or lightly chilled. It is especially good once the roasted broccoli has cooled but still retains some of its crisp edges, allowing the dressing to coat it without becoming thin from residual heat.
Avoid serving it piping hot, since the warmth can loosen the creamy dressing and soften the crunchy chickpeas and breadcrumbs. If refrigerated, let it stand for about 15 minutes before serving.
Make Ahead Window & Storage
You can roast the broccoli and prepare the Caesar dressing up to 24 hours in advance. Cool the broccoli completely before refrigerating it so trapped steam does not soften the browned edges.
Store the broccoli, dressing, roasted chickpeas, breadcrumbs, and Parmesan in separate airtight containers. Toss the broccoli with only enough dressing to coat it shortly before serving, then add the crunchy components at the end.
Once fully assembled, the salad is best eaten the same day. Leftovers can be refrigerated for up to two days, although the chickpeas and breadcrumbs will gradually soften. Refresh the salad with extra roasted chickpeas, Parmesan, black pepper, and a squeeze of lemon before serving again.
Potluck Portability and Transportation
Pack the cooled broccoli in a wide, tightly sealed container and carry the dressing in a separate leakproof jar. Transport the roasted chickpeas, Parmesan, and breadcrumbs separately so they remain dry and crisp.
At the gathering, toss the broccoli with the dressing, transfer it to a shallow serving bowl, and finish with the chickpeas, breadcrumbs, Parmesan, lemon zest, and plenty of cracked black pepper. Keep the salad chilled when it is not being served.
21. Roasted Sweet Potato & Black Bean Salad with Lime-Pepita Dressing
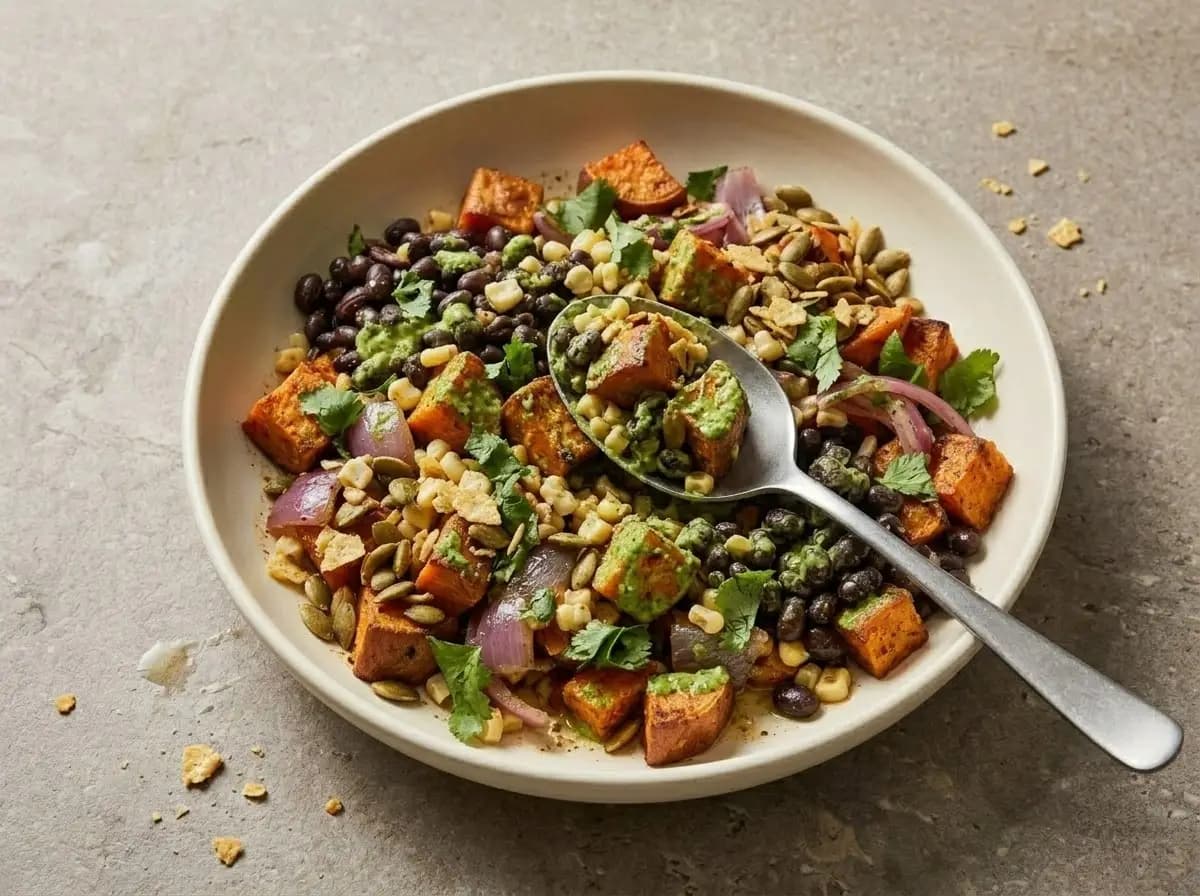
Roasted sweet potatoes bring caramelized edges and a soft, almost creamy center to this colorful black bean salad. You get smoky-sweet cubes in every serving, balanced by earthy beans, juicy corn, red onion, and fresh cilantro, so the bowl feels substantial without becoming overly rich.
The lime-pepita dressing ties everything together with citrusy acidity, toasted nuttiness, and a gentle savory heat. Whole pepitas add extra crunch, while a few crushed tortilla chips can give the salad a crisp finishing layer. The contrast between warm spices, bright lime, tender vegetables, and crunchy toppings makes this an especially useful make-ahead side for casual gatherings.
Serving Temperature
You can serve this salad at cool room temperature or lightly chilled. It tastes best when the roasted sweet potatoes have cooled but are not refrigerator-cold, allowing their caramelized flavor and soft texture to remain noticeable.
If the salad has been refrigerated, let it sit out for about 15 to 20 minutes before serving. Give it a gentle toss so the lime-pepita dressing loosens and coats the beans, corn, and sweet potatoes evenly.
Alternate Ways to Serve
You can spoon the salad into lettuce cups or warm tortillas for a more substantial handheld option. It also works as a build-your-own bowl base when you serve the avocado, extra dressing, tortilla strips, and fresh lime separately for guests to add themselves.
Make Ahead Window & Storage
You can roast the sweet potatoes and prepare the lime-pepita dressing up to 24 hours in advance. Let the potatoes cool completely before refrigerating them so trapped steam does not soften their browned edges.
Store the sweet potatoes, black beans, corn, onion, dressing, herbs, and crunchy toppings in separate airtight containers. Combine the sturdy ingredients several hours before serving, but reserve the cilantro, whole pepitas, and tortilla chips until the end.
Once assembled, the salad keeps well in the refrigerator for approximately three days. The sweet potatoes will soften gradually, so refresh leftovers with a squeeze of lime, a spoonful of reserved dressing, and a fresh handful of pepitas before serving again.
Potluck Portability and Transportation
Pack the sweet potato and black bean mixture in a wide, tightly sealed container and transport it in an insulated bag with ice packs. Carry the dressing in a separate leakproof jar so the salad does not become overly soft during the journey.
Keep the cilantro, pepitas, avocado, and tortilla chips in separate containers. At the gathering, toss the salad with enough dressing to coat it lightly, transfer it to a shallow bowl, and add the crunchy and fresh garnishes just before serving.
22. Tabbouleh-Inspired Brussels Sprouts Salad with Pomegranate & Pistachios
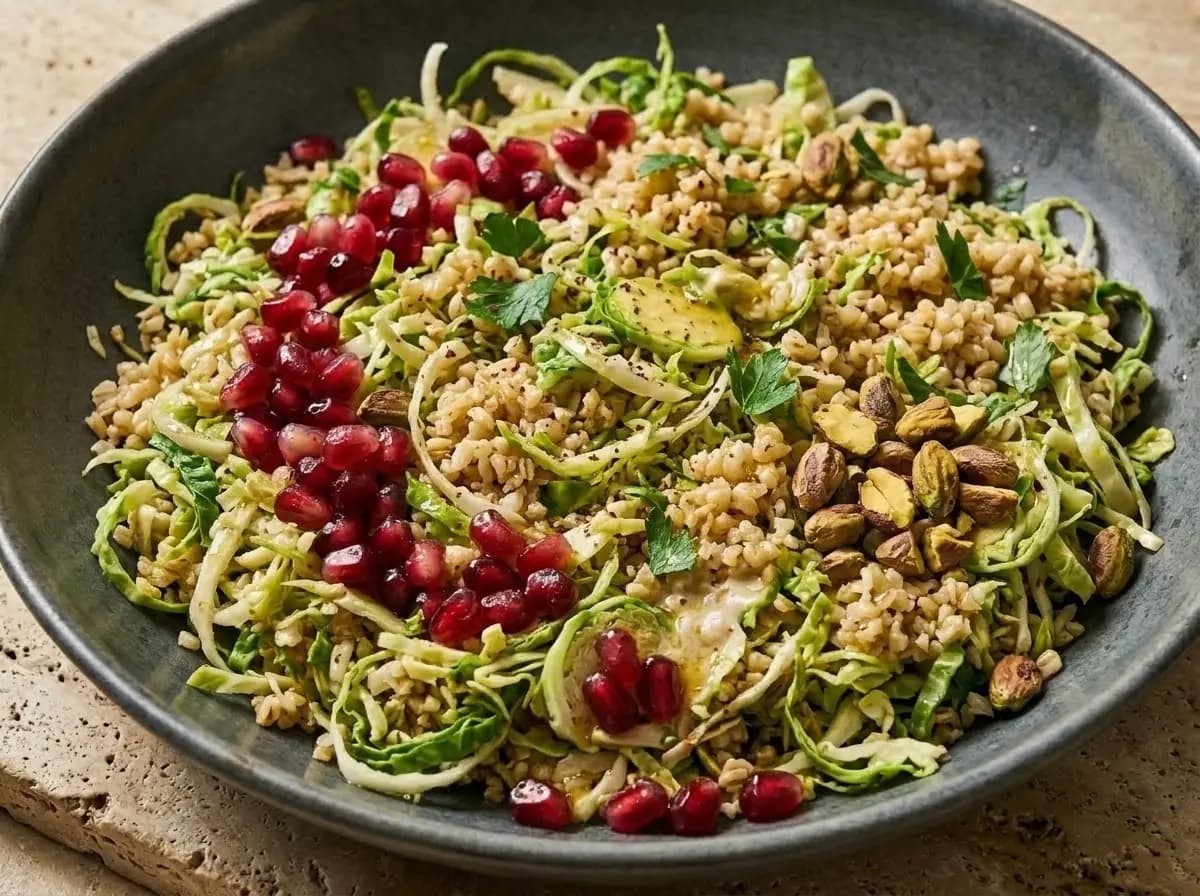
Shaved Brussels sprouts give this salad a crisp, wintry backbone, while the tabbouleh-inspired flavors keep it tasting bright and fresh rather than heavy. You get tender grains folded through the shredded sprouts, plenty of herbs, bursts of juicy pomegranate, and toasted pistachios that add a rich, nutty crunch in every forkful.
Lemon and olive oil bring the sharp, clean flavor you expect from a tabbouleh-style salad, while a little sumac or black pepper adds extra lift. The Brussels sprouts make the texture heartier than classic tabbouleh, but the overall effect still feels lively and refreshing. It is the kind of make-ahead side that looks colorful on a potluck table and holds up far better than a delicate leafy salad.
Serving Temperature
You can serve this salad chilled or at cool room temperature. It tastes especially good after sitting for a short while, since the grains and shaved sprouts absorb more of the lemony dressing without losing their texture.
If it has been refrigerated, let it stand for about 15 to 20 minutes before serving. That helps the olive oil loosen and makes the herbs, pomegranate, and pistachios taste more pronounced.
Make Ahead Window & Storage
You can prepare most of the salad up to 24 hours in advance. Cook the grains, shave the Brussels sprouts, and whisk together the dressing ahead of time, then store everything in separate airtight containers in the refrigerator.
Combine the grains and Brussels sprouts several hours before serving so they have time to absorb the dressing. Keep the pomegranate seeds, pistachios, and some of the fresh herbs separate until the end so they stay bright, crisp, and visually fresh.
Once assembled, the salad keeps well in the refrigerator for approximately two to three days. Before serving again, give it a gentle toss and refresh it with a squeeze of lemon or a drizzle of olive oil if it looks a little dry.
Potluck Portability and Transportation
Transfer the salad to a tightly sealed container and carry it in an insulated bag with ice packs. Because the base is sturdy and not lettuce dependent, it travels especially well and does not wilt quickly during the journey.
Pack the pomegranate seeds, pistachios, and any reserved herbs separately if possible. At the gathering, toss the salad gently, then scatter the toppings over the surface just before serving so the final texture still feels fresh and crunchy.
23. Hearty Italian Farro Salad with Feta and Red Wine Vinaigrette
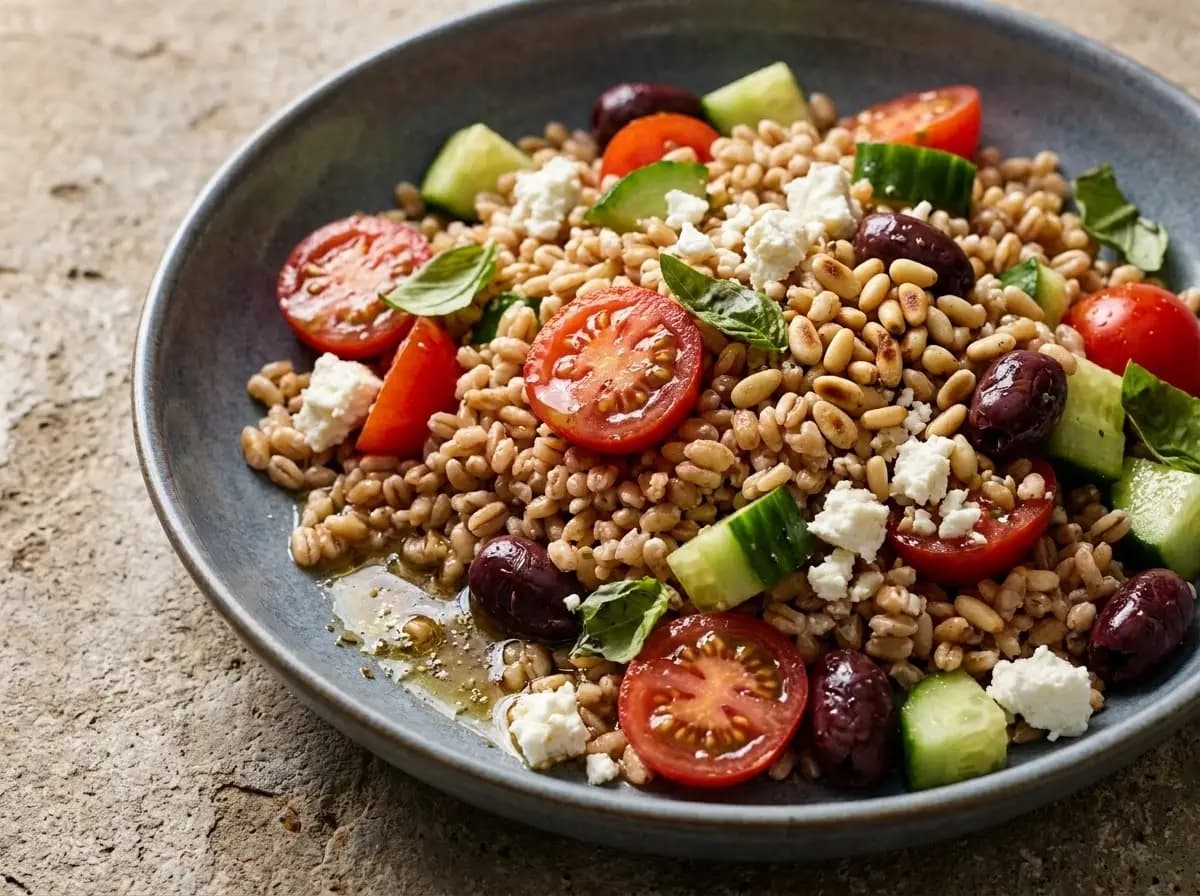
Chewy farro gives this salad a satisfying, substantial base while still leaving plenty of room for fresh Mediterranean-style flavors. You get juicy tomatoes, crisp cucumber, briny olives, creamy feta, and fragrant basil folded through the grains, creating a balanced mix of tenderness, crunch, and freshness in every spoonful.
A red wine vinaigrette brings everything together with fruity acidity, garlic, oregano, and extra-virgin olive oil. The farro absorbs just enough dressing to become deeply seasoned without turning soft, while toasted pine nuts add a buttery crunch that makes the salad feel especially generous. It is colorful, filling, and sturdy enough to hold its texture throughout a potluck or summer gathering.
Serving Temperature
You can serve this farro salad chilled or at cool room temperature. It tastes best after resting outside the refrigerator for about 15 to 20 minutes, which allows the olive oil to loosen and makes the tomatoes, basil, feta, and vinaigrette taste more expressive.
Avoid serving it hot, since warm grains can soften the cucumber, wilt the basil, and cause the feta to lose its distinct crumbly texture.
Make Ahead Window & Storage
You can cook the farro and prepare the red wine vinaigrette up to 24 hours in advance. Toss the farro with part of the dressing while it is still slightly warm so the grains absorb the garlic, herbs, and acidity more evenly, then cool it completely before refrigerating.
Store the dressed farro, chopped vegetables, feta, basil, and toasted pine nuts in separate airtight containers. Combine the farro with the tomatoes, cucumber, and olives several hours before serving, but reserve the feta, basil, and pine nuts for the final toss.
Once assembled, the salad keeps well in the refrigerator for approximately three days. The tomatoes and cucumber will gradually release moisture, so stir it gently before serving and add a small spoonful of reserved vinaigrette only if the grains appear dry.
Potluck Portability and Transportation
Transfer the farro and vegetable mixture to a tightly sealed container and carry it in an insulated bag with ice packs. Pack the feta, basil, pine nuts, and any reserved vinaigrette separately so the garnishes remain fresh and the nuts retain their crunch.
At the gathering, let the salad lose some of its refrigerator chill, then toss it gently and taste before adding more dressing or salt. Finish with the reserved feta, basil, toasted pine nuts, and freshly ground black pepper just before serving.
24. Summer Ricotta with Grilled Vegetables and Basil Oil
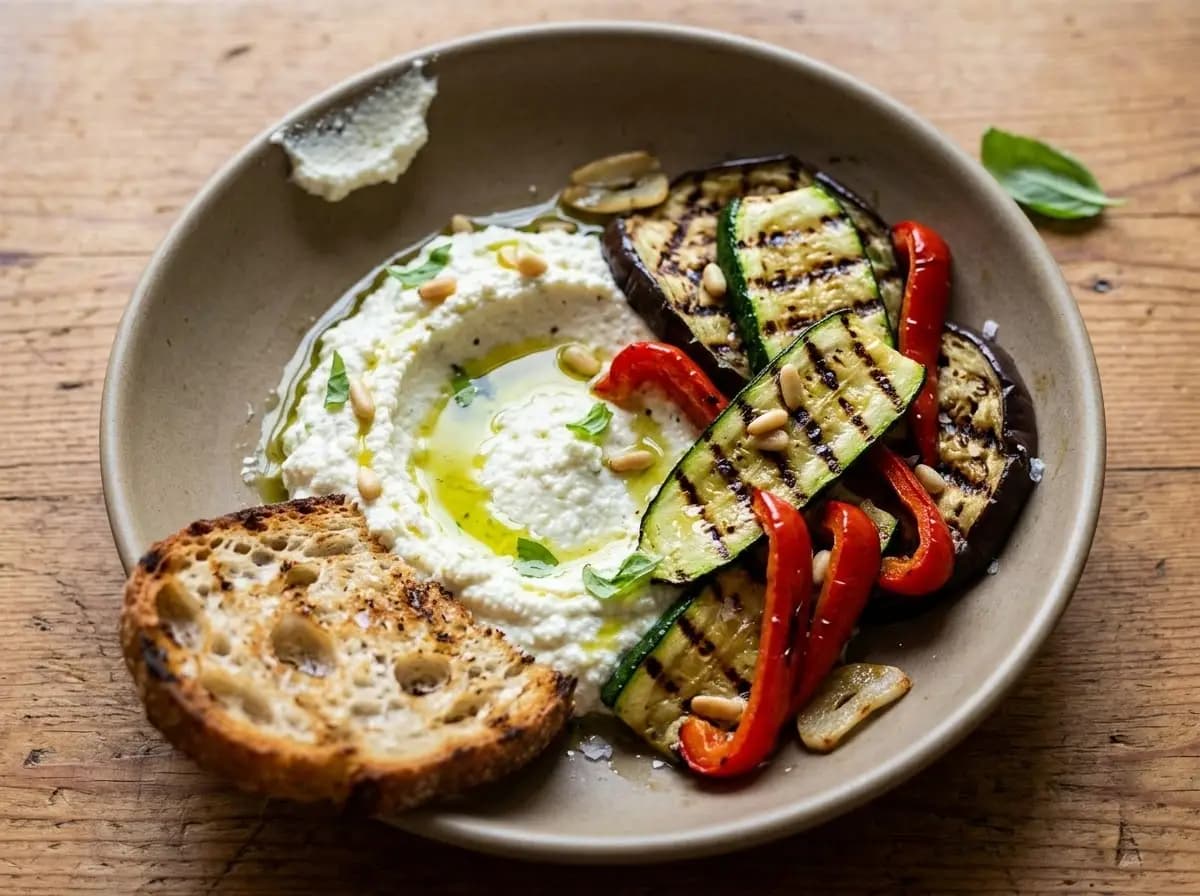
Soft, milky ricotta creates a cool and creamy base for vegetables that have picked up smoky edges from the grill. You can drag each slice of eggplant, zucchini, and sweet red pepper through the ricotta, catching a little basil oil and toasted pine nut along the way.
The basil oil gives the platter its fresh summer character, bringing an herbal lift to the richer cheese and caramelized vegetables. Lemon, flaky salt, and black pepper sharpen the flavors, while grilled bread adds a crisp, rustic element that turns the dish into an easy scoop-and-share potluck platter.
Serving Temperature
You can serve the grilled vegetables warm or at room temperature, with the ricotta cool rather than refrigerator-cold. Let the ricotta stand for about 15 minutes before serving so it softens slightly and becomes easier to scoop.
Avoid placing vegetables directly from the grill onto the ricotta. Let them cool briefly first so their heat does not make the cheese watery or cause the basil oil to lose its fresh flavor.
Alternate Ways to Serve
You can spread the ricotta onto toasted crostini and top each piece with a strip of grilled vegetable, basil oil, and pine nuts for individual potluck bites. For a more casual setup, serve the ricotta, vegetables, and bread in separate dishes and let guests assemble their own portions.
Make Ahead Window & Storage
You can grill the vegetables and prepare the ricotta up to 24 hours in advance. Let the vegetables cool completely, then refrigerate them in an airtight container. Store the ricotta and basil oil separately so the platter remains clean and fresh when assembled.
Prepare the basil oil several hours ahead and refrigerate it in a tightly sealed jar. Bring it closer to room temperature before serving, then stir it well because the olive oil may thicken slightly when chilled.
The assembled dish is best enjoyed the day it is served. Leftover vegetables and ricotta can be refrigerated separately for up to three days, while the toasted bread should remain at room temperature in an airtight container.
Potluck Portability and Transportation
Carry the ricotta in a chilled, leakproof container and pack the grilled vegetables separately in a wide container so they keep their shape. Place both in an insulated bag with ice packs during transportation.
Transport the basil oil, pine nuts, herbs, and grilled bread separately. At the gathering, spread the ricotta across a shallow platter, arrange the vegetables beside or partly over it, and finish with basil oil, toasted pine nuts, flaky salt, and fresh basil just before serving.
25. Cheesy Zucchini Casserole with Panko Topping
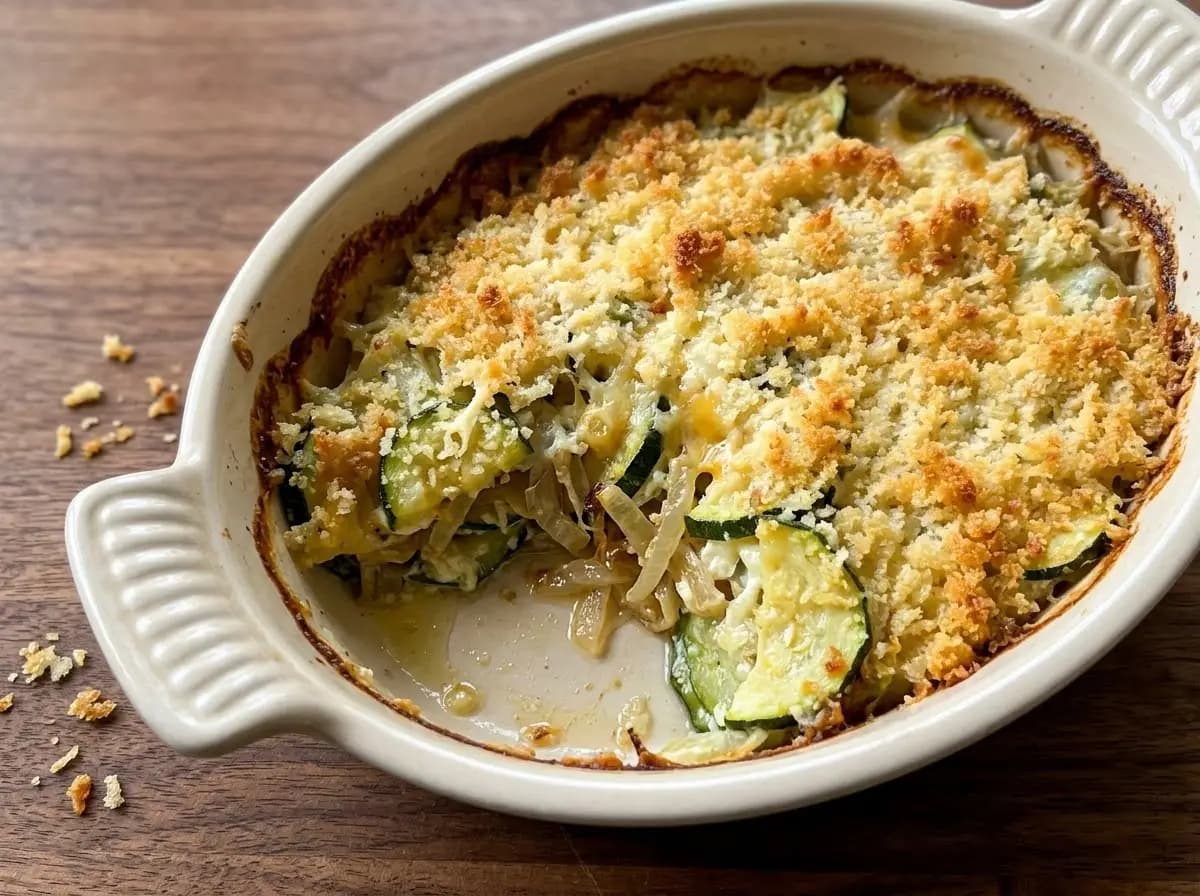
Soft, tender zucchini becomes far more comforting when it is baked in a creamy cheese sauce and finished with a crisp golden panko topping. You get delicate slices of zucchini layered with sweet sautéed onions, plenty of melty cheese, and a buttery crumb crust that adds the contrast a softer vegetable casserole really needs.
The zucchini stays mild and silky, while the cheese brings richness and the panko keeps each spoonful from feeling too heavy. It is the kind of side dish that feels cozy and familiar, yet still works beautifully for a potluck because it can be made ahead, reheated well, and served straight from the baking dish without needing much extra effort.
Serving Temperature
You should serve this casserole warm. It tastes best after resting for about 10 to 15 minutes out of the oven, which gives the cheesy filling time to set slightly while keeping the top crisp and golden.
Avoid serving it piping hot straight from the oven, since the interior will be very loose and the melted cheese can feel overly heavy before it settles. If it has been refrigerated, reheat it uncovered so the panko topping stays crisp rather than softening.
Alternate Ways to Serve
You can bake the mixture in one larger casserole dish for family-style serving, or divide it into smaller ramekins if you want neat individual portions for a dinner party or buffet. The same mixture also works well as a gratin-style side when baked in a shallower dish for more surface area and a slightly crisper topping.
Make Ahead Window & Storage
You can assemble the casserole up to 24 hours in advance. Sauté the onions, prepare the zucchini mixture, layer everything into the baking dish, and keep the panko topping separate until closer to baking if you want the crispest finish.
Refrigerate the assembled casserole tightly covered, then add the panko just before it goes into the oven. If you bake it ahead, let it cool completely before covering and refrigerating. It keeps well for approximately three days.
Reheat leftovers uncovered in a moderate oven until warmed through. If the top needs reviving, add a small extra sprinkle of panko and Parmesan before reheating so the casserole regains some crunch.
Potluck Portability and Transportation
This is an especially practical potluck dish because it can travel directly in the baking dish. Let it cool just slightly after baking, then cover it securely and carry it in an insulated casserole carrier or wrap the dish in towels to help retain warmth during transport.
If you plan to reheat it at the gathering, transport it chilled and bake it uncovered once you arrive. A short uncovered reheat helps the panko topping stay crisp and keeps the zucchini from turning overly soft.
26. Slow-Cooker Garlic-Herb Mushrooms with Parmesan-Style Gremolata
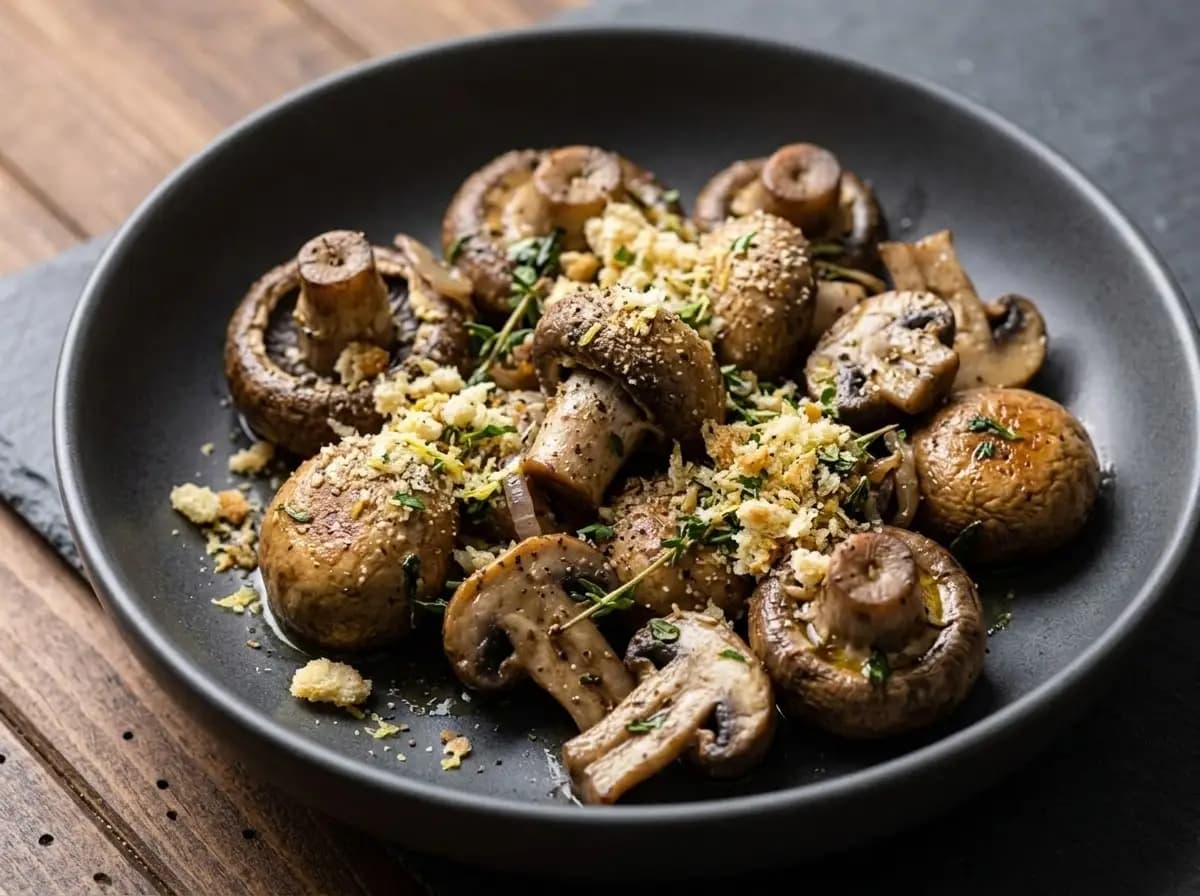
A slow cooker turns a generous batch of mushrooms into a deeply savory side with very little hands-on work. As they cook, the mushrooms release their natural juices and absorb plenty of garlic, olive oil, herbs, and black pepper, giving you tender centers, concentrated flavor, and a glossy finish that feels far richer than the simple preparation suggests.
The Parmesan-style gremolata keeps the dish from becoming too soft or one-note. Crisp golden crumbs, lemon zest, parsley, and a salty Parmesan-style element add freshness and crunch over the warm mushrooms. You get an earthy, garlicky base with a bright citrus lift, making this a sturdy make-ahead side that can stay warm throughout a potluck without requiring last-minute cooking.
Serving Temperature
You should serve these mushrooms warm. They taste best when the cooking juices are still glossy and aromatic, while the gremolata remains dry and crisp over the top.
You can keep them warm in the slow cooker on the lowest setting during serving. Add the gremolata only after transferring the mushrooms to the serving bowl, or scatter it over individual portions, since prolonged heat and steam will soften the crumb topping.
Make Ahead Window & Storage
You can clean the mushrooms, prepare the garlic-herb mixture, and assemble the gremolata up to 24 hours in advance. Refrigerate the mushrooms and herb mixture separately, and keep the gremolata in a tightly sealed container so the crumbs stay crisp.
The mushrooms can also be fully cooked one day ahead. Let them cool, transfer them with their cooking juices to an airtight container, and refrigerate them. Store the Parmesan-style gremolata separately and add it only after reheating.
Cooked mushrooms keep well in the refrigerator for approximately three to four days. Reheat them gently in the slow cooker or in a covered saucepan, stirring occasionally. If the sauce becomes too thin, leave the lid slightly open for part of the reheating time so some of the liquid can reduce.
Potluck Portability and Transportation
Transport the mushrooms in the covered slow-cooker insert when practical, or transfer them to a tightly sealed heat-safe container. Keep them warm in an insulated carrier for a short journey, or transport them chilled and reheat them fully at the gathering.
Carry the gremolata in a separate dry container. Before serving, stir the mushrooms gently, spoon them into a shallow bowl with a small amount of their garlicky cooking juices, and finish generously with the crisp topping, fresh herbs, and a little additional lemon zest.
27. Skewered Brussels Sprouts with Bacon
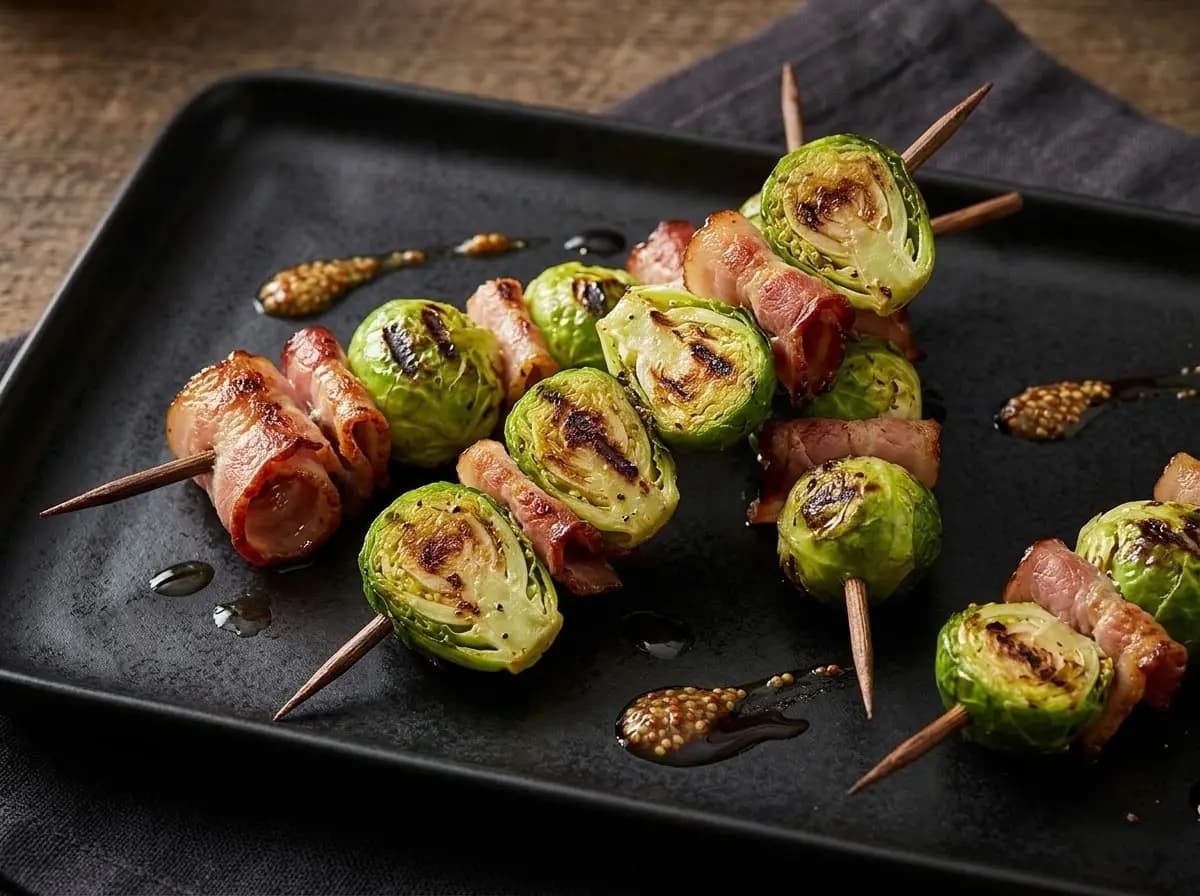
Smoky bacon and charred Brussels sprouts make a surprisingly good pair when they are threaded onto skewers and cooked until the edges turn deeply caramelized. You get tender sprouts with crisp outer leaves, salty bites of bacon, and just enough char to bring out the natural sweetness of the vegetable.
The skewer format makes this side feel playful and easy to serve, while a light glaze or finishing drizzle can add a little sharpness to balance the richness. Each bite gives you a mix of savory, crisp, juicy, and lightly sweet flavors, making this an especially appealing option when you want a vegetable dish that still feels hearty and crowd-pleasing.
Serving Temperature
You should serve these skewers warm or at room temperature. They taste best while the bacon is still slightly crisp and the Brussels sprouts are tender with browned edges.
Avoid serving them straight from the refrigerator, since chilled bacon firms up and the sprouts lose some of their freshly roasted appeal. If they have cooled completely, warm them briefly before serving.
Alternate Ways to Serve
You can remove the Brussels sprouts and bacon from the skewers and arrange them on a platter for easier buffet-style serving. They also work well as bite-size party picks when you use shorter skewers or sturdy toothpicks for smaller individual portions.
Make Ahead Window & Storage
You can trim and blanch the Brussels sprouts, partially cook the bacon, and assemble the skewers up to 24 hours in advance. Store the prepared skewers tightly covered in the refrigerator until you are ready to roast or grill them.
Once cooked, the skewers can be refrigerated for up to three days. Reheat them in a hot oven or air fryer so the bacon regains some crispness and the sprouts warm through without becoming soggy.
If you are using a glaze or finishing drizzle, keep it separate until closer to serving so the bacon stays as crisp as possible.
Potluck Portability and Transportation
Arrange the cooked skewers in a shallow, tightly sealed container and transport them in an insulated carrier if you want to keep them warm. Avoid stacking them too tightly, since that can soften the bacon and crush the more delicate outer leaves.
Carry any glaze, mustard drizzle, or fresh herb garnish separately. At the gathering, rewarm the skewers if possible, then finish them just before serving so they still look glossy and freshly cooked.
28. Creamy English Pea Salad with Bacon & Cheddar
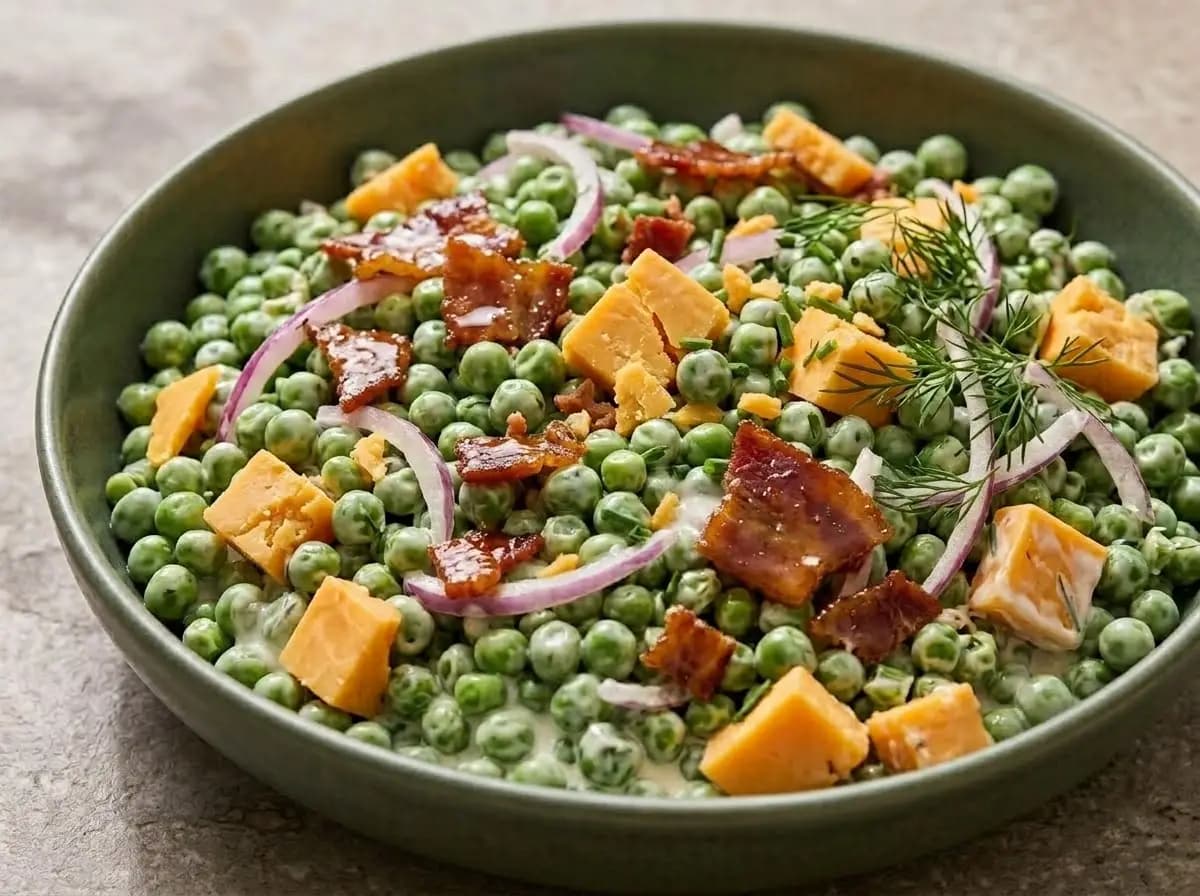
Sweet peas, sharp cheddar, and crisp bacon come together in a salad that feels nostalgic but still fresh enough for a modern potluck spread. You get little bursts of sweetness from the peas, salty crunch from the bacon, and rich bites of cheddar throughout, all held together by a creamy dressing that coats everything without turning the salad heavy.
Thin slices of red onion bring a mild sharpness that keeps the richer ingredients in balance, while fresh dill or chives add a bright finish. The result is cool, savory, a little tangy, and pleasantly creamy, making it the kind of side dish that is easy to prepare ahead and easy for guests to keep going back to for another spoonful.
Serving Temperature
You should serve this pea salad chilled or cool from the refrigerator. It tastes best when the dressing is cold and creamy, the peas stay firm, and the bacon and cheddar remain clearly distinct in the salad.
Let it sit out for about 10 to 15 minutes before serving if it has been very cold, but avoid leaving it in warm conditions for too long since the creamy dressing can soften and loosen.
Make Ahead Window & Storage
You can prepare this salad up to 24 hours in advance. Cook and crumble the bacon, cube or shred the cheddar, slice the onion, and mix the dressing ahead of time, then fold everything together once the bacon has cooled.
For the best texture, reserve a small portion of the bacon, cheddar, and fresh herbs to add just before serving. Store the finished salad in an airtight container in the refrigerator, where it keeps well for approximately two to three days.
Give it a gentle stir before serving in case the dressing has settled at the bottom. If needed, you can freshen it with a small spoonful of extra dressing or a tiny splash of lemon juice or vinegar.
Potluck Portability and Transportation
Transfer the salad to a tightly sealed container and carry it in an insulated bag with ice packs. Because it is a chilled, creamy salad, it is best kept cool until shortly before serving.
Pack any reserved bacon, cheddar, herbs, or onion separately if you want the top to look extra fresh. At the gathering, stir the salad gently, spoon it into a shallow serving bowl, and finish with the reserved toppings just before placing it on the table.
29. Slow-Cooked Boston Baked Beans (with Bacon)
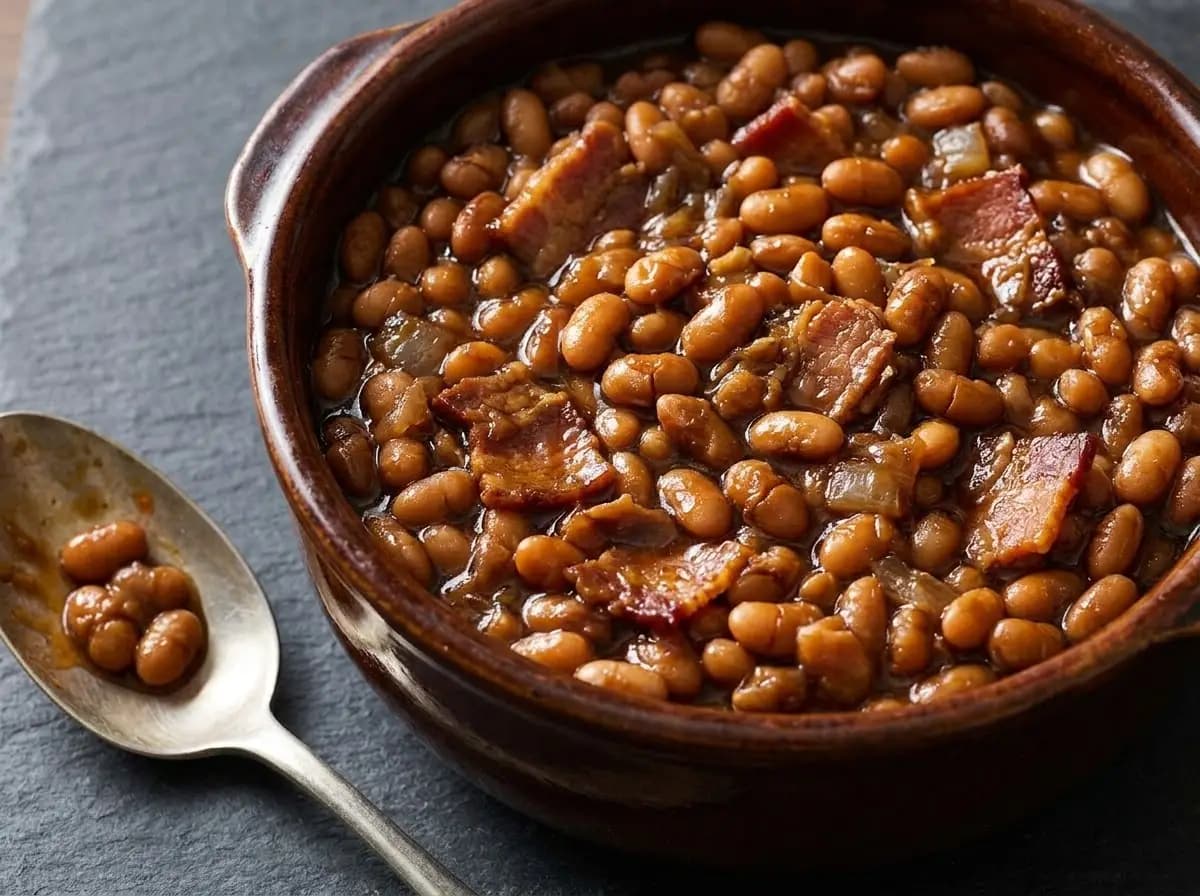
A long, gentle cook transforms simple beans into a glossy, deeply seasoned side with smoky bacon tucked into every serving. You get tender navy beans surrounded by a thick molasses-rich sauce, with softened onion and savory pieces of bacon bringing warmth and depth to the sweeter elements.
Mustard and a little acidity keep the sauce from tasting sugary, while the bacon adds enough salt and smoke to balance the molasses and brown sugar. The beans become creamy inside without losing their shape, giving you a substantial, old-fashioned potluck favorite that feels especially welcome beside grilled and barbecue-style dishes.
Serving Temperature
You should serve these baked beans warm. The sauce tastes richest when it is gently heated and thick enough to cling to the beans, while the bacon remains tender and savory throughout the bowl.
Keep them warm in a slow cooker on the lowest setting during serving, stirring occasionally around the edges. If the sauce becomes too thick, loosen it with a small splash of hot water or broth rather than adding more sweetener.
Make Ahead Window & Storage
You can prepare the baked beans one to two days in advance. Their flavor often becomes even more developed after resting, as the beans continue absorbing the molasses, mustard, onion, and smoky bacon seasoning.
Let the beans cool before transferring them to an airtight container and refrigerating them. They keep well for approximately three to four days. Reheat them slowly on the stovetop, in the oven, or in a slow cooker, stirring occasionally so the thick sauce does not catch at the bottom.
If the chilled sauce has become very firm, add liquid gradually during reheating. The beans should remain thick and spoonable rather than watery or soupy.
Potluck Portability and Transportation
Transport the beans in the covered slow-cooker insert when practical, or use a tightly sealed heat-safe container. For a short journey, place the container in an insulated carrier to help retain warmth.
At the gathering, transfer the beans to a slow cooker and heat them fully before switching to the warm setting. Stir gently before serving and make sure the bacon and onions are distributed evenly rather than settled at the bottom.
30. Ensaladilla Rusa (Spanish Shrimp & Potato Salad)
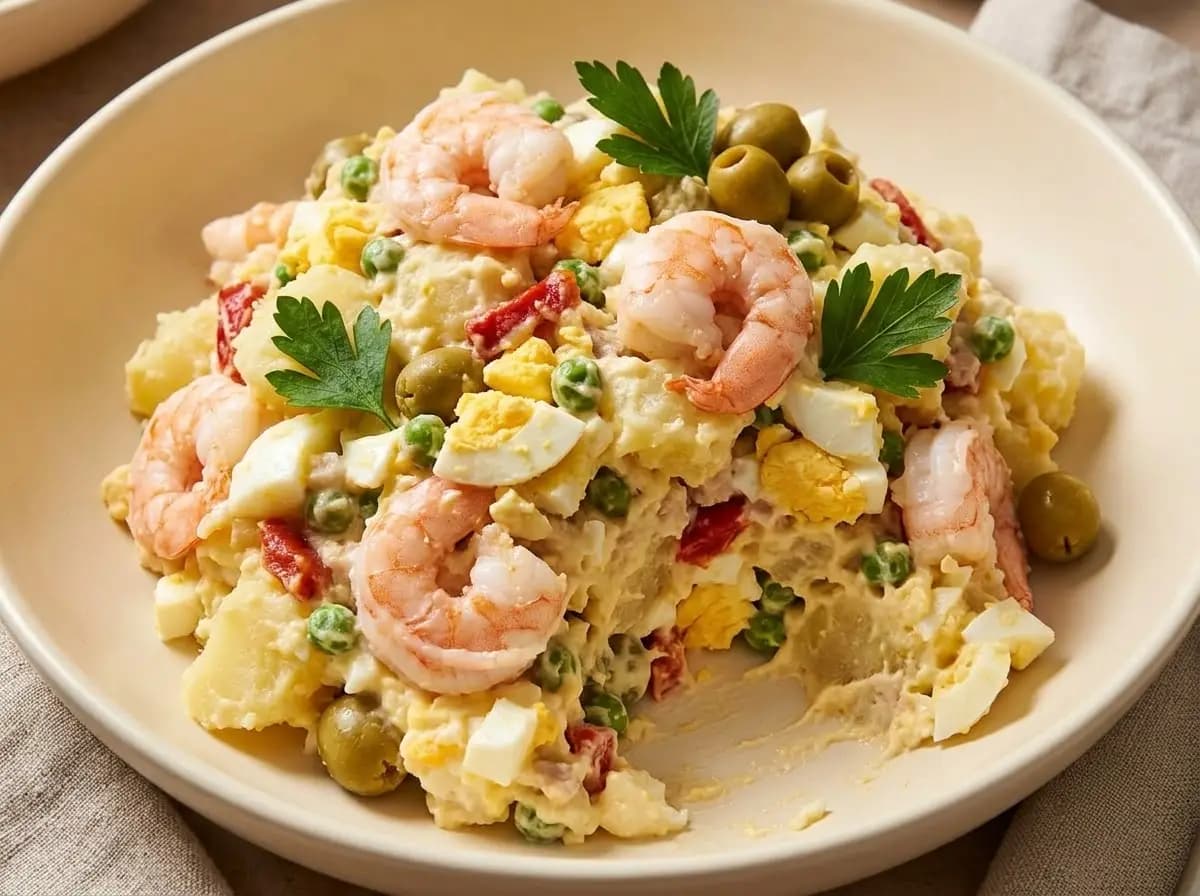
Creamy, comforting, and just a little elegant, ensaladilla rusa gives you everything people love about a classic potato salad, but with a more distinctive Spanish feel. Tender potatoes are folded with peas, chopped egg, briny olives, and a silky mayonnaise-based dressing, then finished with shrimp for a cool, savory topping that makes the whole dish feel a bit more special.
You get soft potatoes, sweet peas, creamy dressing, and little pops of salt from the olives in every bite, while the shrimp adds a delicate seafood note that keeps the salad from feeling too plain. It is rich without being heavy, beautifully make-ahead, and exactly the kind of chilled side that feels right at home on a warm-weather table or a tapas-style spread.
Serving Temperature
You should serve ensaladilla rusa chilled or cool from the refrigerator. It tastes best when the salad is fully cold but not icy, so the potatoes stay tender and the dressing remains creamy and smooth.
If it has been refrigerated for several hours, you can let it sit out for about 10 minutes before serving. That slight rest helps the flavor come through more clearly without making the mayonnaise soften too much.
Alternate Ways to Serve
You can present it as one larger salad in a serving bowl, or shape it into a neat mound and garnish it with shrimp, egg, olives, and parsley for a more polished tapas-style look. It also works very well spooned onto toasted bread or small crackers for individual appetizer portions.
Make Ahead Window & Storage
You can prepare the salad up to 24 hours in advance. Cook the potatoes, peas, eggs, and shrimp ahead of time, let everything cool completely, then combine the salad and refrigerate it in an airtight container.
For the freshest presentation, keep a few shrimp, some chopped egg, olives, and parsley separate until shortly before serving. That way, the garnish still looks clean and the top of the salad feels freshly finished rather than fully mixed in.
The salad keeps well in the refrigerator for approximately two days. Stir it gently before serving if the dressing has settled, and add a small spoonful of mayonnaise only if it seems a little dry after chilling.
Potluck Portability and Transportation
Transfer the salad to a tightly sealed container and carry it in an insulated bag with ice packs. Because it is mayonnaise-based and served chilled, it is important to keep it cool throughout transport and while waiting to serve.
If you want a neater finish, transport the garnish separately and add the shrimp, olives, egg, and parsley once you arrive. Keep the salad shaded and chilled as much as possible, especially during warm outdoor gatherings.
31. Slow Cooker BBQ Chicken (Pull-Apart)
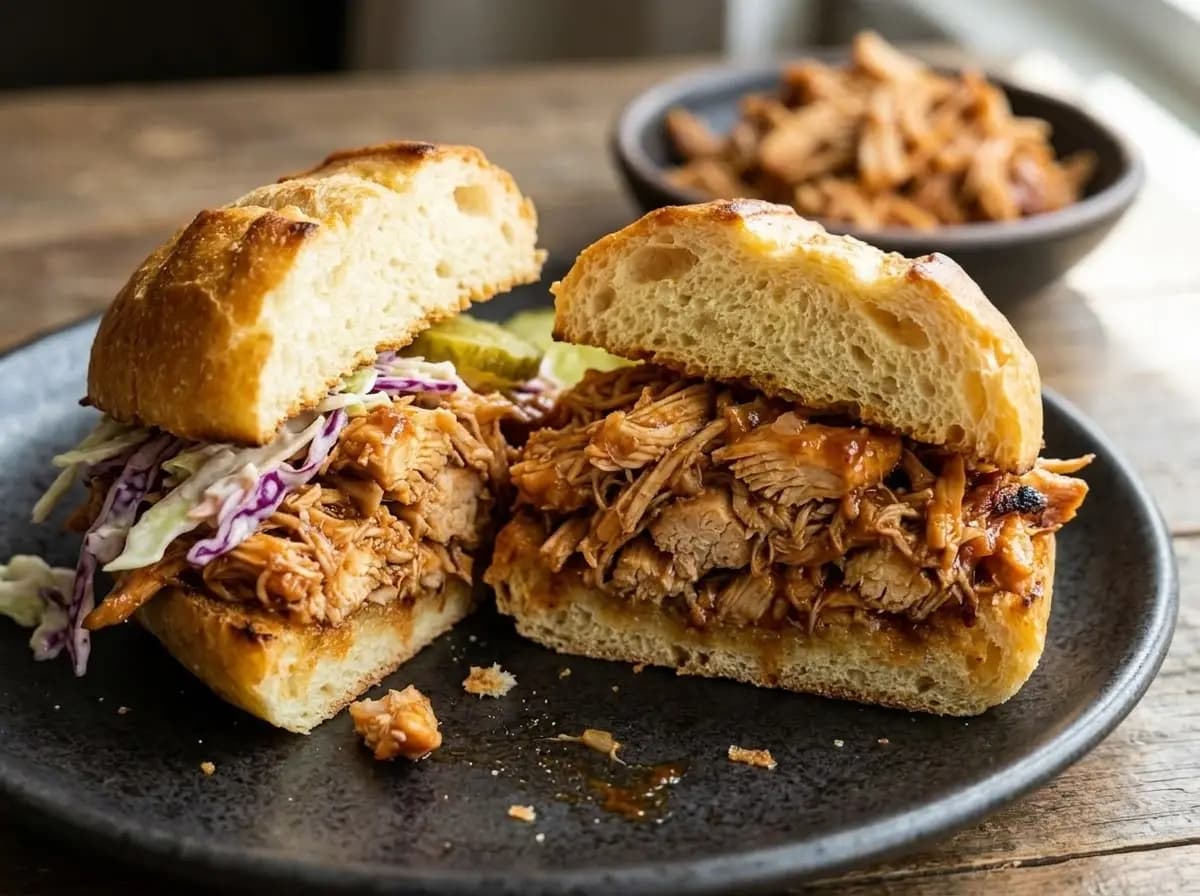
Fork-tender chicken becomes wonderfully juicy and deeply seasoned after a slow simmer in a smoky barbecue sauce. You can pull the meat apart with very little effort, leaving soft shreds that soak up the sweet, tangy sauce while still keeping enough texture to feel substantial in every serving.
A little vinegar and mustard sharpen the richer barbecue flavors, while garlic, onion, and smoked spices give the chicken a savory backbone. Pile it generously onto toasted rolls with crisp coleslaw and pickles, and you get a satisfying mix of saucy chicken, buttery bread, cool crunch, and bright acidity that works especially well for relaxed potlucks and larger gatherings.
Serving Temperature
You should serve the pulled BBQ chicken warm. It tastes best when the sauce is loose enough to coat the meat and the chicken remains tender and juicy rather than sitting in a dry pile.
Keep it on the slow cooker's warm setting during serving, stirring occasionally so the sauce and chicken stay evenly distributed. Toast the rolls separately and add chilled toppings only when guests are ready to assemble their portions.
Alternate Ways to Serve
You can serve the chicken as full-size sandwiches, smaller sliders, or spoon it into soft rolls and wraps. It also works well over baked potatoes, rice, creamy polenta, or a simple grain bowl when you want an option that does not rely on bread.
For an easy potluck setup, place the warm chicken in the slow cooker and arrange the buns, coleslaw, pickles, and extra barbecue sauce beside it so guests can build their own sandwiches.
Make Ahead Window & Storage
You can prepare the BBQ chicken up to two days in advance. Cook and shred the chicken, return it to the sauce, and allow it to cool before transferring it to an airtight container in the refrigerator.
Store the buns, coleslaw, pickles, and other toppings separately. Keeping them away from the sauced chicken prevents the bread from becoming soggy and helps the slaw remain crisp.
The cooked chicken keeps well in the refrigerator for approximately three to four days. Reheat it gently in the slow cooker or in a covered saucepan, adding a small splash of water, broth, or barbecue sauce only if the mixture has thickened during storage.
Potluck Portability and Transportation
Transport the chicken in the covered slow-cooker insert when practical, or transfer it to a tightly sealed heat-safe container and place it in an insulated carrier. Keep the chicken warm during a short journey, or transport it chilled and reheat it thoroughly at the gathering.
Pack the rolls in a separate bag and carry the coleslaw, pickles, and other chilled toppings in an insulated container with ice packs. Once you arrive, stir the chicken gently, adjust the sauce if needed, and switch the slow cooker to its warm setting for serving.
32. Miso-Scallion Corn Spoonbread

Somewhere between cornbread and a savory corn pudding, this spoonbread gives you a softly set center beneath a deeply golden surface. Sweet corn kernels run through the tender cornmeal base, while white miso adds a quiet savory depth that makes the natural sweetness of the corn taste fuller rather than noticeably salty.
Scallions bring freshness to the rich, custardy mixture, and a light scattering of sesame seeds adds gentle crunch across the top. You can serve it directly from the skillet, scooping through the browned crust into the warm, creamy interior for a comforting potluck side that feels familiar but has a more interesting savory finish.
Serving Temperature
You should serve this spoonbread warm. It tastes best after resting for about 10 to 15 minutes out of the oven, which gives the center time to settle while keeping it soft enough to scoop easily.
Avoid serving it straight from the refrigerator, since the cornmeal and butter will firm as they chill. Reheat it gently before serving so the middle becomes tender again without drying out the browned top.
Make Ahead Window & Storage
You can bake the spoonbread up to one day in advance. Let it cool completely, cover the baking dish tightly, and refrigerate it until you are ready to reheat and serve.
Warm it covered in a moderate oven until the center is heated through, then uncover it for the final few minutes so the surface regains some of its texture. If the spoonbread looks dry around the edges, brush the top lightly with melted butter before reheating.
Leftovers keep well in the refrigerator for approximately three days. Because the dish contains eggs and dairy, keep it chilled during storage and avoid leaving it at warm room temperature for an extended period.
Potluck Portability and Transportation
Bake and transport the spoonbread in the same covered skillet or casserole dish whenever possible. Place the warm dish in an insulated carrier for a short journey, or carry it chilled and reheat it at the gathering when oven space is available.
Bring a large serving spoon and a small container of sliced scallions and toasted sesame seeds separately. Add the fresh garnish after reheating so the top still looks bright and textured when it reaches the table.
33. Fried Rice from Cauliflower (Low-Carb)
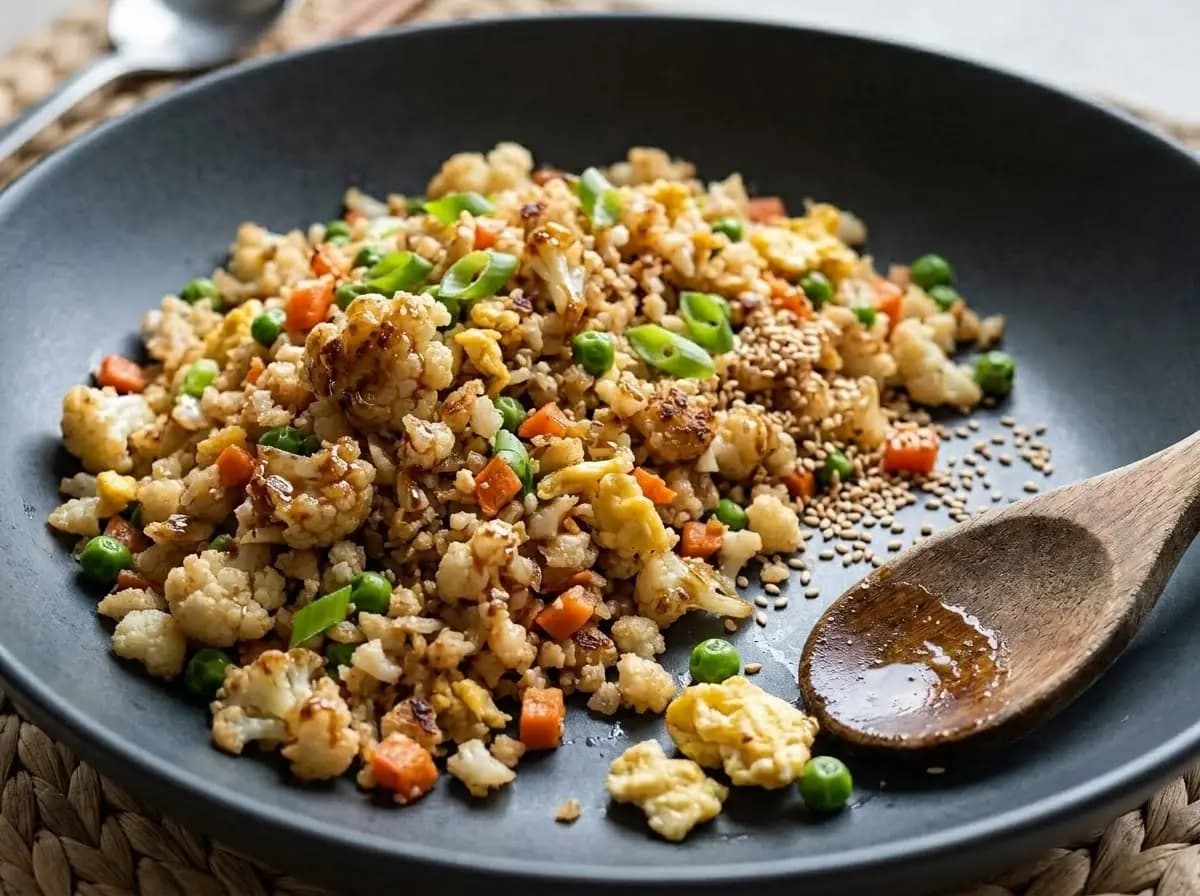
Light in texture but still deeply satisfying, this cauliflower fried rice gives you all the savory, stir-fried comfort of the classic version while keeping the dish much lower in carbs. Finely chopped cauliflower takes the place of rice, soaking up the garlicky, sesame-scented seasoning while still staying a little tender and a little crisp.
Scrambled egg, peas, carrots, and scallions bring color and familiar fried rice flavor, while a hot skillet helps the cauliflower pick up those slightly golden, toasty bits that make the dish feel more complete. You get a side that tastes hearty without feeling heavy, and it works especially well when you want something quick, flexible, and easy to reheat.
Serving Temperature
You should serve this cauliflower fried rice warm. It tastes best shortly after cooking, when the cauliflower is tender but not watery, the egg is soft, and the vegetables still hold a little bite.
Avoid serving it piping hot straight from the pan if you want the flavors to come through more clearly. A short rest of a few minutes helps the seasoning settle, but it should still be served warm rather than chilled.
Alternate Ways to Serve
You can serve it on its own as a lighter main dish, spoon it into lettuce cups for a more playful presentation, or use it as a base for extra toppings such as grilled chicken, shrimp, tofu, or a fried egg. It also works well in meal-prep bowls when you want a lower-carb lunch option.
Make Ahead Window & Storage
You can chop the cauliflower and prep the vegetables up to 24 hours in advance. Store the riced cauliflower, peas, carrots, scallions, and any other add-ins in separate airtight containers in the refrigerator until you are ready to cook.
The cooked fried rice keeps well in the refrigerator for approximately three days. Let it cool before storing, then reheat it quickly in a hot skillet so excess moisture can cook off and the cauliflower regains some of its fried texture.
If you are making it ahead, slightly undercook the cauliflower the first time so it does not become too soft when reheated. A small splash of soy sauce or sesame oil can freshen it up before serving again.
Potluck Portability and Transportation
Transfer the cauliflower fried rice to a tightly sealed container and keep it warm in an insulated carrier if serving soon after cooking. If the gathering is farther away, transport it chilled and reheat it in a skillet or wide pan at the destination for the best texture.
Pack any extra scallions, sesame seeds, or sauce separately and add them just before serving. This keeps the top looking fresh and prevents the garnish from softening during transport.
34. Jicama and Pomelo Salad with Shrimp & Spicy Thai Dressing
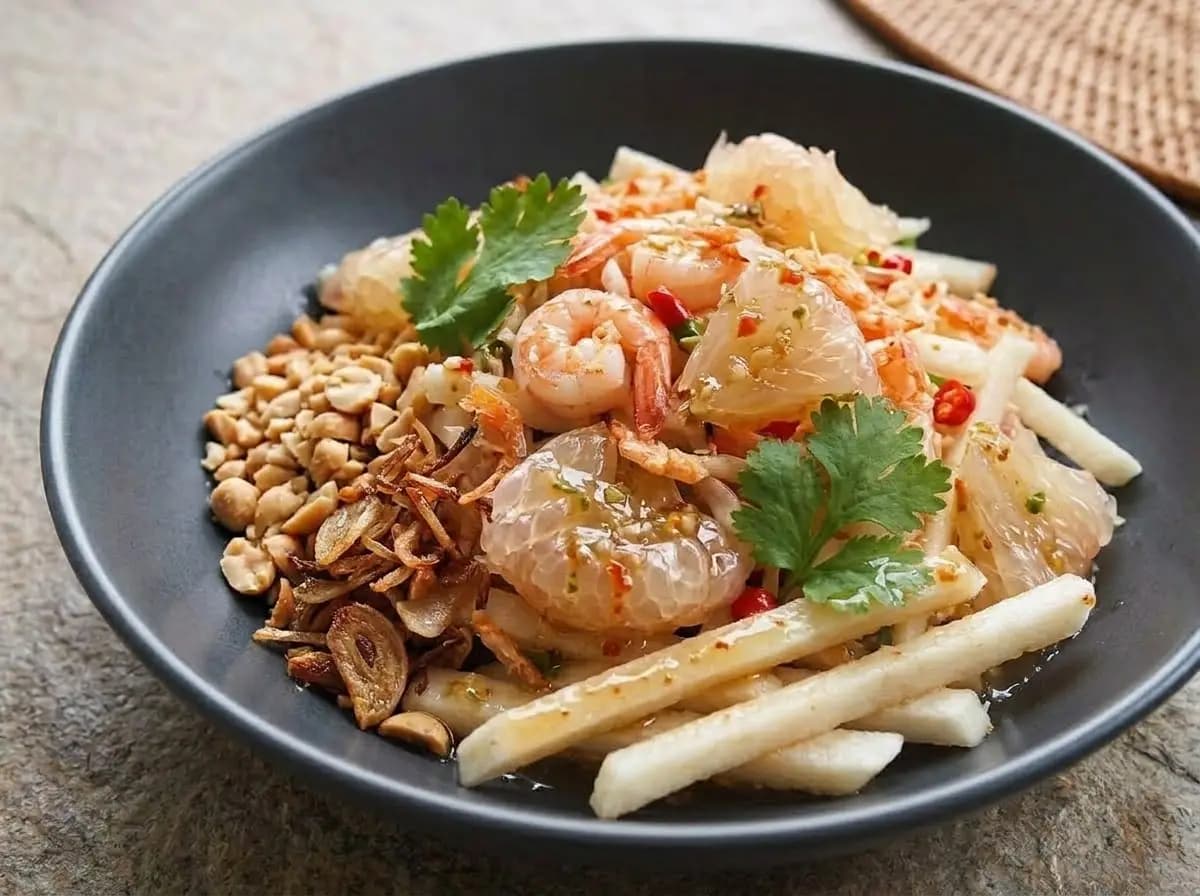
Crisp, cooling jicama gives this salad its refreshing bite, while juicy pomelo brings the kind of sweet-tart brightness that makes every forkful feel especially lively. You get a beautiful contrast of textures here: crunchy matchsticks of jicama, tender citrus segments, tender shrimp, fresh herbs, roasted peanuts, and a spicy Thai-style dressing that wakes up the whole bowl.
The dressing pulls everything together with lime, chile, and a savory-salty edge that keeps the pomelo from tasting too sweet. Fresh cilantro and crispy shallots add even more character, making the salad feel light but far from plain. It is the kind of dish that tastes clean, vibrant, and a little bold, which makes it especially appealing for warm-weather meals and potluck spreads where you want something bright on the table.
Serving Temperature
You should serve this salad chilled or cool from the refrigerator. It tastes best when the pomelo is cold and juicy, the jicama stays very crisp, and the dressing feels sharp and refreshing against the sweeter citrus.
Avoid letting it sit too long in warm conditions, since the pomelo can start releasing more juice and the jicama may lose some of its snap. For the best texture, keep it cool until shortly before serving.
Alternate Ways to Serve
You can serve it as a composed salad on a platter, spoon it into lettuce cups for lighter individual portions, or present it as a side alongside grilled seafood, chicken, or other Southeast Asian-style dishes. It also works well as a starter salad when you want something crisp and palate-cleansing before a richer meal.
Make Ahead Window & Storage
You can prep most of the components up to 12 to 24 hours in advance. Peel and cut the jicama, segment the pomelo, chop the herbs, and mix the dressing ahead of time, then store everything separately in airtight containers in the refrigerator.
For the best result, combine the jicama and dressing closer to serving time, then fold in the pomelo gently so the segments stay intact. Keep the peanuts, crispy shallots, and herbs separate until the very end so they stay crunchy and fresh.
Once fully assembled, the salad is best eaten the same day. If it sits for a while, give it a gentle toss before serving and add a final squeeze of lime or a little extra dressing if needed.
Potluck Portability and Transportation
Pack the jicama, pomelo, and dressing in separate chilled containers and carry them in an insulated bag with ice packs. This helps the salad stay crisp and prevents excess liquid from collecting too early.
Transport the peanuts, crispy shallots, and herbs separately. At the gathering, toss the salad gently, arrange it on a shallow platter or bowl, and finish with the crunchy toppings and herbs just before serving so it still looks bright and fresh.
35. Grape Jelly and Chili Sauce Meatballs
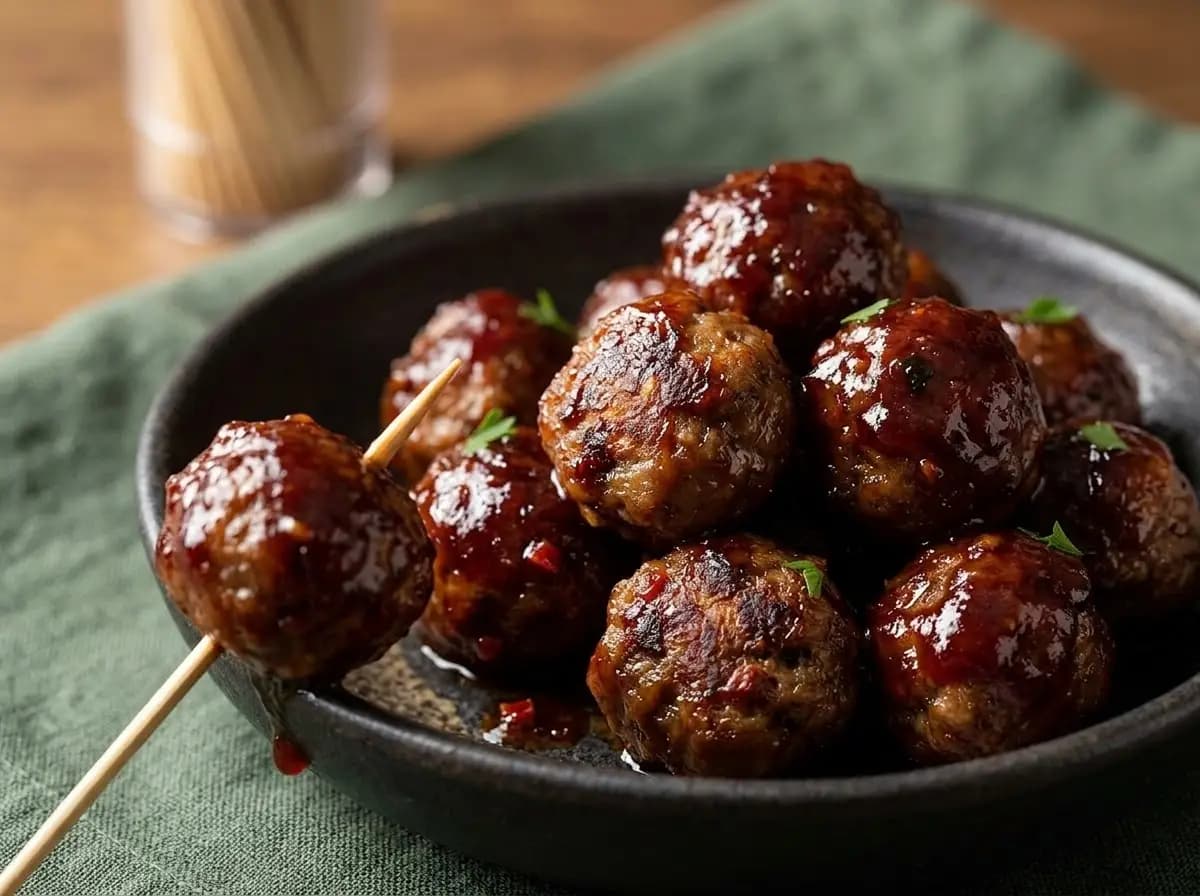
Glossy, sweet, tangy, and just a little spicy, these meatballs bring the kind of retro potluck flavor that disappears quickly once the toothpicks come out. You coat tender, browned meatballs in a simple sauce made from grape jelly and chili sauce, creating a sticky glaze that clings to every bite instead of pooling loosely at the bottom of the bowl.
The grape jelly provides fruity sweetness, while the chili sauce adds tomato, vinegar, and gentle spice to keep the glaze balanced. As the meatballs simmer, the sauce thickens around them and takes on their savory flavor, giving you a warm, easy-to-serve dish that works especially well for parties, game days, and crowded potluck tables.
Serving Temperature
You should serve these meatballs warm. The glaze tastes best when it is fluid enough to coat each meatball evenly but thick enough to stay attached when guests lift one from the serving dish.
Keep them on the slow cooker's warm setting during serving and stir gently from time to time so the sauce remains evenly distributed. Avoid letting the glaze boil for an extended period, since it can become overly thick and sticky around the edges.
Alternate Ways to Serve
You can serve the meatballs individually with cocktail picks, pile them into small slider rolls, or spoon them over rice for a more substantial serving. For the easiest potluck setup, leave them in the slow cooker with toothpicks and small plates nearby so guests can help themselves.
Make Ahead Window & Storage
You can cook the meatballs and prepare the sauce up to two days in advance. Let everything cool, then refrigerate the meatballs in their sauce inside an airtight container so they continue absorbing the sweet and tangy glaze.
Reheat them gently in a slow cooker, covered saucepan, or baking dish until warmed through. If the sauce has thickened too much in the refrigerator, add a very small splash of water before reheating rather than adding more jelly or chili sauce.
Leftovers keep well in the refrigerator for approximately three to four days. You can also freeze the cooked meatballs with the sauce for up to two months, then thaw them in the refrigerator before reheating.
Potluck Portability and Transportation
Transport the meatballs in the covered slow-cooker insert when practical, or transfer them to a tightly sealed, heat-safe container. Keep them warm in an insulated carrier during a short journey, or transport them chilled and reheat them fully at the gathering.
Once you arrive, stir the meatballs carefully and switch the slow cooker to the warm setting. Keep the serving picks separate until the dish reaches the table, and provide a small spoon so guests can add extra glaze to their portions.
36. Bacon-Wrapped Smokies (Pigs in a Blanket)

Salty, smoky, and irresistibly bite-sized, these bacon-wrapped smokies are the kind of warm party snack that disappears almost as soon as you set them out. You get juicy little sausages wrapped in crisp-edged bacon, with just enough rendered richness to make each bite feel deeply savory and satisfying.
As they cook, the bacon tightens around the smokies and turns golden in all the right places, giving you a snack that feels simple but still crowd pleasing. Whether you serve them plain or finish them with a light sweet or tangy glaze, they land somewhere between nostalgic comfort food and classic potluck finger food, which is exactly why people keep reaching for one more.
Serving Temperature
You should serve these smokies warm. They taste best when the bacon is still lightly crisp around the edges and the little sausages are hot and juicy inside.
Avoid serving them refrigerator-cold, since the bacon firms up and loses some of its best texture. If they cool down, a quick reheat in the oven helps them crisp back up much better than microwaving.
Alternate Ways to Serve
You can serve them straight from a platter with toothpicks for easy grabbing, or brush them with a sweet-spicy glaze and keep them warm in a slow cooker for a more classic party-style presentation. They also work well as part of an appetizer board with pickles, mustard, and dipping sauces on the side.
Make Ahead Window & Storage
You can assemble the bacon-wrapped smokies up to 24 hours in advance. Wrap the bacon around each smoky, secure with toothpicks if needed, and refrigerate them in a tightly covered container until you are ready to bake.
Once cooked, they keep well in the refrigerator for approximately three to four days. Reheat them in a hot oven or air fryer so the bacon regains some crispness and the sausages warm through evenly.
If you are planning to glaze them, it is best to add the glaze during the final stretch of baking or reheating. That helps the outside stay sticky and glossy instead of turning watery during storage.
Potluck Portability and Transportation
Arrange the cooked smokies in a shallow, tightly sealed container and transport them while still slightly warm, or reheat them once you arrive. They travel especially well because they are compact, sturdy, and easy to plate quickly.
For the best serving setup, transfer them to a platter or slow cooker and provide toothpicks nearby. If you are using a glaze or dipping sauce, carry it separately and add it just before serving so the bacon stays as crisp as possible.
37. Hawaiian Ham and Cheese Sliders
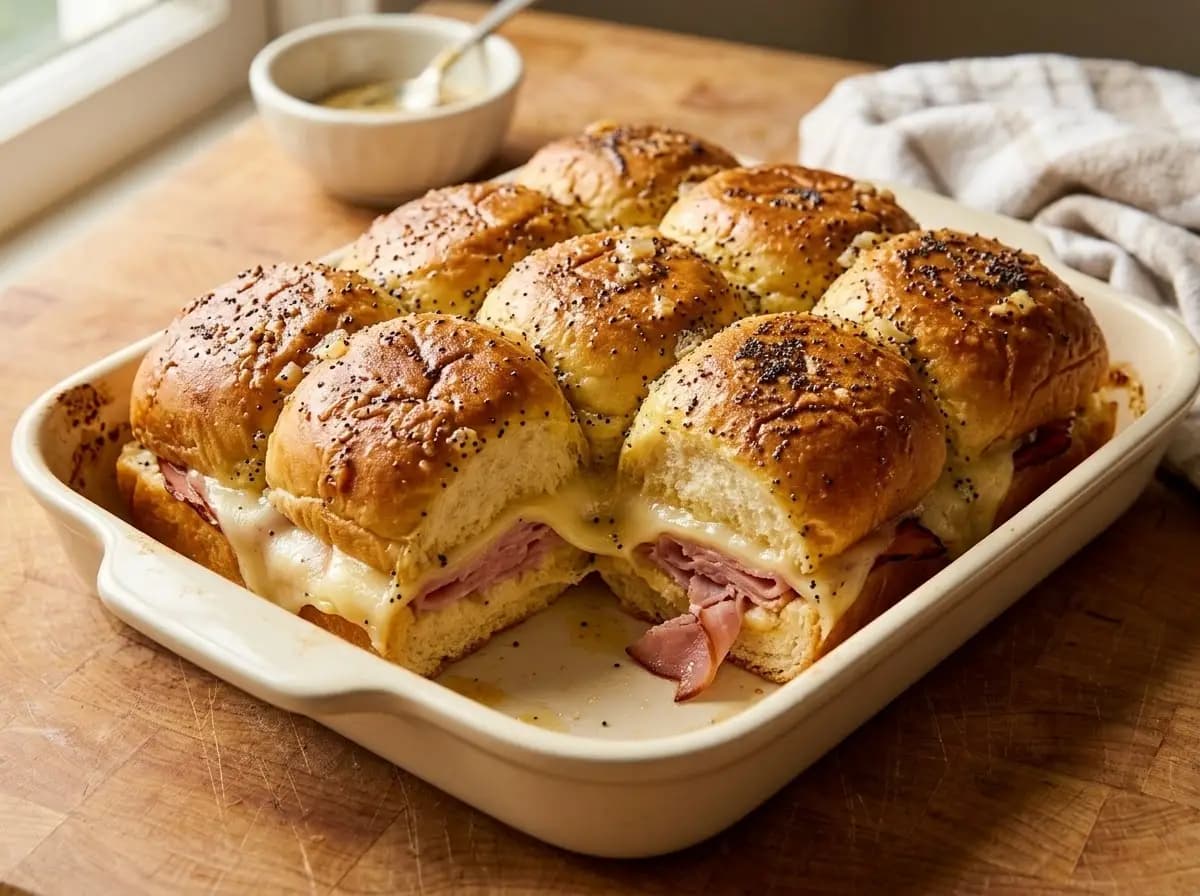
Soft, sweet rolls, savory ham, and melty cheese make these sliders the kind of baked sandwich people reach for first. You get fluffy pull-apart buns with warm layers of ham tucked inside, while the cheese melts into the rolls and creates that especially comforting, gooey middle that makes every slider feel rich and satisfying.
What really brings them together is the buttery topping brushed over the rolls before baking. It soaks into the tops, adds extra flavor, and helps the buns turn glossy and golden in the oven. The slight sweetness of the Hawaiian rolls balances the salty ham and creamy cheese beautifully, giving you an easy party dish that feels nostalgic, filling, and very easy to share.
Serving Temperature
You should serve these sliders warm. They taste best when the cheese is still melted, the tops are lightly crisp, and the rolls are soft enough to pull apart easily without losing their shape.
Let them rest for about 5 to 10 minutes after baking so the cheese settles slightly and the sliders are easier to separate. If they cool down too much, reheat them briefly in the oven rather than microwaving so the tops do not turn soft and steamy.
Alternate Ways to Serve
You can serve them as full pull-apart sliders straight from the baking dish, or separate them and arrange them on a platter for easier grabbing at a buffet. They also work well cut into smaller halves if you want more appetizer-style portions for a party spread.
Make Ahead Window & Storage
You can assemble the sliders up to 24 hours in advance. Layer the rolls with ham and cheese in the baking dish, cover tightly, and refrigerate them until you are ready to bake. The buttery topping can also be mixed ahead and spooned or brushed over the tops just before baking.
Once baked, the sliders keep well in the refrigerator for approximately two to three days. Cover the dish or transfer the leftovers to an airtight container, then reheat them uncovered in the oven so the tops stay a little crisp and the cheese melts again evenly.
If you want the freshest texture, avoid overbaking during the first round of baking. That way, the rolls stay soft and do not dry out too much when they are reheated later.
Potluck Portability and Transportation
These sliders are especially potluck-friendly because they can travel right in the baking dish. Once baked, cover the dish tightly with foil and place it in an insulated carrier or wrap it in kitchen towels to help retain warmth during transport.
If the gathering is farther away, you can transport them assembled but unbaked, then bake them at the destination if oven space is available. Otherwise, reheat the baked sliders briefly once you arrive so the cheese is melty and the tops feel freshly baked before serving.
38. Tangy Barbecue Chicken Wings
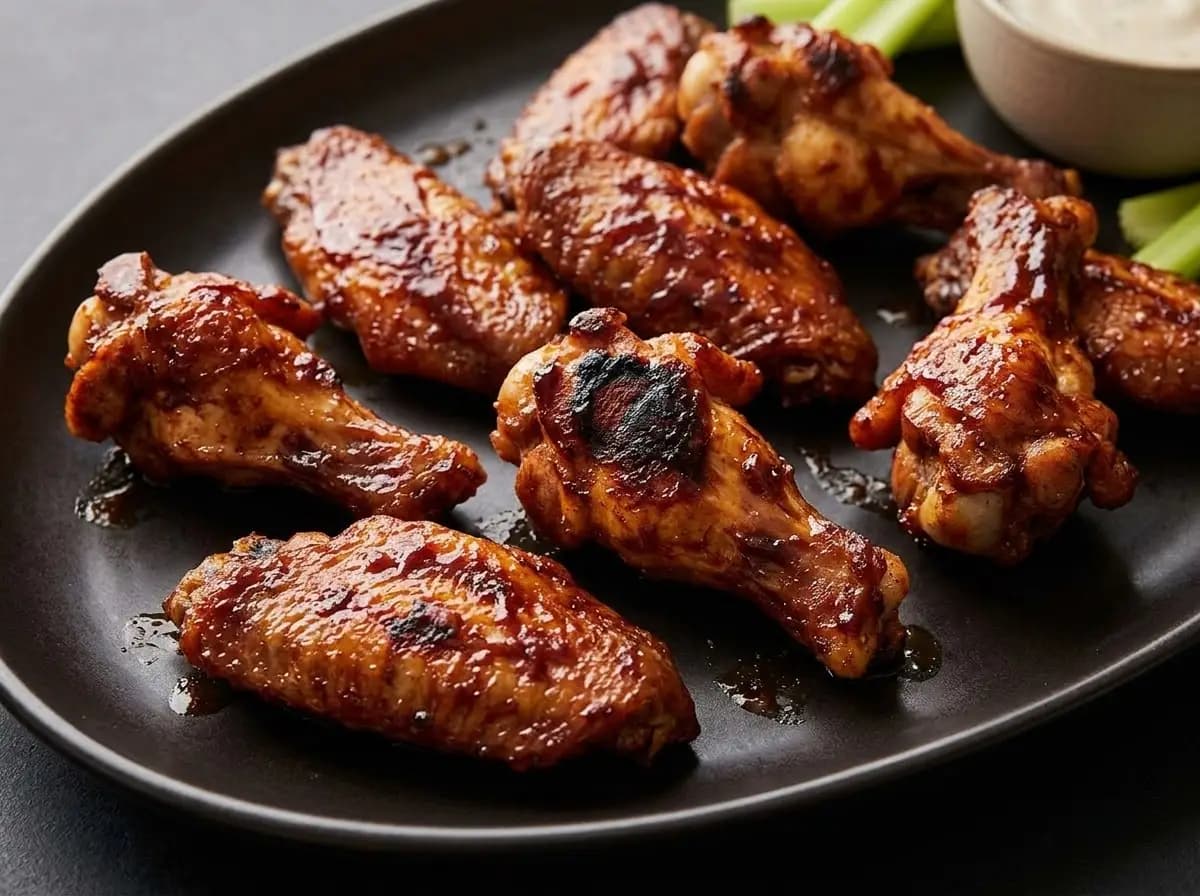
Sticky, lacquered edges and a few dark charred spots give these barbecue wings the kind of finish that makes them hard to pass by. The chicken stays juicy beneath its glossy coating, while the sauce clings closely to every drumette and flat instead of collecting in a heavy pool underneath.
A generous splash of vinegar gives the barbecue sauce its lively tang, balancing the sweeter tomato base with mustard, garlic, smoke, and gentle heat. You taste savory chicken first, followed by caramelized sweetness and a sharper finish that keeps each wing from feeling too rich. Crisp celery and a cool, creamy dip make an especially refreshing contrast beside the warm, saucy platter.
Serving Temperature
You should serve these wings warm, ideally soon after they have been glazed and returned to the oven or grill for their final caramelized finish. The sauce should remain glossy and slightly sticky, while the skin and browned edges still hold some texture.
If the wings cool before serving, reheat them uncovered in a hot oven or air fryer. Avoid microwaving when possible, since trapped steam can soften the skin and loosen the barbecue glaze.
Make Ahead Window & Storage
You can season the wings and prepare the barbecue sauce up to 24 hours in advance. Keep the raw wings tightly covered in the refrigerator and store the sauce separately, reserving any sauce intended for serving before it comes into contact with the raw chicken.
You can also cook the wings several hours ahead, refrigerate them once cooled, and add the final layer of sauce during reheating. Return them to a hot oven until warmed through and caramelized around the edges.
Store cooked leftovers in an airtight container in the refrigerator for approximately three to four days. Keep the celery and creamy dip separate so they remain cold and fresh.
Potluck Portability and Transportation
Arrange the cooked wings in a shallow, tightly covered container and carry them in an insulated carrier if they will be served shortly after arrival. For a longer journey, transport them chilled and reheat them uncovered at the gathering for the best texture.
Pack the celery, dipping sauce, and any extra barbecue glaze separately in a chilled bag with ice packs. Once the wings are hot, transfer them to a wide platter and brush on only a light final layer of sauce so they look glossy without becoming overly wet.
39. Bacon Cheeseburger Slider

Everything people love about a bacon cheeseburger gets packed into a smaller, softer, party-friendly format here. You get a juicy beef patty layered with melted cheddar, smoky bacon, and a fluffy slider bun that soaks up just enough savory richness without falling apart.
The seasoned tops make these feel even more inviting, adding a buttery, slightly garlicky finish that turns a simple slider into something far more craveable. Each bite gives you tender beef, gooey cheese, crisp-edged bacon, and soft bread, making this the kind of warm, hearty potluck dish that people go back for quickly.
Serving Temperature
You should serve these sliders warm. They taste best when the beef is still juicy, the cheese is fully melted, and the buns are soft with lightly toasted edges.
Let them rest for about 5 minutes after baking or assembling so the cheese settles slightly and the sliders hold together better. If they cool too much, reheat them briefly in the oven rather than the microwave so the buns stay soft without turning soggy.
Alternate Ways to Serve
You can serve them as individual sliders on a platter, or bake and present them pull-apart style in a baking dish for easier party serving. They also work well with classic burger toppings on the side, so guests can add pickles, caramelized onions, mustard, ketchup, or burger sauce to their own portion.
Make Ahead Window & Storage
You can cook the bacon, shape the beef patties, and prepare the buns up to 24 hours in advance. Keep the cooked bacon and raw patties refrigerated separately, then cook and assemble the sliders closer to serving time for the best texture.
If you want to fully assemble them ahead, layer the buns, cooked beef, cheese, and bacon in a baking dish, cover tightly, and refrigerate for several hours before warming through in the oven. Add any fresh toppings only at the end so the buns do not soften too early.
Leftovers keep well in the refrigerator for approximately two to three days. Reheat them uncovered in the oven so the buns warm through and the cheese melts again without steaming the bread too much.
Potluck Portability and Transportation
These sliders travel especially well in the same baking dish or in a tightly covered container. Wrap the warm dish in towels or place it in an insulated carrier if you want to keep them warm during transport.
If you are bringing extra condiments or toppings, pack them separately and add them at the gathering. That keeps the sliders neater, prevents sogginess, and lets the buns and bacon hold their texture better.
40. Sweet and Spicy Kielbasa Bites

Caramelized edges and a glossy chile-flecked glaze turn simple kielbasa rounds into an easy party bite with plenty of personality. You get smoky, savory sausage coated in a sauce that begins sweet, then finishes with a gentle warmth that keeps each piece from tasting overly rich.
A little mustard and vinegar sharpen the glaze, while garlic and chile add depth beneath the sweetness. As the kielbasa cooks, the sauce thickens and clings to the browned surfaces, giving you tender centers, lightly crisp edges, and a sticky finish that works perfectly with cocktail picks at a potluck or casual gathering.
Serving Temperature
You should serve these kielbasa bites warm. The glaze tastes best when it is fluid enough to coat the sausage but thick enough to stay attached when each piece is lifted with a toothpick.
Keep them in a slow cooker on the lowest warm setting during serving, stirring gently from time to time. Avoid letting the glaze simmer continuously, since the sugars can become overly sticky or begin catching around the edges.
Alternate Ways to Serve
You can present the kielbasa as individual cocktail bites with toothpicks, keep the pieces warm in a small slow cooker, or thread several slices onto short skewers for easier serving. For a more substantial option, spoon the glazed kielbasa over rice or creamy polenta with some of the extra sauce.
Make Ahead Window & Storage
You can slice the kielbasa and prepare the sweet-and-spicy glaze up to two days in advance. Store them separately in airtight containers in the refrigerator, then combine and cook when you are ready to serve.
The complete dish can also be made one day ahead. Let the kielbasa cool in the glaze, refrigerate it in a sealed container, and reheat it gently in a slow cooker or covered saucepan until evenly hot.
Leftovers keep well in the refrigerator for approximately three to four days. If the chilled glaze becomes too thick, add a very small splash of water or apple cider vinegar while reheating rather than adding more sugar.
Potluck Portability and Transportation
Transport the kielbasa in a covered slow-cooker insert when practical, or place it in a tightly sealed, heat-safe container. For a short journey, an insulated carrier will help keep the bites warm and the glaze loose.
At the gathering, reheat the kielbasa fully if needed, stir carefully to redistribute the sauce, and switch the slow cooker to its warm setting. Keep the toothpicks separate until serving so they remain clean and easy for guests to grab.
41. Baked Scotch Eggs with Mustard Dip

A crisp, golden crumb gives way to a savory sausage layer and a perfectly centered egg in these oven-baked Scotch eggs. You get the satisfying contrast of crunchy coating, well-seasoned meat, and tender egg without the heavier, oilier finish that often comes with deep-frying.
Herbs, black pepper, and a touch of mustard season the sausage from within, while the dipping sauce adds a creamy, tangy finish that cuts through the richness. Serve the eggs whole for an easy grab-and-go option or slice them open to reveal the bright yolks, turning a familiar picnic classic into a polished potluck dish that is sturdy, filling, and easy to portion.
Serving Temperature
You can serve these Scotch eggs warm or at cool room temperature. They taste especially good after resting for about 10 minutes, when the sausage juices have settled but the crumb coating still has a crisp texture.
Avoid serving them refrigerator-cold if possible, since the sausage and egg can feel firmer and less flavorful. If they have been chilled, warm them briefly in the oven or let them lose some of their refrigerator chill before serving.
Alternate Ways to Serve
You can serve the Scotch eggs whole with mustard dip for a substantial handheld portion, or cut them into halves or quarters for easier buffet serving. Smaller versions made with quail eggs also work well when you want a more bite-sized appetizer for a larger gathering.
Make Ahead Window & Storage
You can assemble the Scotch eggs up to 24 hours in advance. Wrap each peeled egg evenly in the sausage mixture, coat it in breadcrumbs, and refrigerate the prepared eggs in a single layer until you are ready to bake.
You can also bake them one day ahead. Let them cool completely before placing them in an airtight container in the refrigerator. Store the mustard dip separately so the crumb coating stays dry.
Cooked Scotch eggs keep well in the refrigerator for approximately three days. Reheat them uncovered in a moderate oven or air fryer until hot through and crisp on the outside. Avoid prolonged microwave reheating, which can make the coating soft and the egg rubbery.
Potluck Portability and Transportation
Arrange the cooked Scotch eggs in a shallow, tightly sealed container, placing parchment paper between layers if stacking is necessary. Transport them chilled in an insulated bag with ice packs, especially when the journey or waiting time will be longer.
Carry the mustard dip in a separate leakproof container. At the gathering, reheat the eggs if oven space is available, or let them stand briefly before arranging them on a platter. Slice a few open just before serving so guests can see the egg centers while the remaining pieces stay moist.
42. Chicken Satay Skewers with Peanut Sauce

These chicken satay skewers bring you the kind of bold, savory flavor that feels both casual and a little special at the same time. Tender pieces of chicken are marinated until deeply seasoned, then cooked until lightly charred at the edges, giving you juicy bites with plenty of smoky, caramelized flavor in every skewer.
The peanut sauce adds the finishing touch, bringing creamy richness, gentle heat, and a balance of nuttiness, sweetness, salt, and lime. When you serve the skewers with the sauce on the side, you get a dish that feels easy to pass around at gatherings while still looking polished and crowd pleasing. The contrast between the warm grilled chicken and the smooth, savory dipping sauce is what makes this one so satisfying.
Serving Temperature
You should serve these satay skewers warm. They taste best shortly after cooking, when the chicken is still juicy and the lightly charred edges are most noticeable.
The peanut sauce can be served slightly warm, at room temperature, or lightly chilled depending on your preference. For the best overall balance, keep the skewers warm and the sauce cool to room temperature so the flavors stay distinct and refreshing.
Alternate Ways to Serve
You can serve the chicken satay as appetizer skewers with peanut sauce for dipping, or remove the chicken from the skewers and add it to rice bowls, lettuce wraps, or a platter with cucumber salad and herbs. It also works well as part of a larger Southeast Asian-inspired spread when you want something hearty but easy to eat.
Make Ahead Window & Storage
You can marinate the chicken up to 24 hours in advance and keep it covered in the refrigerator until you are ready to thread and cook the skewers. The peanut sauce can also be made ahead and refrigerated separately for up to two to three days.
Once cooked, the chicken keeps well in the refrigerator for approximately three days. Reheat the skewers gently in the oven, in a skillet, or in an air fryer so the chicken warms through without drying out too much.
If the peanut sauce thickens in the refrigerator, stir in a small splash of warm water, coconut milk, or lime juice before serving to loosen it back to a smooth dipping consistency.
Potluck Portability and Transportation
Arrange the cooked skewers in a shallow container or on a tray, cover them well, and transport them warm in an insulated carrier if you are serving them soon after arrival. For a longer journey, carry the skewers chilled and reheat them at the destination if possible.
Keep the peanut sauce in a separate leakproof container so it stays neat and easy to portion. Once you arrive, transfer the skewers to a platter, place the sauce in a bowl alongside, and add the lime wedges and any fresh garnish just before serving.
43. Strawberry Pretzel Dessert
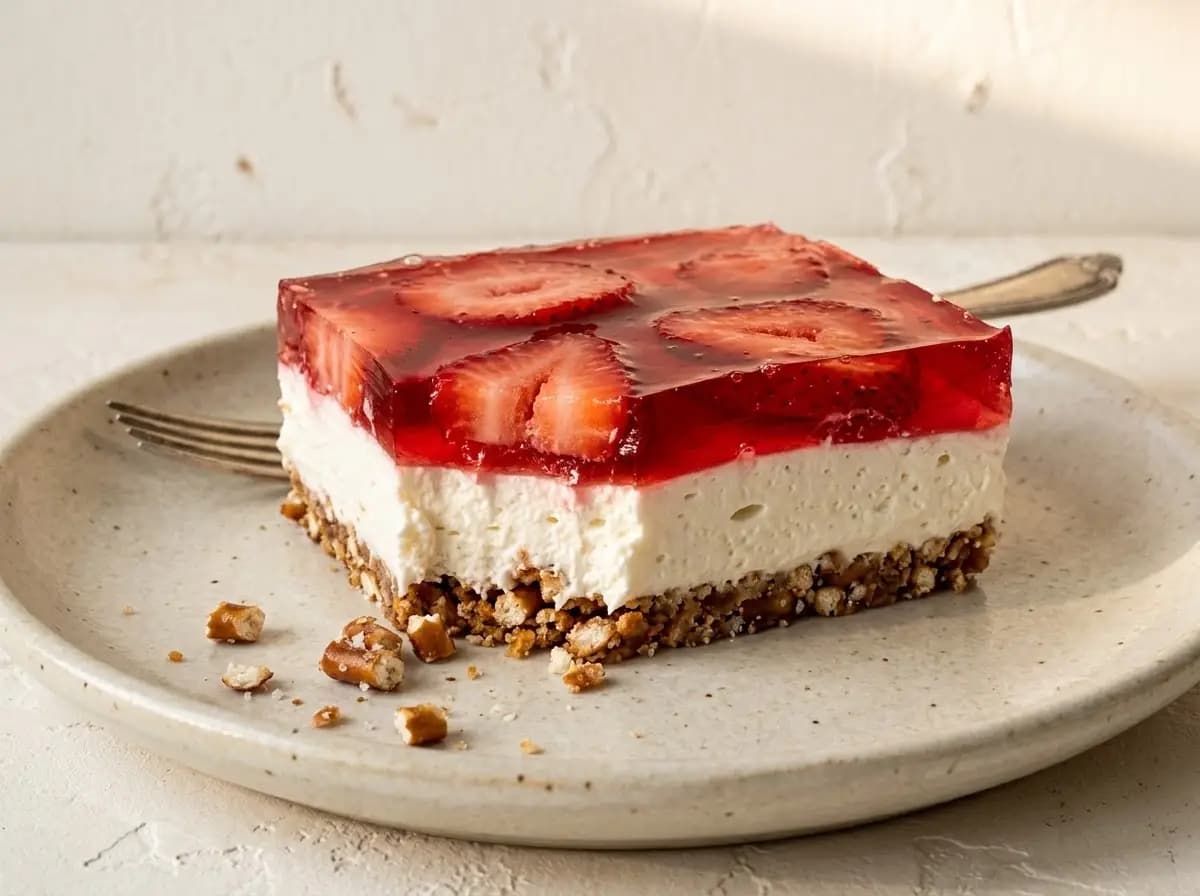
Sweet, salty, creamy, and bright, this strawberry pretzel dessert gives you one of those classic layered bites that feels especially welcome at a potluck table. You get a crisp pretzel crust on the bottom, a smooth cream-cheese filling in the middle, and a glossy strawberry topping that brings both fruity sweetness and a little tart freshness.
The contrast is what makes it so memorable. The salty crunch of the pretzel base keeps the dessert from feeling overly sweet, while the creamy layer adds a soft, cheesecake-like richness that balances the juicy strawberry gelatin topping beautifully. It is chilled, sliceable, and easy to serve, which is exactly why it remains such a reliable crowd-pleasing dessert for gatherings.
Serving Temperature
You should serve this dessert well chilled. It tastes best straight from the refrigerator, when the creamy layer is fully set, the strawberry topping is cool and firm, and the slices hold their shape neatly on the plate.
Avoid leaving it out too long before serving, especially in a warm room or outdoors, since the creamy center can soften and the gelatin topping may begin to loosen. For the best texture, keep it chilled until just before slicing.
Alternate Ways to Serve
You can serve it in neat dessert squares for a classic potluck presentation, or make it in individual cups or jars if you want easier grab-and-go portions. It also works well cut into smaller rectangles when you want bite-size dessert servings as part of a larger buffet.
Make Ahead Window & Storage
This is an excellent make-ahead dessert. You can prepare it fully up to one day in advance, and in many cases it tastes even better after chilling overnight because the layers have more time to set cleanly.
Keep it tightly covered in the refrigerator until you are ready to serve. The crust can be baked ahead first, then topped with the cream layer and the strawberry layer once cooled, but the full assembled dessert is usually the easiest option for make-ahead planning.
Leftovers keep well in the refrigerator for approximately two to three days. After that, the pretzel base may gradually soften, though the dessert will still be enjoyable. Store any remaining slices covered so they do not absorb refrigerator odors.
Potluck Portability and Transportation
This dessert travels best in the same baking dish or pan it was chilled in. Cover it tightly and keep it in a cooler bag or insulated carrier with ice packs so the layers stay cold and firm during transport.
If possible, slice it once you arrive rather than before leaving home, since uncut layers hold together more neatly during travel. Bring a thin spatula or serving server so you can lift each square cleanly from the pan.
44. No-bake Lemon Berry Parfaits
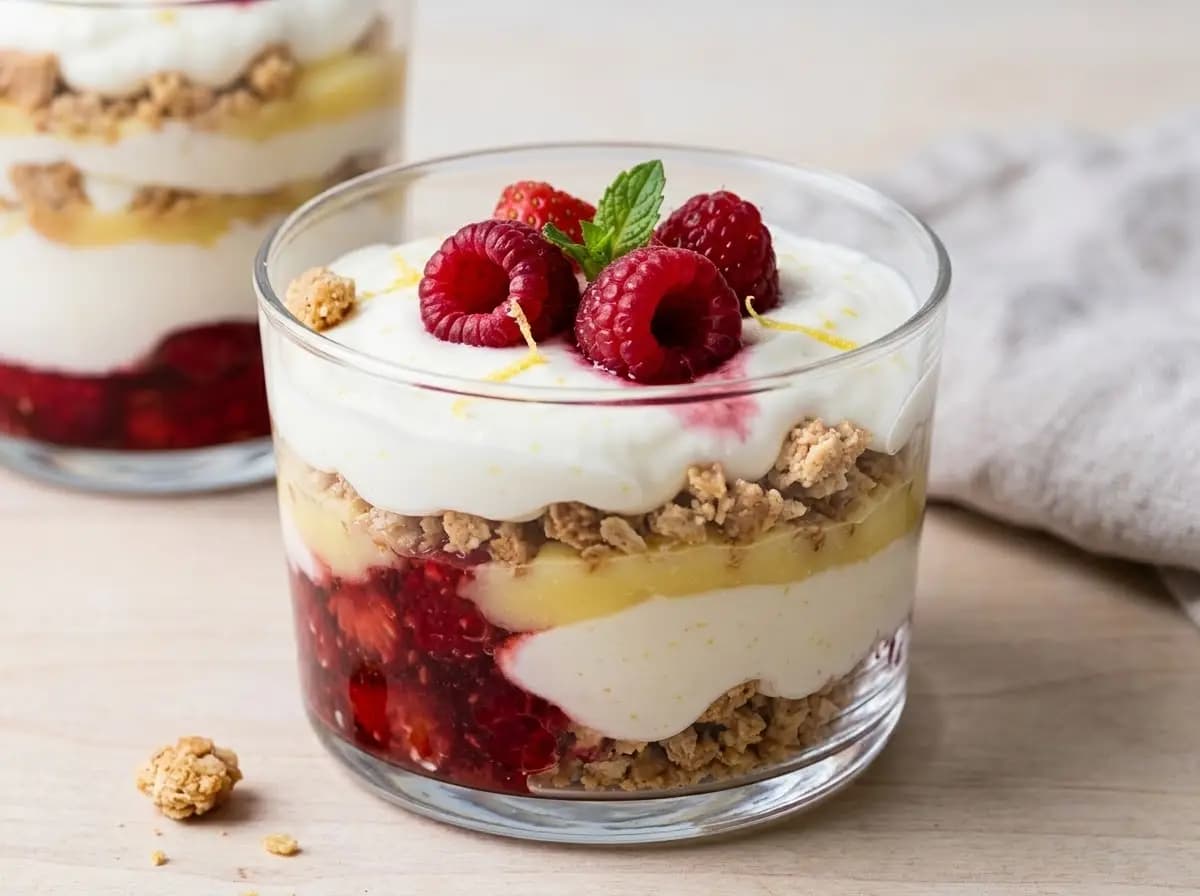
Light, creamy, and full of bright citrus flavor, these no-bake lemon berry parfaits feel like the kind of dessert that instantly makes a table look more cheerful. You get layers of silky lemon cream, juicy berries, and buttery cookie or granola crumble, all stacked into individual cups that feel both elegant and very easy to serve.
The lemon brings a fresh, sunny sharpness that keeps the dessert from feeling too rich, while the berries add sweetness, color, and a little tart contrast. Every spoonful gives you creamy filling, soft fruit, and a bit of crumbly texture, which makes these parfaits especially satisfying even though they are completely no-bake. They are simple, chilled, and perfect when you want a dessert that feels polished without a lot of effort.
Serving Temperature
You should serve these parfaits chilled. They taste best straight from the refrigerator, when the lemon layer is cool and creamy, the berries are fresh, and the dessert feels light and refreshing.
If they sit out too long, the creamy layers can soften and the crumble may start losing some of its texture. For the best presentation and flavor, keep them refrigerated until shortly before serving.
Alternate Ways to Serve
You can serve them in small glasses, jars, or dessert cups for individual portions, or layer the same components in a larger trifle-style dish for a more shareable presentation. If you want a slightly more casual version, you can also use short tumblers or mason jars with lids for easy transport.
Make Ahead Window & Storage
These parfaits are excellent for making ahead. You can prepare them up to 24 hours in advance and keep them covered in the refrigerator until serving time.
For the best texture, it helps to keep the crumble slightly separate until the final assembly if you want it to stay especially crisp. If you do assemble everything in advance, the crumbs will soften a little, but the parfaits will still taste delicious and hold together nicely.
Leftovers keep well in the refrigerator for about two days. Cover each glass or container so the creamy layers stay fresh and do not absorb other refrigerator odors.
Potluck Portability and Transportation
These parfaits travel especially well when portioned into individual jars or dessert cups. Cover them tightly and carry them in a chilled insulated bag or cooler with ice packs so the lemon filling stays cold and properly set.
If you are transporting them a longer distance, keep any delicate toppings, extra berries, mint, or lemon zest separate and add them just before serving. That helps the parfaits look fresher and keeps the top layer neat and attractive.
What Dishes Go Best with Potluck Parties?
Creating a well-balanced potluck menu is an art form. The best potluck dishes share three key qualities: temperature resilience, ease of serving, and universal dietary appeal.
Frequently Asked Questions (FAQs)
Q: How far ahead can I make these potluck side dishes?
Most of these dishes can be prepared about 12–48 hours ahead. Salads, slaws, bean dishes and marinated sides often work especially well when given time to chill and develop flavor.
Q: Which potluck sides are best for making the night before?
Sturdy options like Cowboy Caviar, Greek Lentil Salad, Coronation Coleslaw and bean-based sides are great choices. Keep any crunchy toppings or delicate garnishes separate until serving.
Q: Which side dishes travel best to a potluck?
Bean salads, grain salads, slaws, baked sides and sturdy vegetable dishes usually travel best. Avoid anything that depends on delicate greens or complicated last-minute assembly.
Q: Do make-ahead side dishes need to be reheated?
Not always. Many dishes in this collection are designed to taste good chilled or at room temperature, while warm sides like baked beans, orzo and garlic-herb mushrooms can be reheated before serving.
Q: How do I keep cold potluck dishes cold while traveling?
Transport perishable dishes in an insulated cooler with ice or frozen gel packs. USDA recommends keeping cold food at 40°F or below.
Q: How do I keep warm potluck sides hot?
Use an insulated carrier, slow cooker, warming tray or chafing dish when appropriate. Hot foods should be held at 140°F or above.
Q: How much side dish should I bring to a potluck?
A useful starting point is around 4–5 ounces of a side dish per guest. You can make a little less when the potluck has several different sides to choose from.
Q: Should I add dressing to salads before the potluck?
It depends on the dish. Sturdy slaws, bean salads and grain salads can often be dressed ahead, while delicate greens and crunchy toppings are better finished shortly before serving.
Q: What are good make-ahead sides for an outdoor potluck?
Choose sturdy dishes that transport easily and do not require constant reheating. Bean salads, slaws, grain salads and vegetable sides are convenient choices, but perishable foods still need to stay properly chilled.
Q: Are there vegetarian options in this potluck side dish list?
Yes. The collection includes plenty of vegetable, bean, lentil, grain and pasta-based dishes, so it is easy to add vegetarian choices to the table.
Q: How long can potluck side dishes sit out?
Perishable food should generally not sit at room temperature for more than 2 hours, or 1 hour when the temperature is above 90°F.